

Welcome back to our Basement Workshop Stone Repointing Series. It’s a rocky romp through restoring the creepy part of our house – the basement. You can catch up on Part 1 here.
Today we’re talking about the concrete problem.
Most people in the U.S. probably take for granted that their basement, if they have one, has a concrete floor. So did I, until we bought this house.
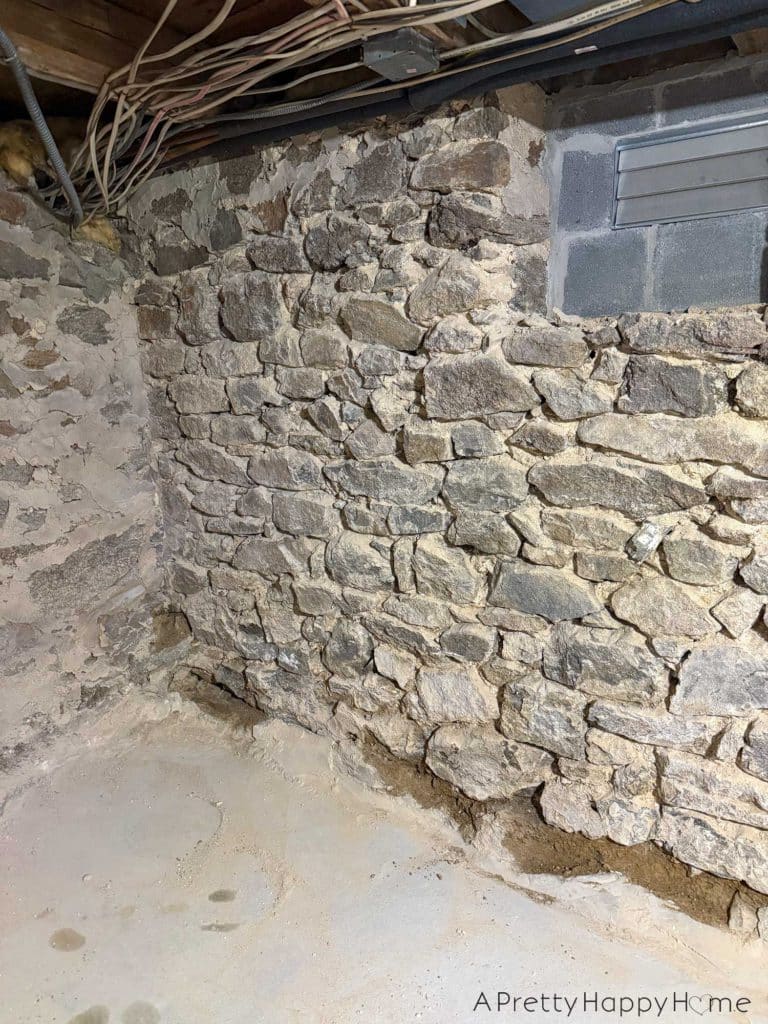
Part of our basement has a rubble floor. Aside from the perk that the floor is one big drain, it’s about as awesome for modern living as you imagine.
However, the part of our basement that we are currently repointing DOES have a concrete floor. We’re a mixed bag of fancy around here. We are extremely grateful that someone went to the expense of putting that floor in.
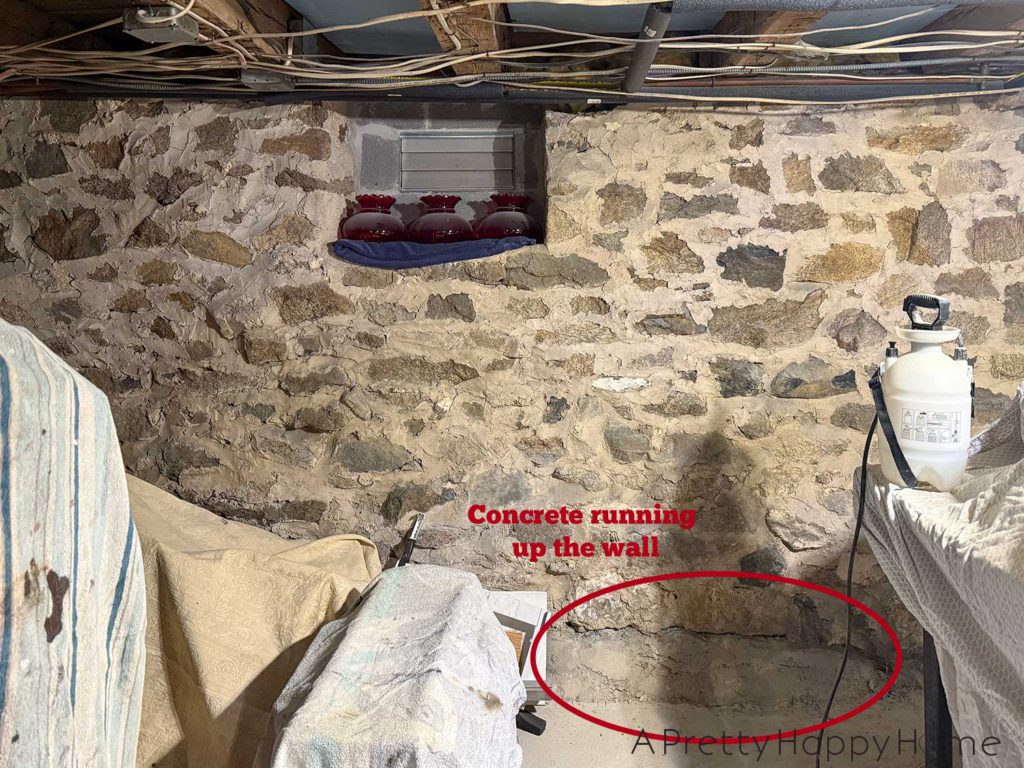
I’m sure whoever poured that concrete floor thought they were doing the homeowner a favor by running the concrete up the sides of the foundation about 12 inches in certain spots.
You might be thinking that seems like a weird favor.
Critical Thinkers of the World unite because I thought the same thing.
More specifically, I wondered what that concrete might be hiding. It wasn’t running up the wall at a 90-degree angle from the floor. Oh, no. It swooped up from the floor with a flourish, so the transition from the floor to the wall was curved.

The problem with concrete on stone foundations:
If you’ve followed along for more than five minutes, you’ll know that any product that includes Portland cement as a component, like concrete, is bad for a historic stone foundation. (See here for more on that.)
It turns out, my suspicions were correct.
That concrete was hiding a problem or, if we’re trying for a positive attitude, an opportunity for structural improvement.
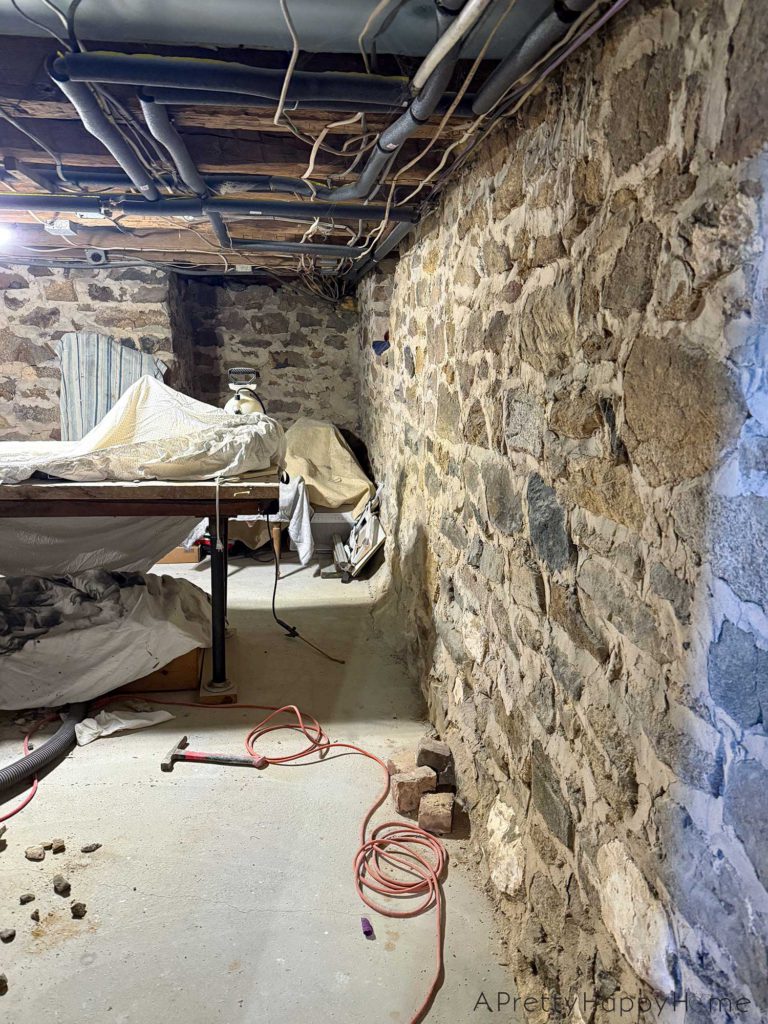
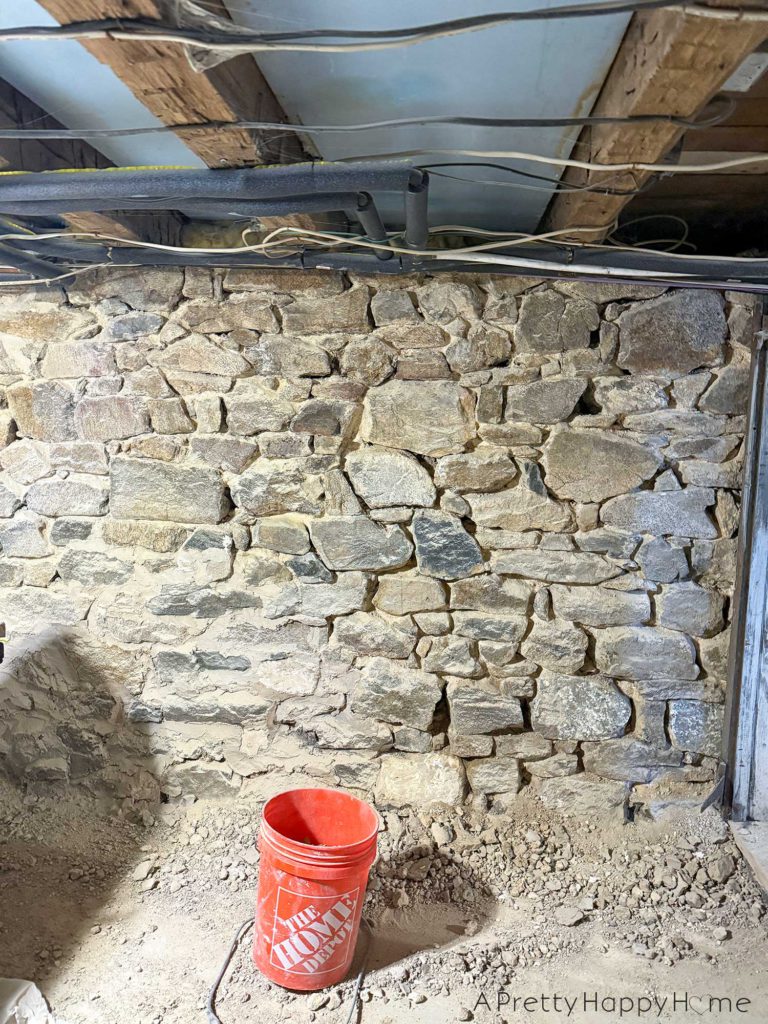
When we chipped away that concrete with a pneumatic chisel, specifically the chisel attachment on our hammer drill, we discovered that some stones were missing from the bottom of the foundation.
That’s not the greatest thing to find, or not to find, as is the case.
On the bright side, the house is still standing. So…there’s that. The bare minimum.
We also noticed that the areas that had concrete on the wall were moist. I’m sorry to use the m word. I know many people don’t like that word, but it fits well because we don’t like what’s going on here. We don’t want our foundation wall to be moist.
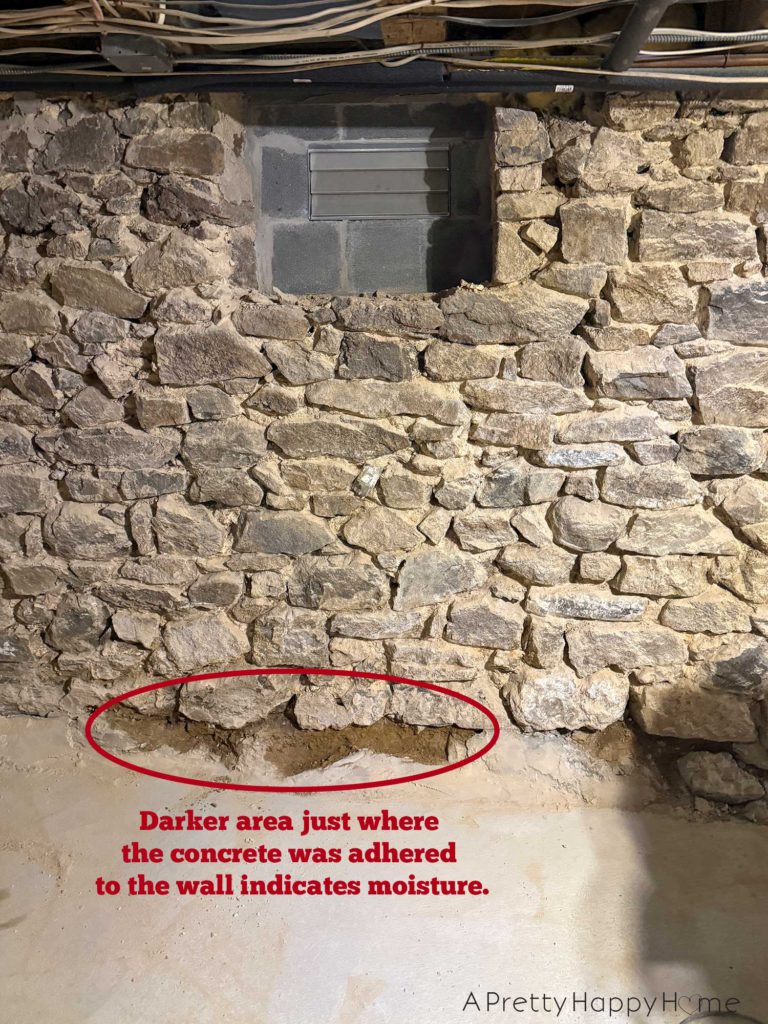
The concrete had been there for maybe 20 – 30 years. Our working theory is that the concrete was trapping moisture in the wall, preventing the lime mortar that the wall was built with from doing its job.
If you’re thinking that looks like dirt, when the rest of the wall is wet, it looks the same. However, there does appear to be some clay in this very old mortar mix. This is the oldest foundation wall of our house, dating back to the 1780s.
Lime mortar for these historic stone foundations is designed or able to breathe. That means it takes on and releases moisture. When it takes on moisture, it can heal microcracks in the mortar through a process called autogenous healing. This means that the water moves lime around, and when the water evaporates, it deposits the lime in these microcracks, which seals up the crack when it dries. (source)
Why do microcracks even appear? It could be from the movement of the building or the degradation of the mortar over time. (source)
We did consider that maybe there’s another reason the wall was moist. We do live on a sloped property after all. But the areas of the foundation wall – within a couple of feet of each other – that did not have concrete on them were bone dry. Also, half of this wall is buried underground. The wall would probably be wet going further up the wall if it were a groundwater issue.
Without more data, we’re going with the working theory.
What do we do now?
We thank God that stone foundations are repairable, and then start the repair work.
All that means is we dig out around the base of the foundation wall, add more rocks to rebuild the wall, and resecure with lime mortar*. Not very many stones are missing. Just one layer, so maybe six inches on a 24-inch thick wall. This wall is thicker than our other foundation walls by about 6 inches.
Not sure why…maybe that’s how they built them in the 1700s, and then later realized it didn’t need to be quite as thick. Or maybe this foundation isn’t dug down as deep as the new foundation walls from the 1800s. If only someone had written a blog, oversharing every single little detail about their house decisions, so we’d know for sure.
Out of an abundance of caution, we are going to do this repair work in two stages, as the concrete that hasn’t been chipped out yet is offering stability.
My next report will hopefully have a finished wall to show you!
Does your house have a basement? Is it finished and not dusty? Is it a place you happily hang out in? Comments are like the perfect bag of sand when you’re mixing lime mortar. They really make my day. You can comment on this blog post, email me here, or reach out via direct message on Instagram or Facebook.
*We use natural hydraulic lime mixed in a 1:2.5 ratio with sharp or all-purpose sand and water.
Thank you for following along with our DIY adventures. If you’d like another blog post to read, try one of these.
Basement Workshop Stone Repointing: Part 1, Why Now
Vintage Floral Easter Eggs Using Temporary Tattoos
Stone Carriage House: Part 9, Time Capsule