

Grab your popcorn! A new fieldstone wall series starts right now. We are reconstructing an extremely old fieldstone wall and taking you along for the ride. You get all the perks without having to do any of the work. You’re welcome.
Where Is This Fieldstone Wall?
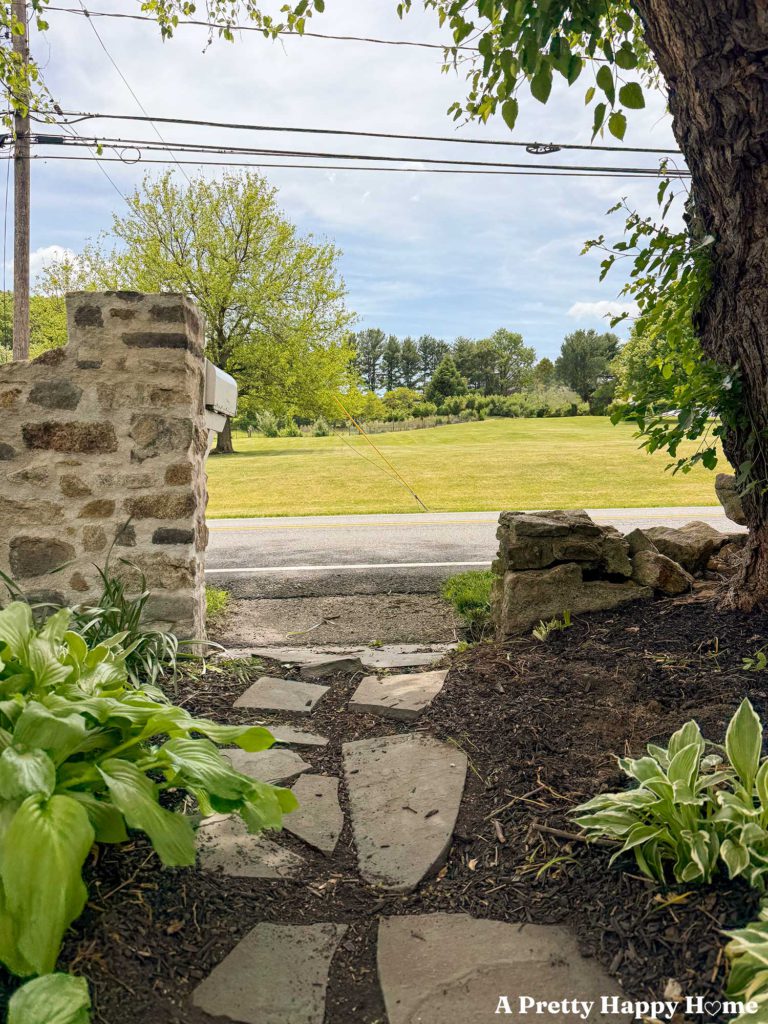
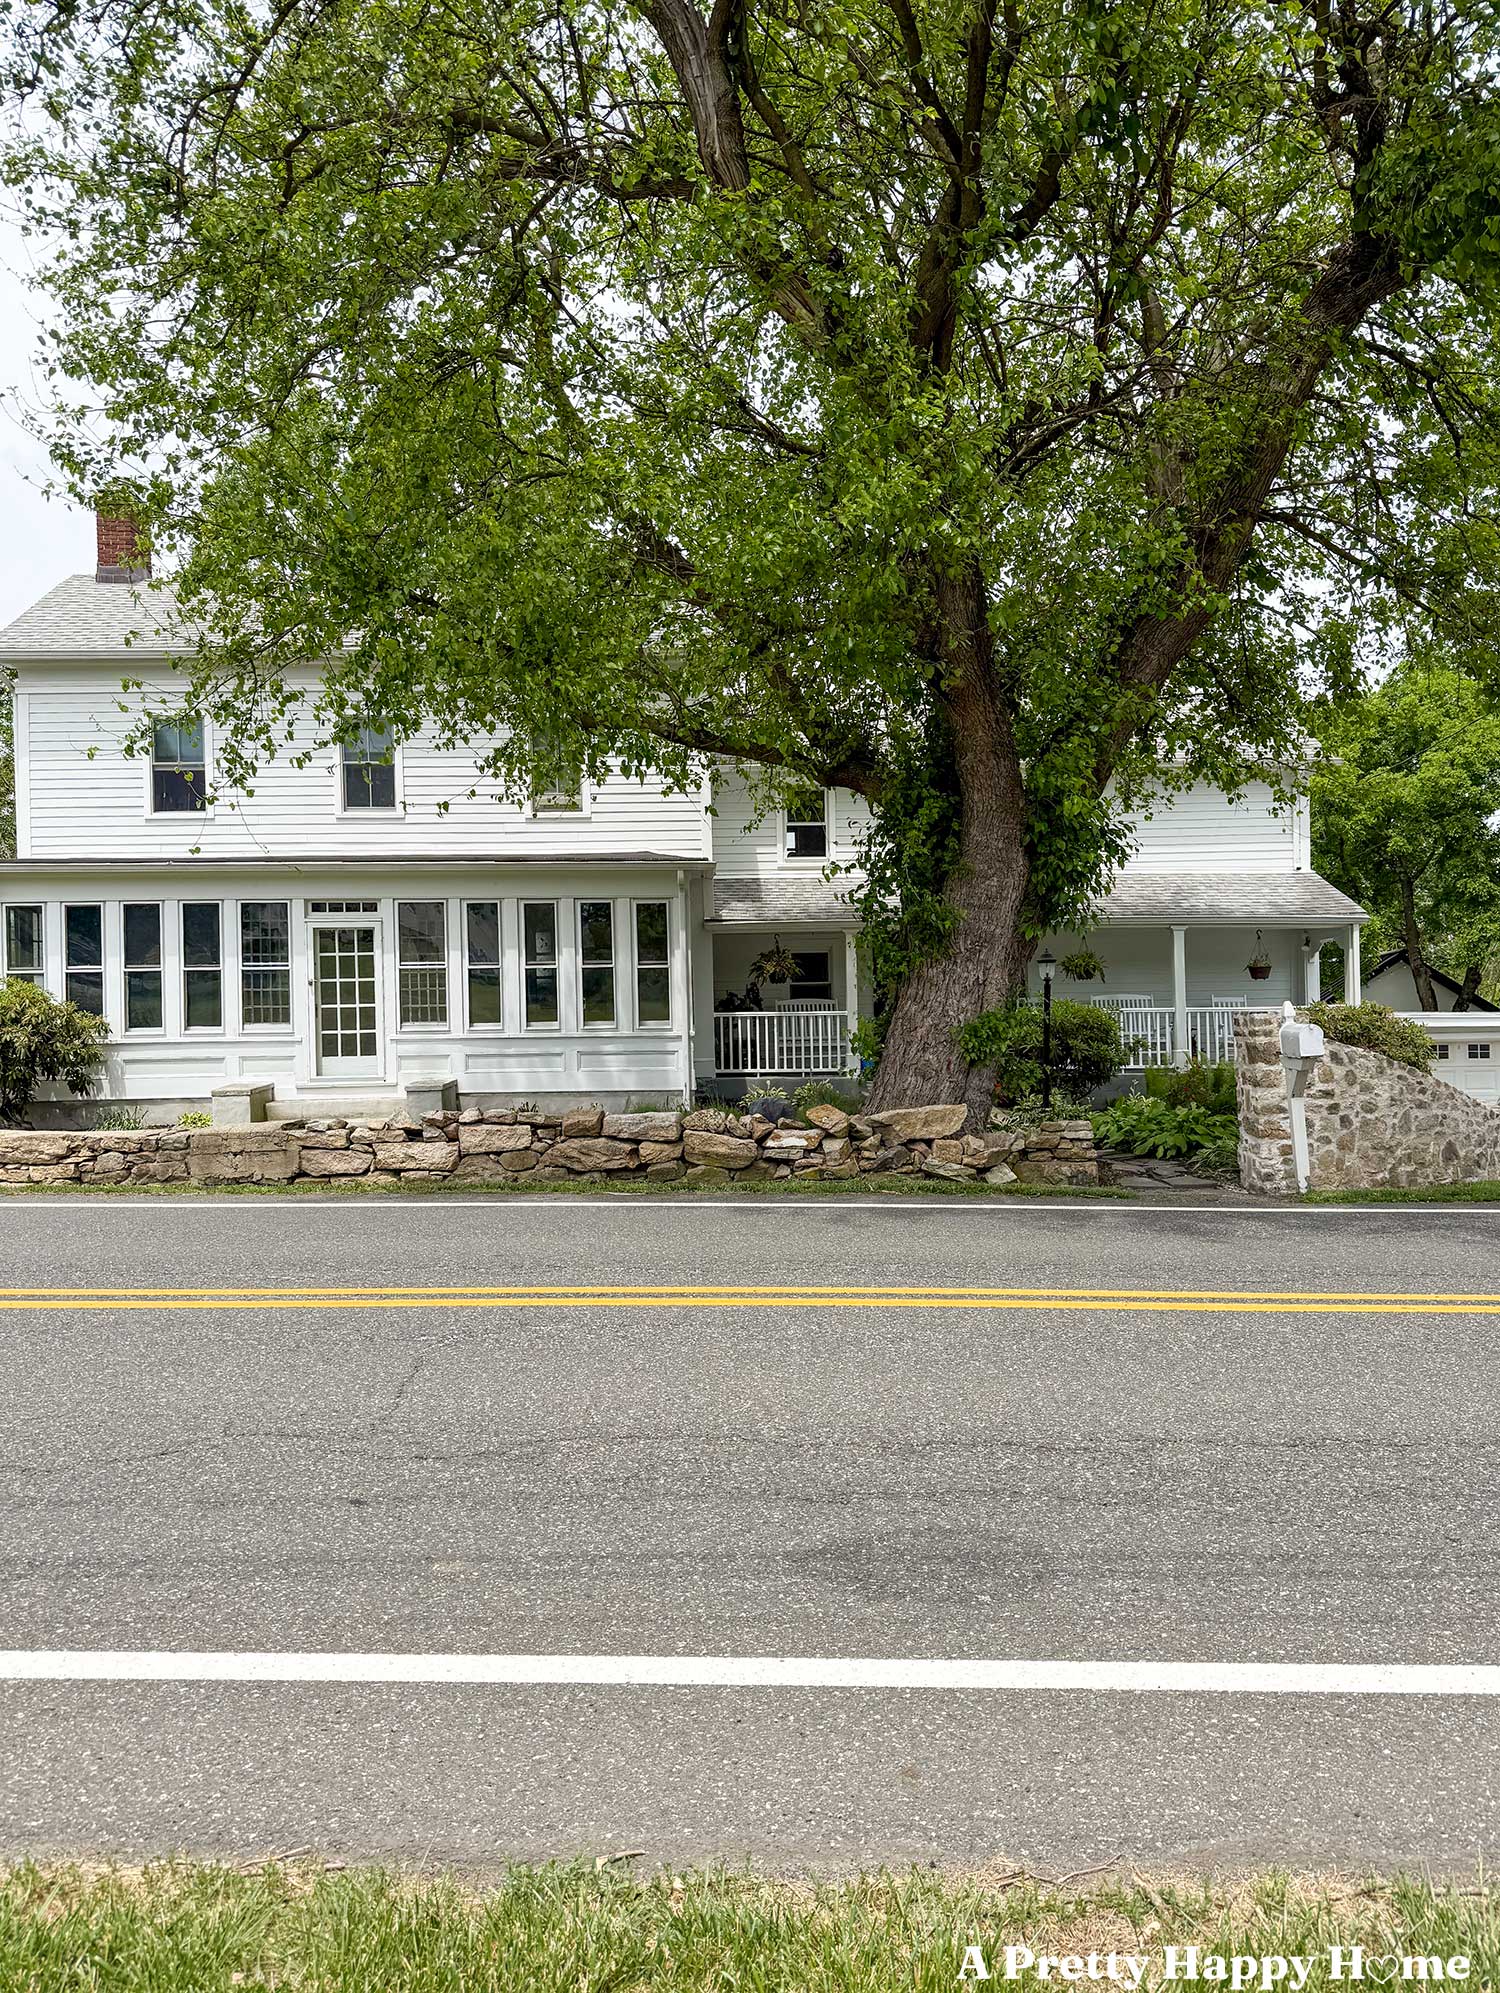
The front of our 1780s property is framed by a low fieldstone wall. Low stone walls are common in our area, where old properties had to be cleared to farm the land. The rocks the farmers pulled out of the ground had to go somewhere. They were used for foundations, stone buildings, cart tracks, and walls or fences.
And let me tell you, our property is STILL heaving up rocks after almost 250 years. Some people find gardening pleasant. I feel like I have to go to war with the ground just to move enough rocks out of the way to plant a small lavender plant.

Why Does the Fieldstone Wall Need to be Reconstructed?
The fieldstone wall is in rough shape. You can’t tell by looking at it, but it was once mortared together.
Years of patching with concrete, being hit by the lawnmower and snowplow, being used as a launchpad by deer, surviving an earthquake, and brush overgrowth have taken their toll on this fieldstone wall.
It’s so bad that there are sections of the wall that are more aptly described as a rock pile than a wall.
This is Phase 2 of the Fieldstone Wall Project
In case you missed it, we already reconstructed one section of the fieldstone wall – the curved part. You can see a glimpse of that in the above photo and catch up on that amazing transformation here. Sometimes we are still shocked by how much better it looks, and we built it. Ha!
Unfortunately, building a fieldstone wall the old-fashioned way takes a lot of time, especially when it’s mainly one person working on it. It’s a project that can only be done during nice weather, as the lime mortar needs to cure under a specific range of conditions. We use lime mortar to rebuild our low fieldstone walls because that’s what was originally used, and it’s really the best mortar for this particular job.
We ran out of time to start Phase 2 before winter set in last year, but now we’re back at it! I’m sure the neighbors will be glad because our wall does look a little lopsided right now.
The Challenge of Reconstructing This Fieldstone Wall
Get ready for suspense, intrigue, and DRAMA because coming up with a plan to reconstruct the next section of wall has been challenging and is still not set in lime mortar.
In fact, it’s less of a plan and more of a general agreement on the broad brushstrokes of a plan.
Here’s what we know for sure. The biggest obstacle to building this fieldstone wall is not metaphorical. This is good news because, for once, we are not the problem. The bad news is I wish we were the problem.
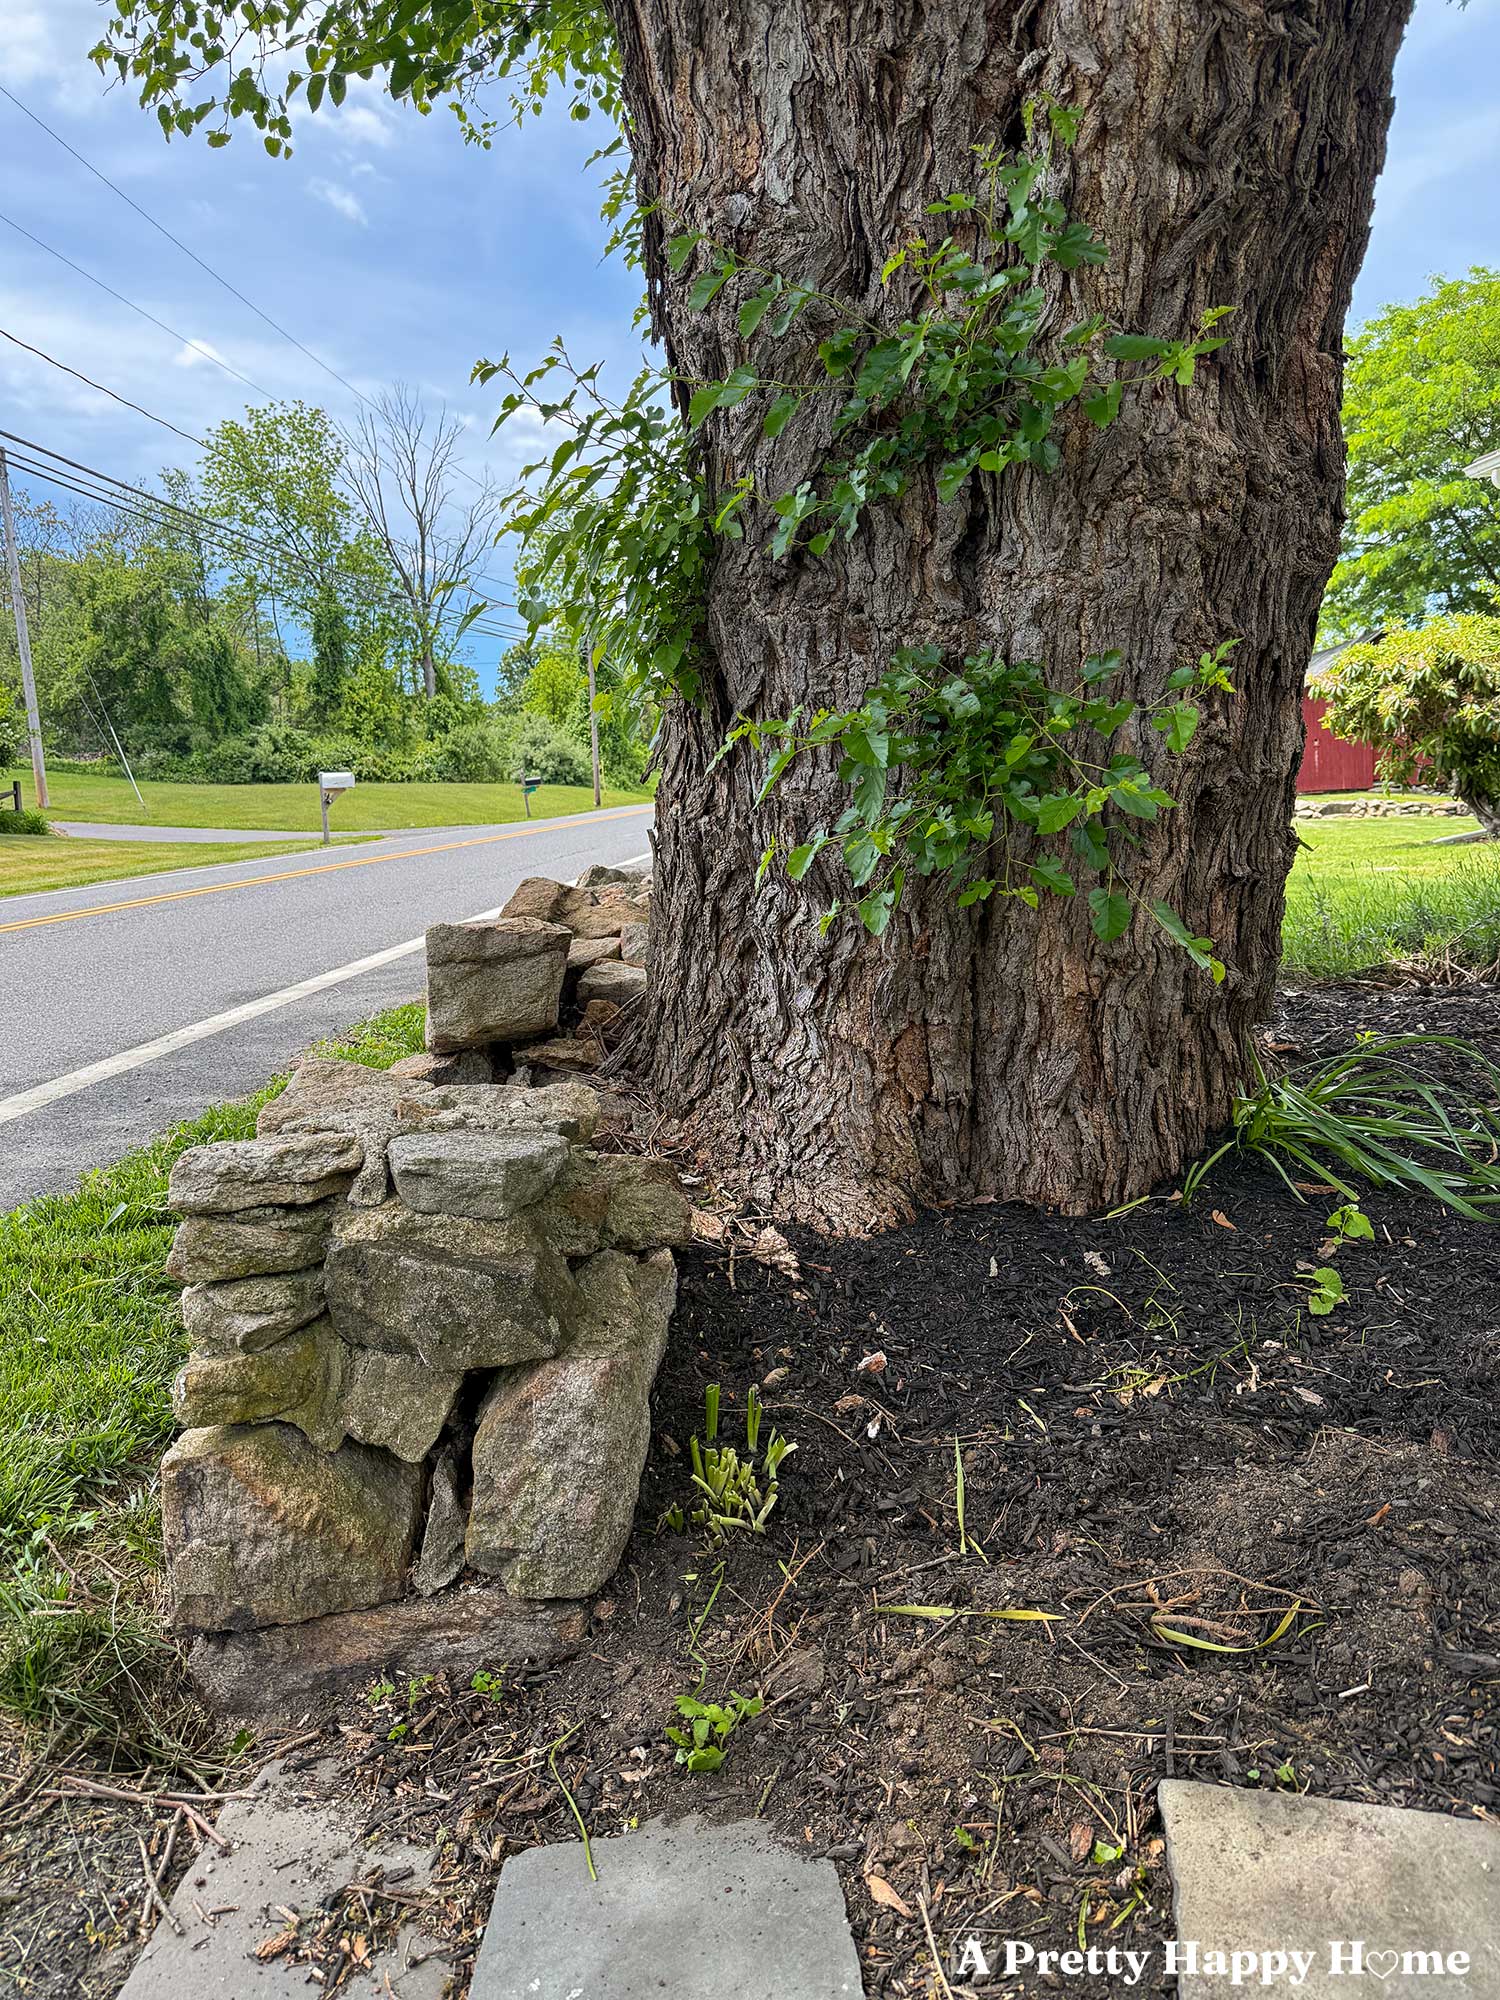
That would be easier than dealing with the actual problem, which is a tree.
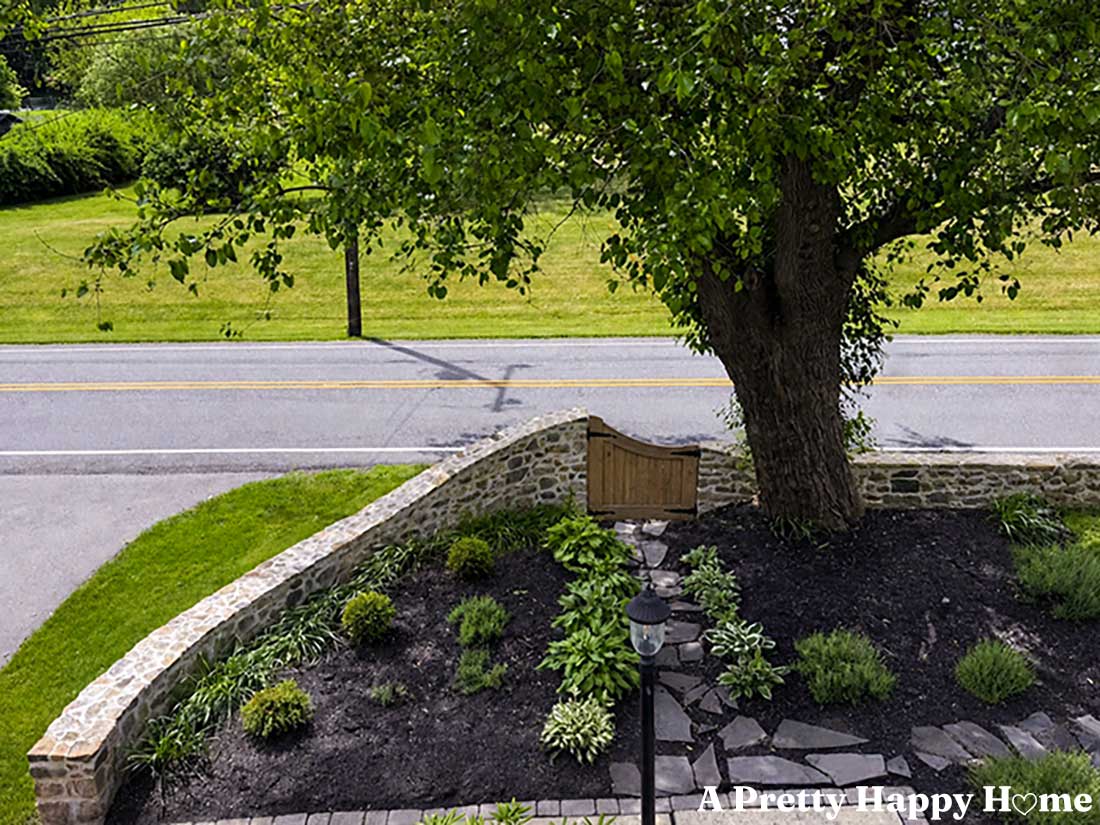
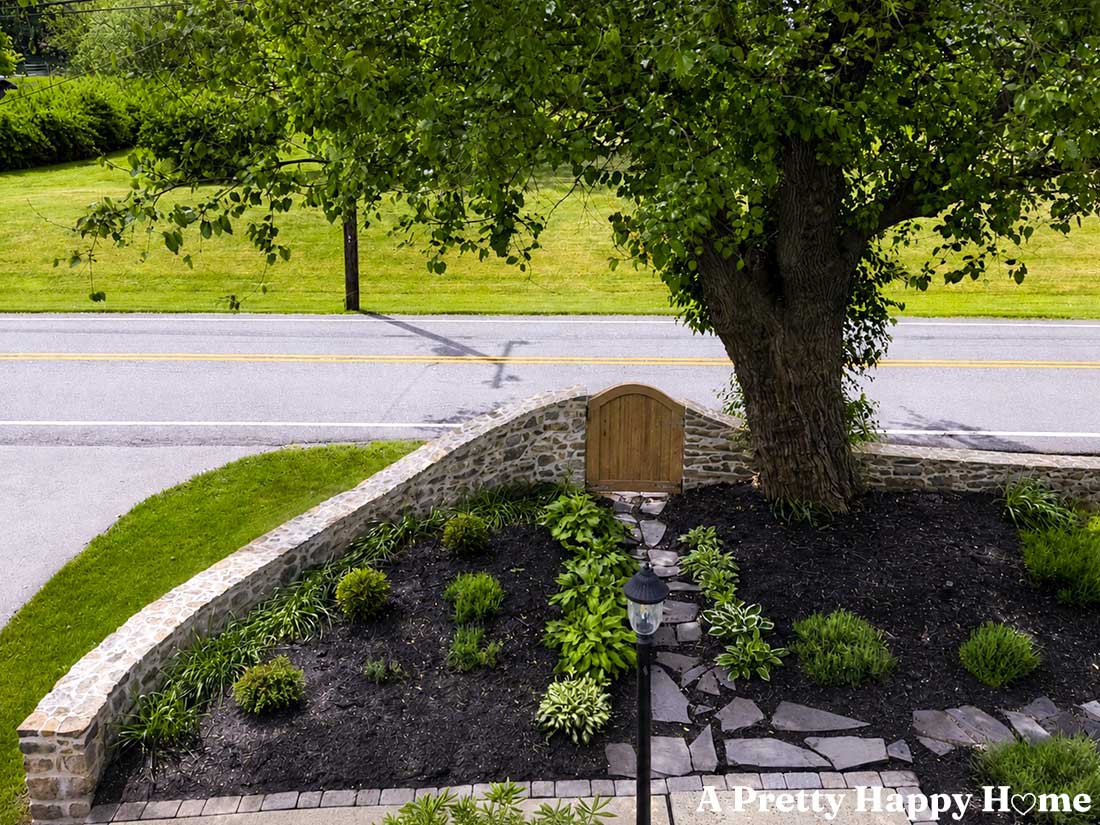
It’s a literal obstacle. The tree is in a crucial spot that messes up our design plans for a curved and swooped wall.
The wall was there first, and a long line of homeowners, present company included, has allowed this elm tree to grow right smack dab behind the wall. The trunk has become so big that it is pushing the wall out toward the road. This is a contributing factor as to why the wall needs to be rebuilt.
Of course, we won’t cut down the tree unless it becomes a danger to the house or community infrastructure. We estimate the tree is 110 years old, which is past the expected lifespan of elm trees due to the prevalence of Dutch Elm disease. It’s defied the odds, so we hope it continues to live long and prosper. However, we do need to plan on the trunk of this mature elm tree growing by about half an inch per year. Ooph.

The Loose Plan for Reconstructing the Fieldstone Wall
There are two ways of handling the tree being in the way of the fieldstone wall. First, we can stop and restart the wall on either side of the tree. Second, we could continue the wall in front of the tree, but dry-stack the area most likely to be impacted if the tree expands. Think of it like a fieldstone sandwich. A dry-stacked area sandwiched between two sections of mortared fieldstone wall.
We’re going to go with the first option. This is a way of honoring the tree and allowing it to grow. It also gives us a place to put a new mailbox right in front of the tree. Hopefully, the snowplow will think twice about hitting our mailbox if there’s a tree right there.
However, this solution does create another problem because nothing is easy.
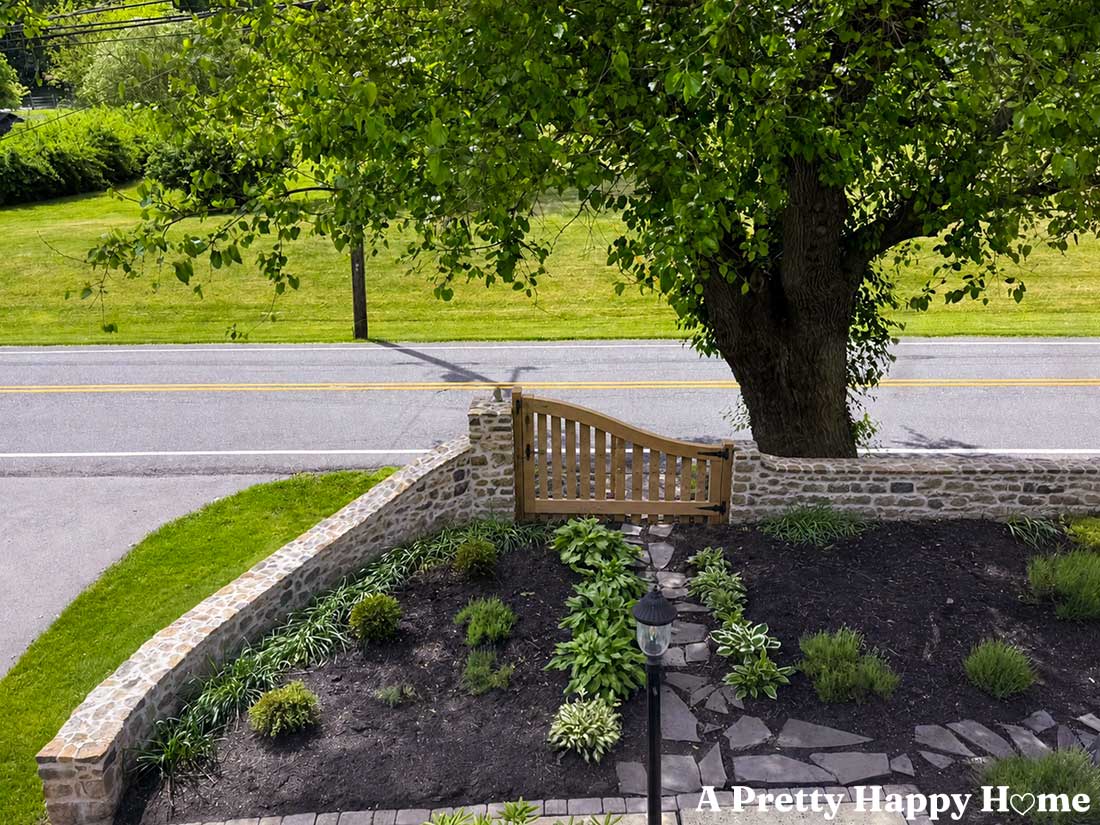
Stopping and restarting the wall on either side of the tree messes up our plan to mimic the swoop on the left side of the wall and put a gate in between the two swoops. The left side was completed last year.
Handy Husband had the idea to make the gate complete the right side of the swoop. If you’re having a hard time imagining how this would look, we asked ChatGPT for help.
So, let’s everyone pause being mad at AI for just a minute. After I show you how it helped us visualize this scenario, then we can go back to being mad at it. How’s that for a solid plan?
The photo below shows the first iteration ChatGPT made using a really bad photo Handy Husband took from an upstairs window.
That said, can you see how we could use the gate to make the swoop on the left make sense if we can’t physically complete it with stone, since the tree is in the way?

Here’s another iteration ChatGPT made after we told it to remove the vertical column and make the gate narrower.
We liked this, but we preferred the convex swoop on the gate in the first image.
It didn’t quite get our instructions right in the final iteration shown below. Such is the conundrum with AI.
However, Handy Husband and I had seen enough to get on the same page and to make a loose plan of how to continue rebuilding this fieldstone wall.
That loose plan involves us removing part of the wall that we just finished building.
You read that correctly. We are not so married to our work that we won’t undo it if it means we can create something better. It’s not wasted effort. Do you know how much I learned building that wall? It’s been a learning laboratory, and now I get a do-over. A chance to improve. It’s pretty cool, if you think about it.
We are going to lower the left side of the wall so that the swoop on the right side makes sense after we add a gate. It’s a proportion thing.
If we can execute on this idea, it will look so elegant, be one-of-a-kind, and address the obstacle of the tree. That’s a lot of winning in one DIY project, and I’m pretty happy about it.
Can you see the vision, or are you still skeptical? Would you have come up with this idea? You can comment here on this blog post, email me here, or reach out via direct message on Instagram or Facebook. Thank you!
If you’d like to check out another blog post, I don’t mind. Try one of these!