

Welcome back to our Curved Fieldstone Wall Series, where we attempt to rebuild the curved fieldstone walls in our front yard using historic masonry techniques. This is part eleven of a twelve-part series, which is your not-so-subtle hint that we are almost done with this project! I don’t know whether to cheer with joy or weep with relief. Maybe both?
If you’ve been following along for this entire series, thank you! If you haven’t and want to catch up, I’ve linked the entire series at the end of this post.
Today, we are discussing the swoop. If that wasn’t a technical term, it is now.
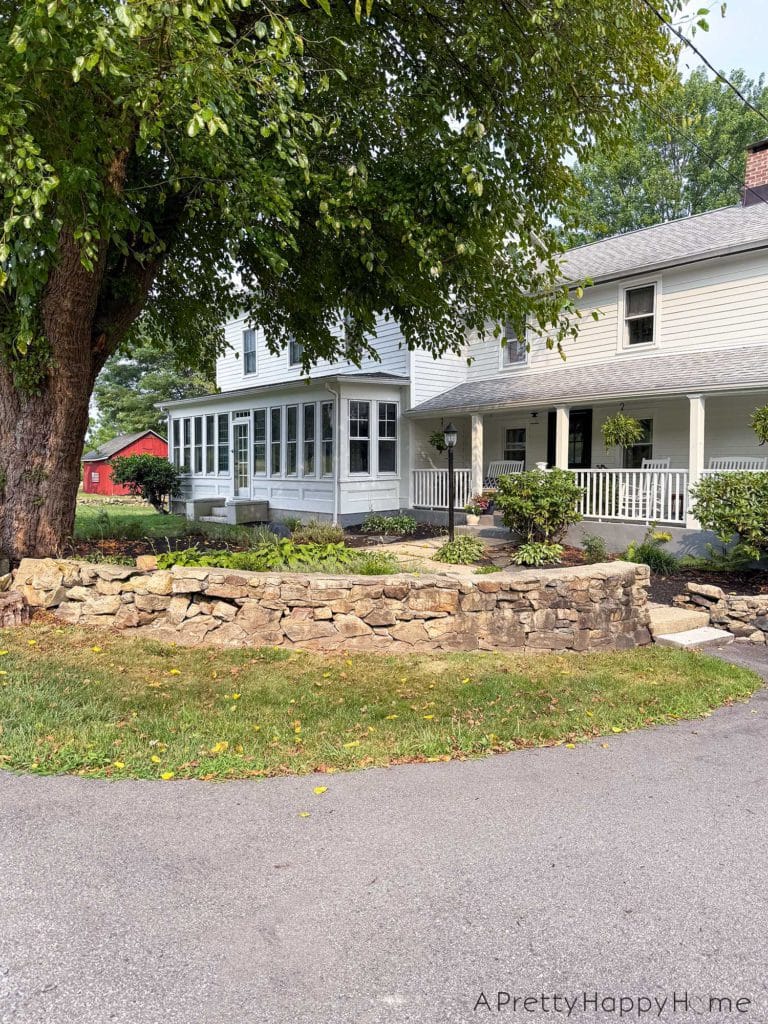
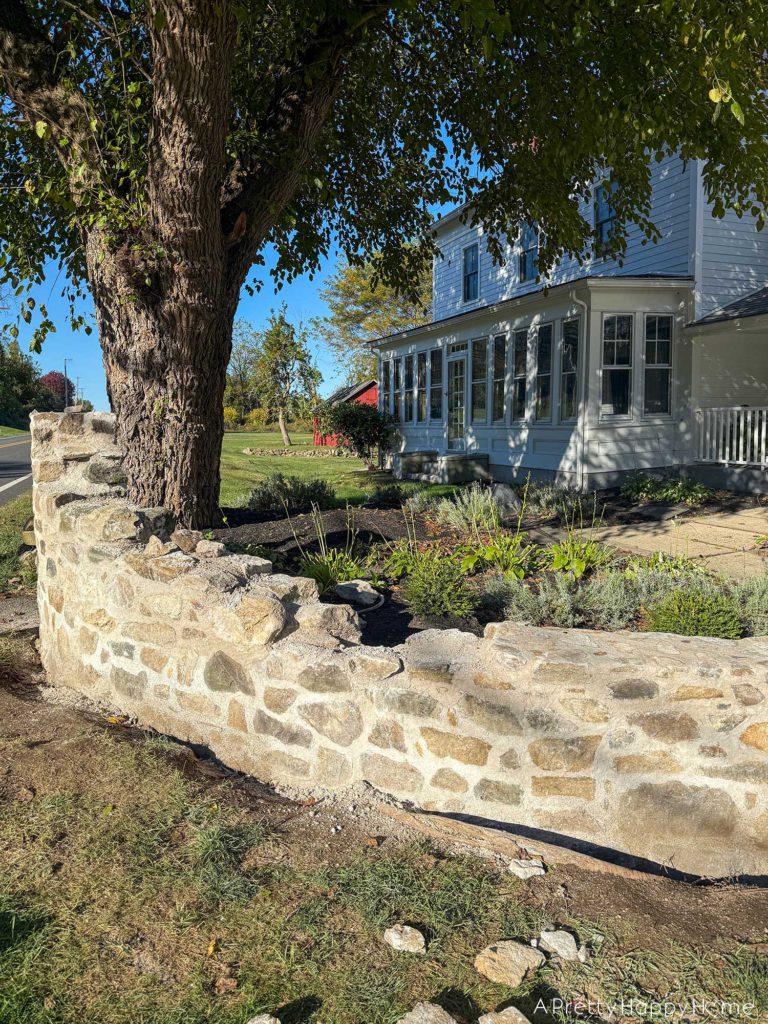
The original curved fieldstone wall (it had two sections separated by steps) was mainly one height, approximately 24 inches off the ground. We changed the shape of each section to add a swoop, and these were added mainly for practical reasons. Any aesthetic improvements are a side benefit.
Here’s the before photo of the first wall section.
Here it was after we changed the shape to add a swoop.
The driveway slopes downward toward the house and garage, so adding the swoop to the first section means that it now matches the second wall section in height where they meet at the steps.
More importantly, the swoop allowed us to better contain the flowerbed, and further shore up the terracing that’s happening there. Practical and pretty.
If we added a swoop to the first wall section, why not add a swoop to the second wall section?
Oh, I can give you plenty of reasons why not to engage in that madness. How much time do we have?
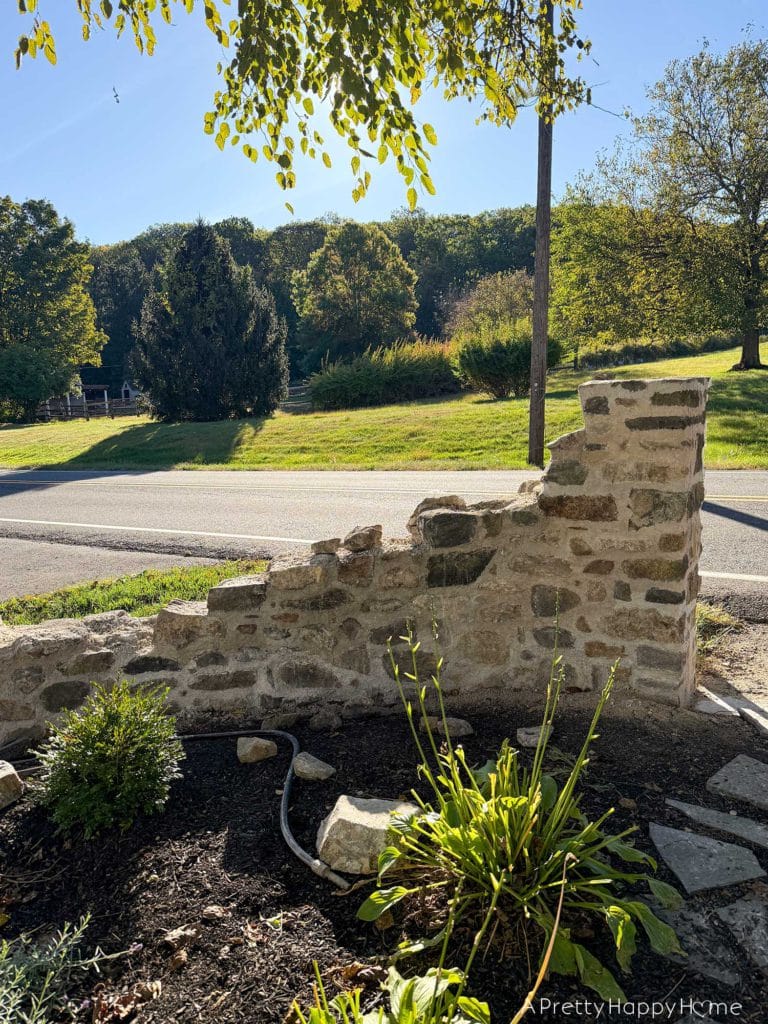
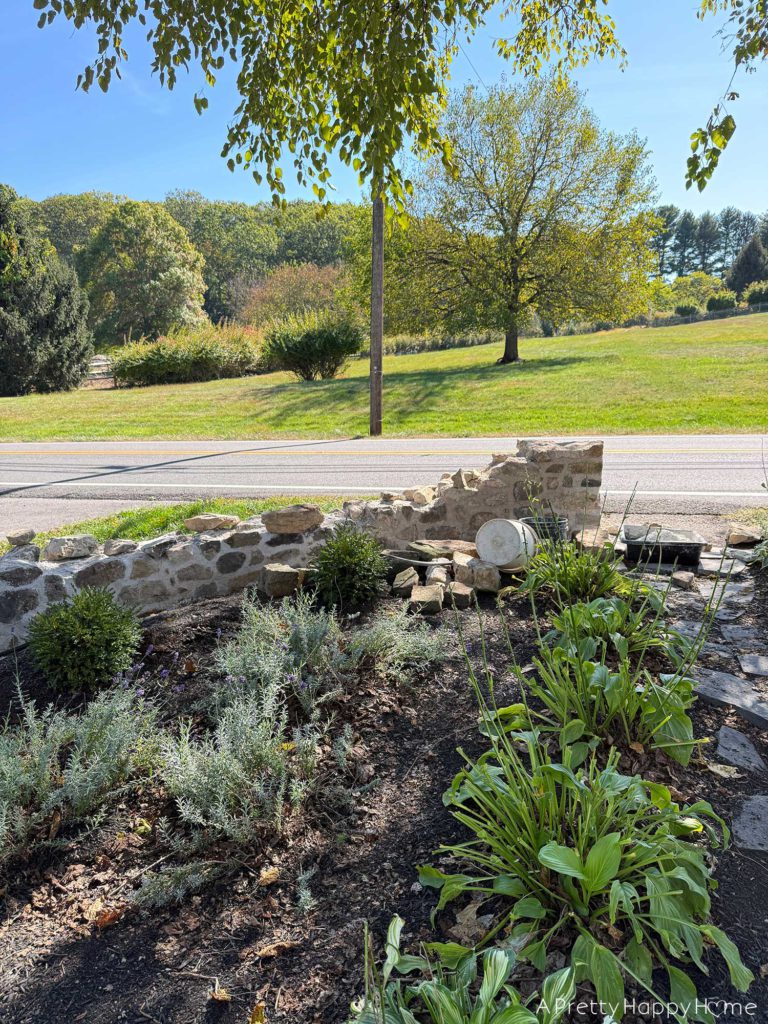
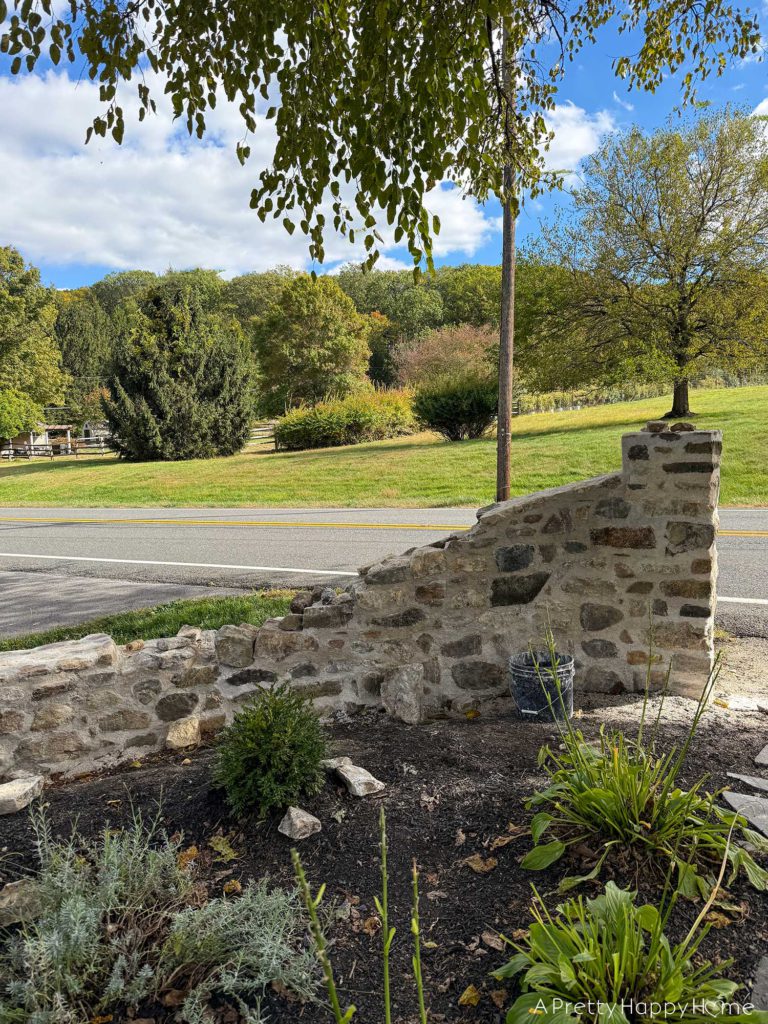
Here’s the before photo of the second wall section.
Despite the insanity added workload of the task, the swoop for the second section was also added for a practical reason.
We wanted the charming entry gate, which needs to be rebuilt, to hang from the wall, and not from fence posts. This should be a more durable long-term solution, and make the gate seem like an intentional design choice, not an afterthought.
Previously, it wasn’t necessary to open the gate when you could just step over the wall. If I had a dime for every time I’ve watched a delivery person step over the wall with a package, I could pay someone else to build this wall.
Hopefully, attaching the gate to the wall will be less maintenance, too, as the string trimmer, lawn mower, and snow piles are hard on the painted posts.

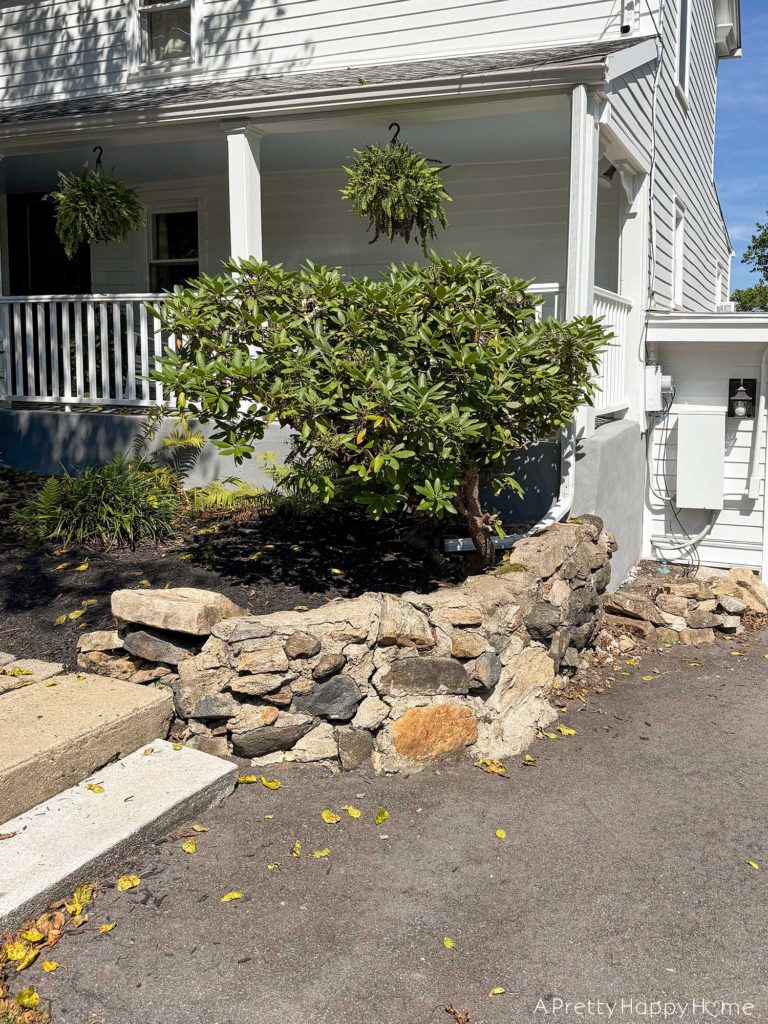
To accommodate a gate, the wall needed to come up to approximately 55 inches on the very end. This is the approximate height of the current fence posts.
By “come up,” I mean swoop up to 55 inches.
Not going to lie, it felt more like 55 feet when I was building it.
How do you install a gate into a fieldstone wall built with lime mortar? I’m sure there are multiple ways. We decided to mortar wood blocks into the wall to accommodate hinges for the new gate that will be built next year. This allows us greater flexibility in where we place the hinges and the size of hinges we can use.
You can see the wood blocks in the photo below.
The exposed area of the wood block is one side of a pressure-treated 4×4. However, there are other pieces of wood screwed to the block, so the entire contraption goes into the stone wall about 12 inches. The chunk of 4×4 probably wouldn’t have pulled out of the wall without anything else attached to it, but why design something to be fine when you can over-engineer the heck out of it so you have one less thing to worry about in life?
By placing the wood contraption a foot into the wall, it increases the amount of the wall that is resting on that wood block and holding it in place. Gravity and the weight of the wall are doing the heavy lifting or pressing, as it were, in this situation.
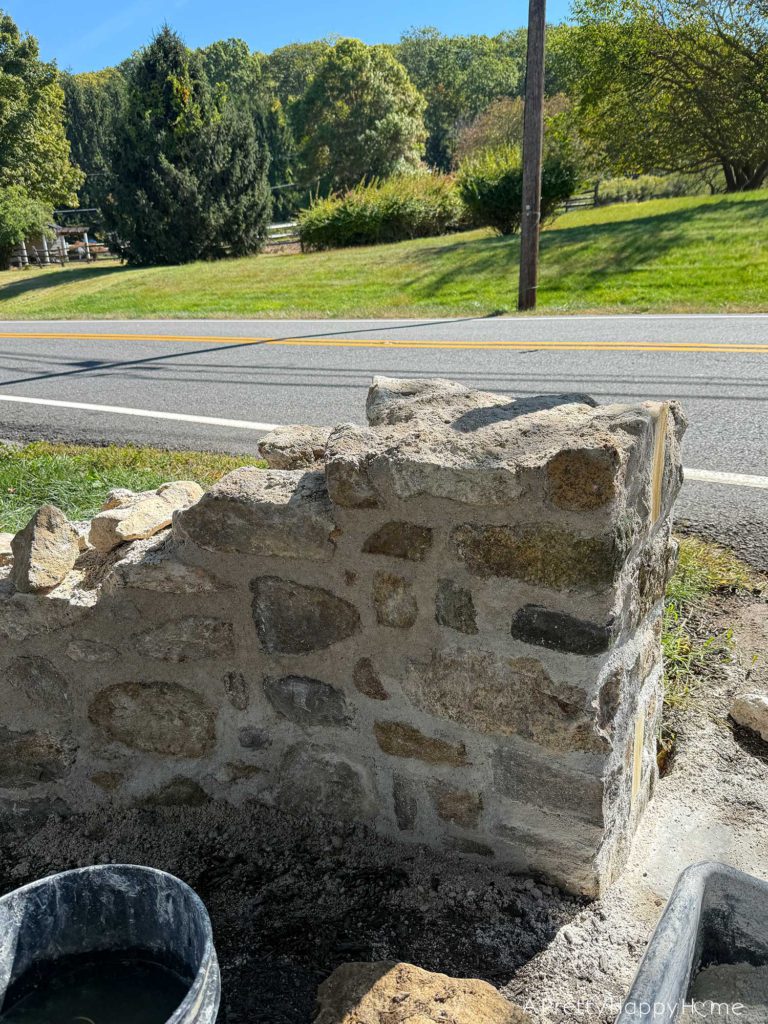
This does mean that the gate, which we only have a concept of, will have to be built within the parameters of where these wood blocks were placed.
Thankfully, that’s Handy Husband’s problem, not mine.
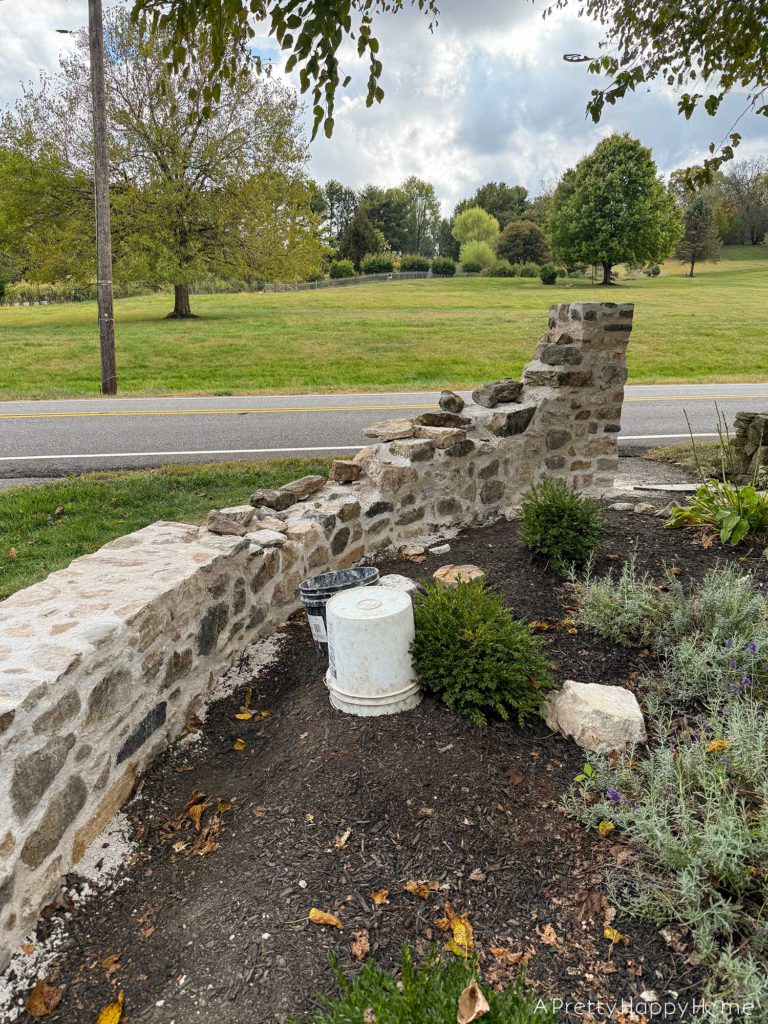
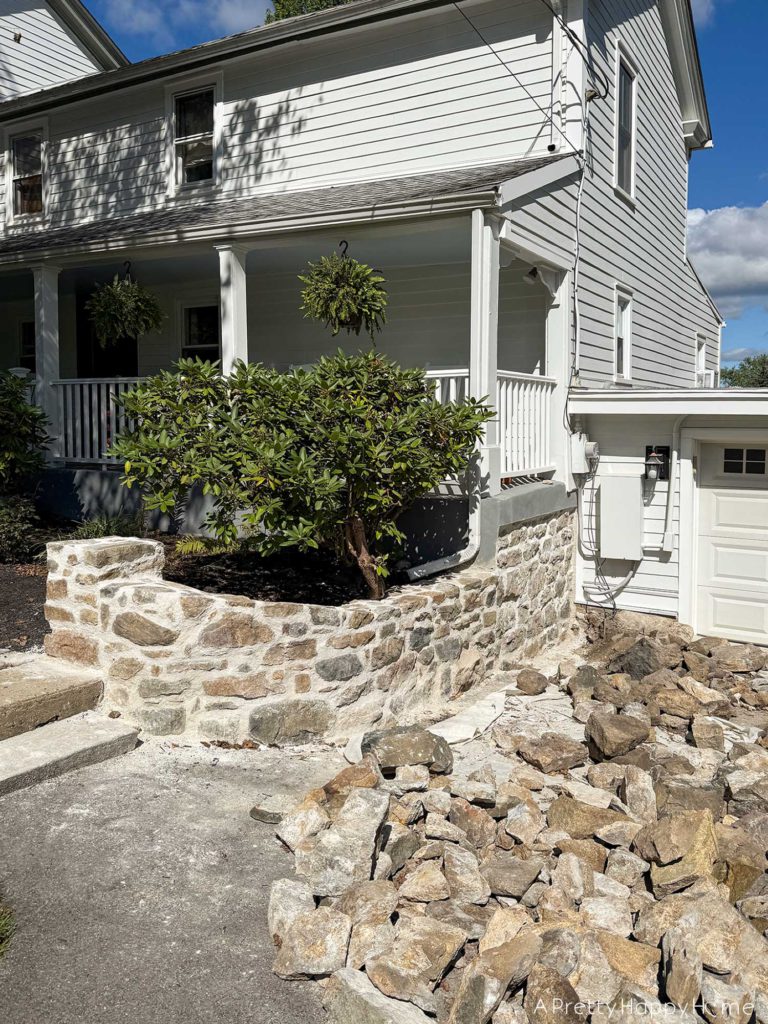
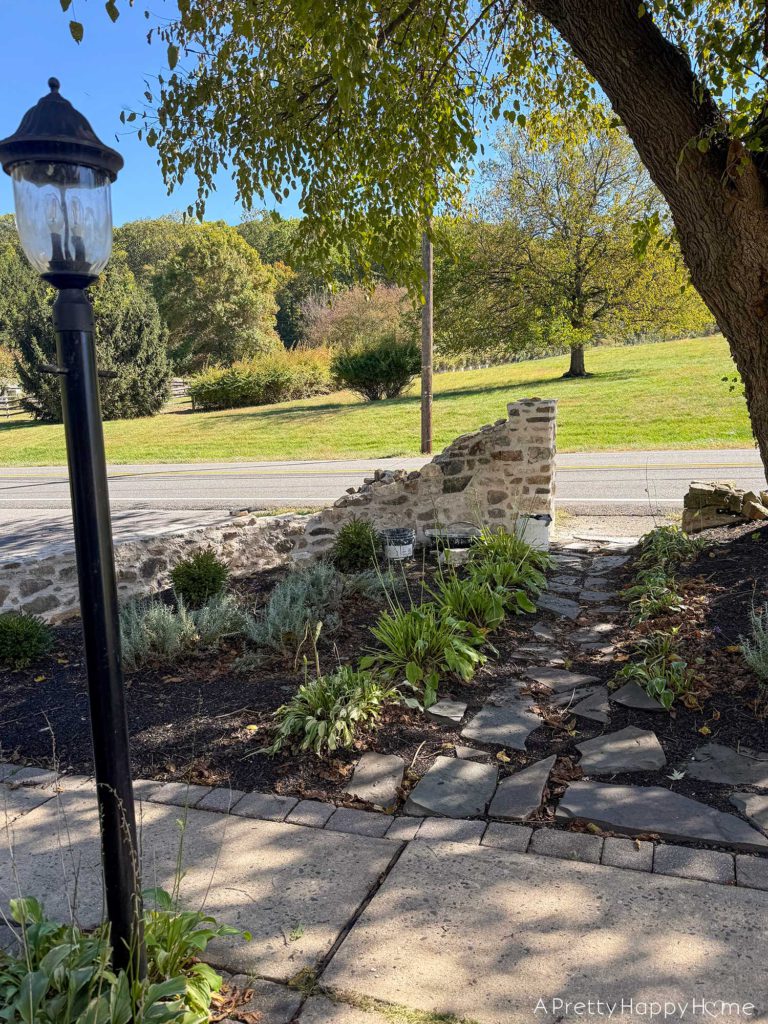
The column at the end of the swoop matches the first one we built in every way except for the final height.
Then it was just a matter of filling it all in.
Just.
I cannot tell you how badly I wanted this project to happen in our backyard, not our front yard, where no one in our community could see what was happening. There are only 5,500 people in our town.
Was I sure that I saw every single one of them on every single day that I was working? Yes.
Doesn’t anyone have to work in the middle of the day? Where are you all going, and why can’t you take a different road? Better yet, why doesn’t everyone stay home? Home is great. Home is amazing. You can’t see me in this fishbowl when you are home.
I’m pretty self-aware, so I know I was experiencing the spotlight effect. This is a psychological bias where you overestimate how much other people are paying attention to you.
But then, much to my horror, the spotlight effect became a little too real.
People started honking, giving me thumbs up, and stopping to ask questions. It was kind. SO KIND. I love my community. But now I knew that they knew that I knew they were watching this show.
It was better when I could pretend they didn’t know.
Just let me overshare my feelings and detail every single excruciating step of the process on my public blog and social media accounts like a normal, well-adjusted person.
One of my readers, an absolute angel, told me that stone walls aren’t supposed to be perfect. Their quirks are part of their charm.
I’m leaning heavily into that encouragement because this swoop puts the quirk in quirky.
I even tried to be extra careful this time, using my levels, measuring tape, and a string guide.
But I seem to be destined to build quirky things. It’s my specialty. Hahahaha!
My next update, if I work up the nerve to share it, will be the final reveal of this curved fieldstone wall.
Have you ever experienced the spotlight effect? Do you have kind neighbors, too? How do you feel about quirky stone walls? Let me know. Comments really do make my day. You can comment on this blog post, email me here, or reach out via direct message on Instagram or Facebook.
Happy DIYing.
P.S. I prefer to keep my photos true to life. This time, in the interest of protecting my neighbors’ privacy, I have removed identifying features from some of these photos. I did not remove any of the wall quirks, but I was tempted.
Thank you for following along with our DIY adventures. I appreciate you! If you missed any of the posts in this series, you can catch up here:
Curved Fieldstone Wall: Part 1, The Plan
Curved Fieldstone Wall: Part 2, Demo Section 1
Curved Fieldstone Wall: Part 3: Progress Section 1
Curved Fieldstone Wall: Part 4: Reveal Section 1
Curved Fieldstone Wall: Part 5: Porch Wall
Curved Fieldstone Wall: Part 6, Demo Section 2
Curved Fieldstone Wall: Part 7, The Stairs
Curved Fieldstone Wall: Part 8, Progress Section 2