Building Fieldstone Stairs: Part 2
Welcome back! We are building fieldstone stairs.
This is a DIY project we’ve never attempted before and may never attempt again.
We have just enough confidence, competence, and delusions to approach new projects with an “everything is figure-out-able” attitude.
Today I’m going to overshare our process for building fieldstone stairs. Please note when I say fieldstone I mean actual stone taken out of the ground (my backyard) and used in its natural form. This is not stone purchased on a pallet from the stone quarry that has even, predictable dimensions. That would make this project infinitely easier – a concept with which we are wholly unfamiliar.
Let’s get into the nitty-gritty.
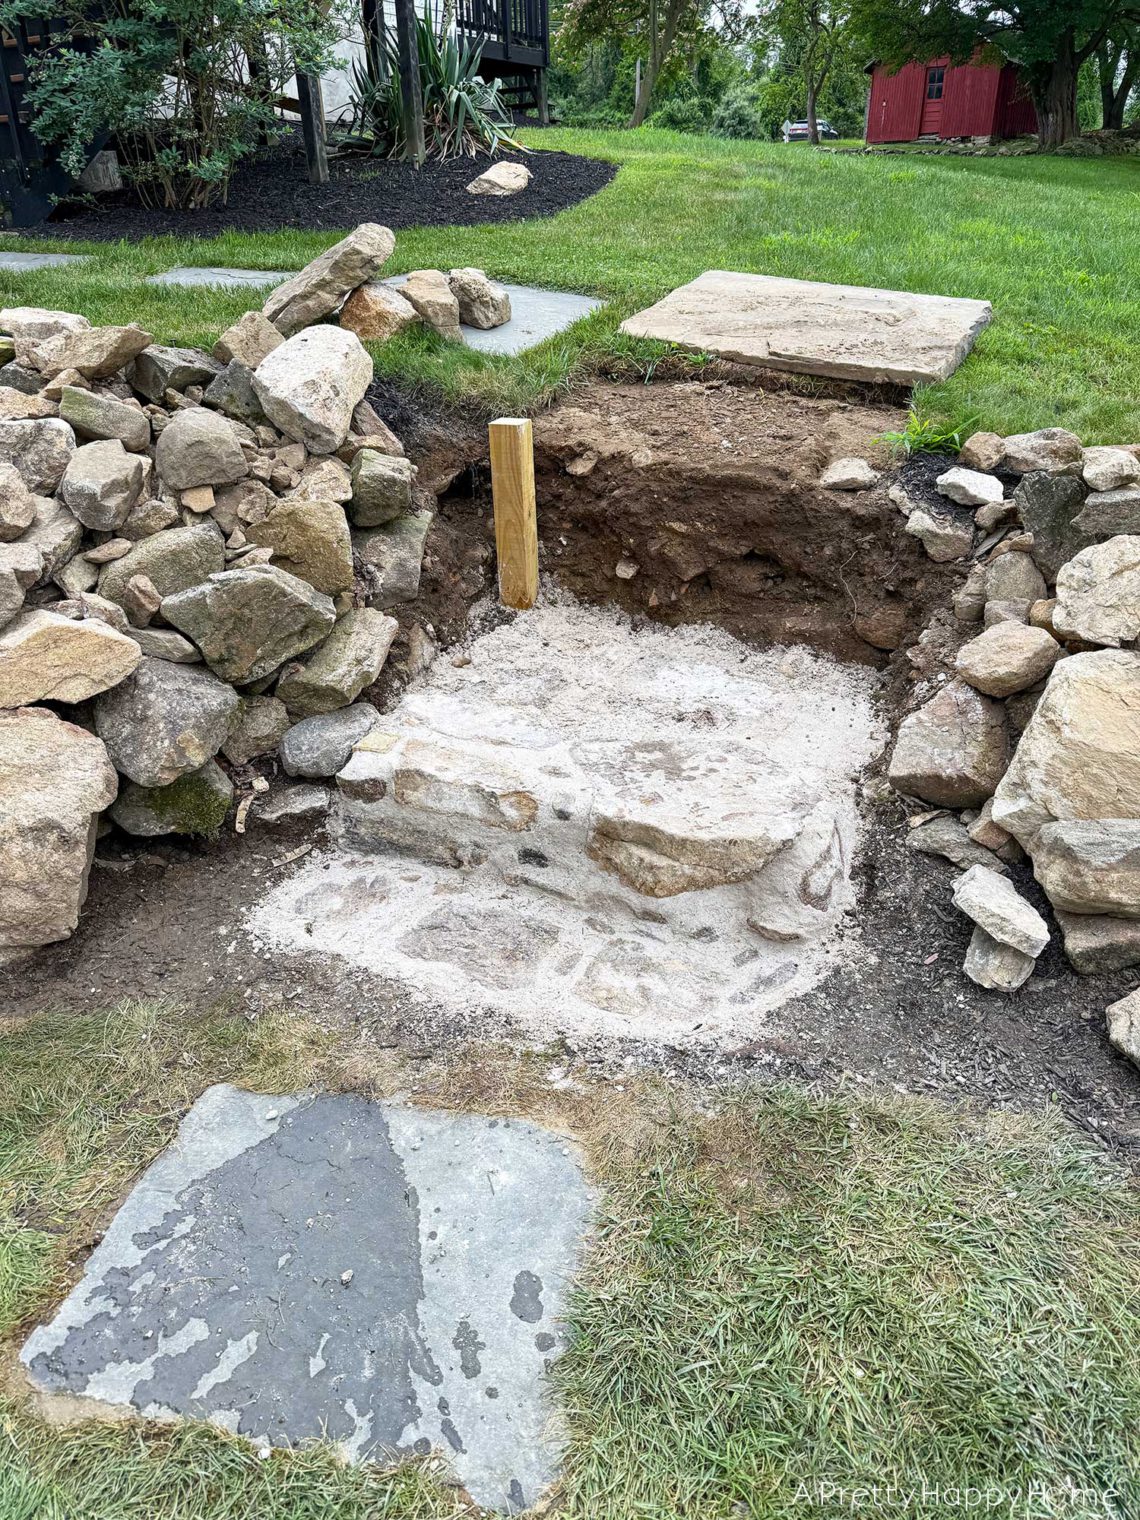
First, we prepped the area for the fieldstone stairs.
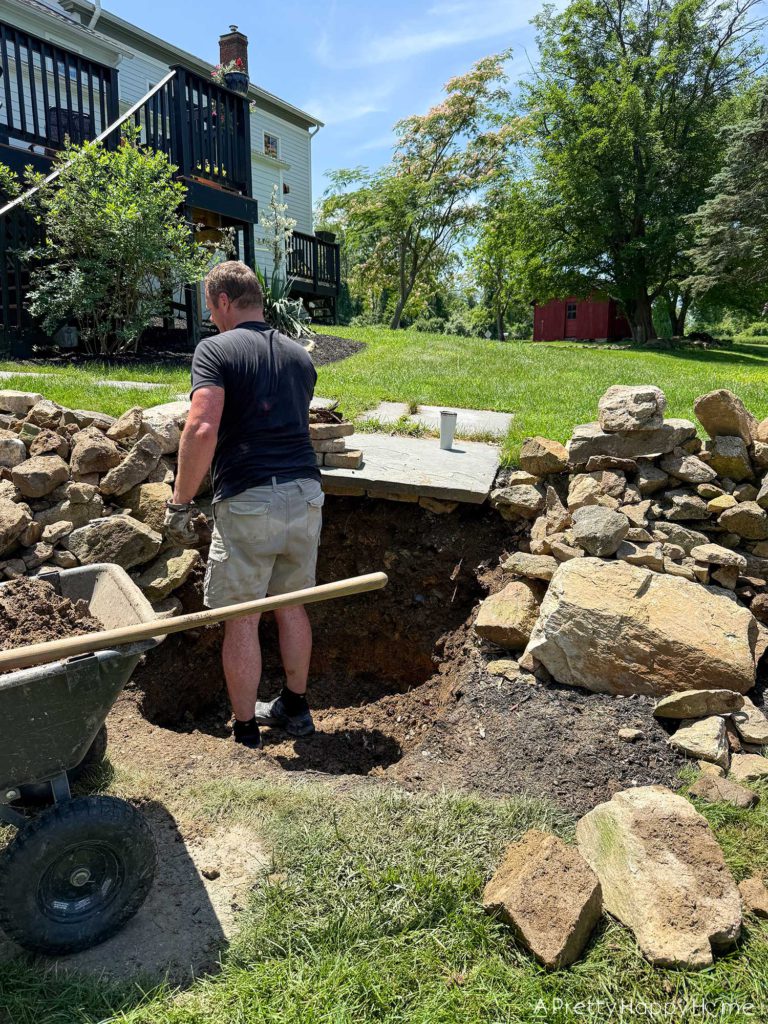
We removed old wood stairs, so we knew exactly where the new stairs were going to go. That worked to our advantage, and we shamelessly take our DIY wins when they come to us.
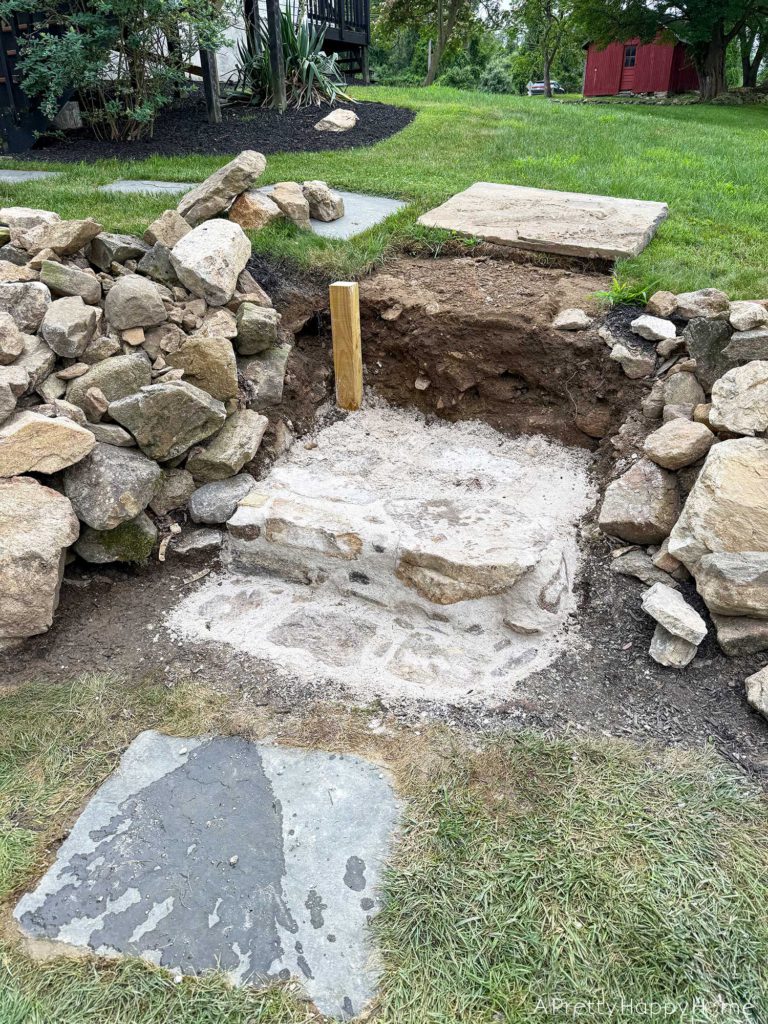
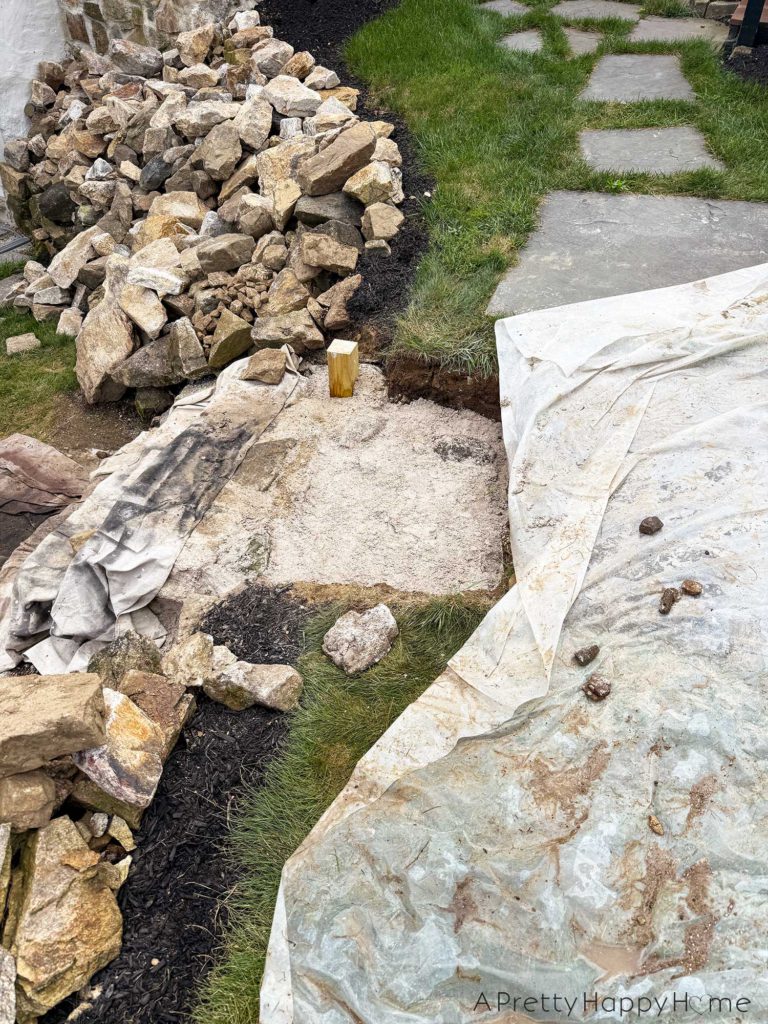
However, we did have to dig out the area where the fieldstone stairs will be built into the hill. It might not seem like it would amount to much, but we removed TWELVE (!) wheelbarrows of dirt from this area. That doesn’t include the stones that also came out of the ground.
We did take the frost line into account when prepping the area, but it’s a weird situation where the stairs are cut into the ground. Part of the structure will be below the frost line, but not all of it. I’m all about sharing the DIY wins and fails, so I’ll be sure and report back if we have regrets after the winter.
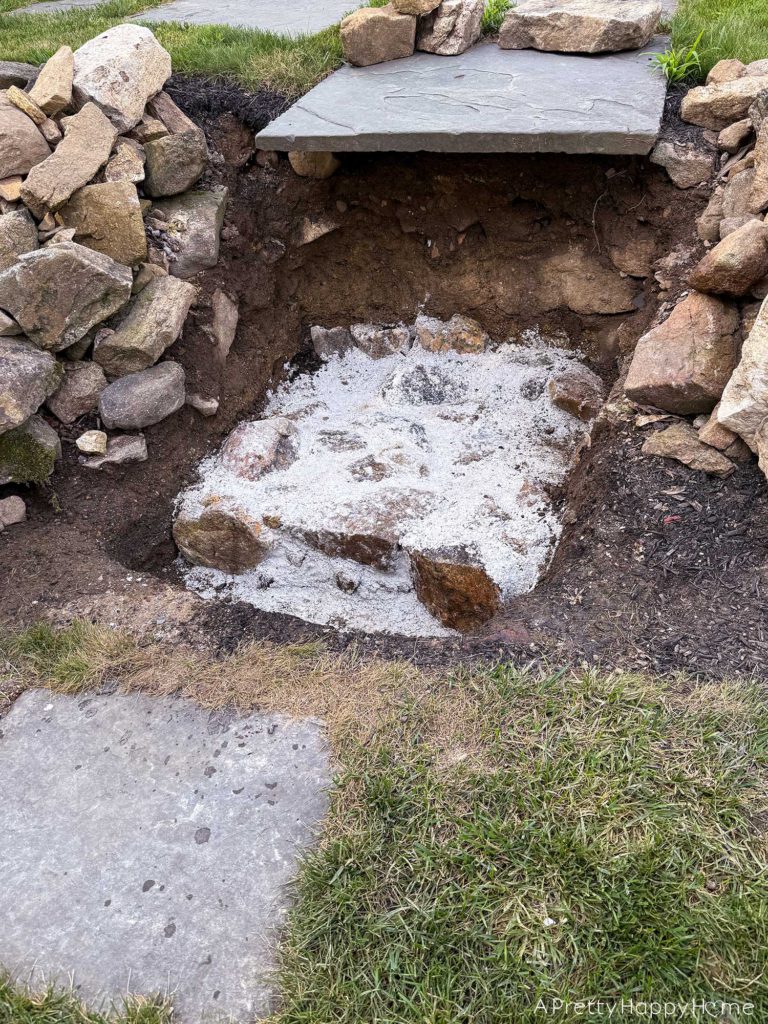
Next, we placed our base or foundation.
The area we dug out for the base of the stairs was level-ish, but it wasn’t critical to have it perfect due to the imperfect nature of the various stones we’ll be placing. They will be all different shapes and sizes, which you can see from the rocks shown in these pictures. This means we’ll end up correcting any leveling issue from the top.
The steps are built directly on the dirt, which, from what we can tell, is how the stone foundations on the old buildings on our property are built. However, we did set the stones in a bed of lime mortar so they weren’t directly touching the dirt. Then we secured them to each other with more lime mortar.
Lime mortar should always be used with fieldstone not concrete or another Portland cement-based product. We used NHL5 in a 1:3 ratio with all purpose sand, not fine play sand. The rocks also need to be damp when placed to better help the mortar adhere.
Below you can see the first layer we placed. None of this will be visible because it’s the foundation for the first layer and step.
We determined our rise over run.
Our rise over run was determined based on the runners for the old wood steps.
We did 6.5 inches for the rise and 10 inches for the run.
Let me tell you…using unevenly sized and shaped fieldstone for this project made getting our rise over run correct and the steps level VERY TRICKY. I understand why people do big flagstone steps instead.
This trickiness was complicated by the fact that we did this project in the middle of July. Do you know what happens in the middle of July? The sun decides to discover your melting down point.
Just like I need to turn the radio down when I’m driving so I can see better, I need the sun to dial down the temperature so I can think better and not get cranky as easily.
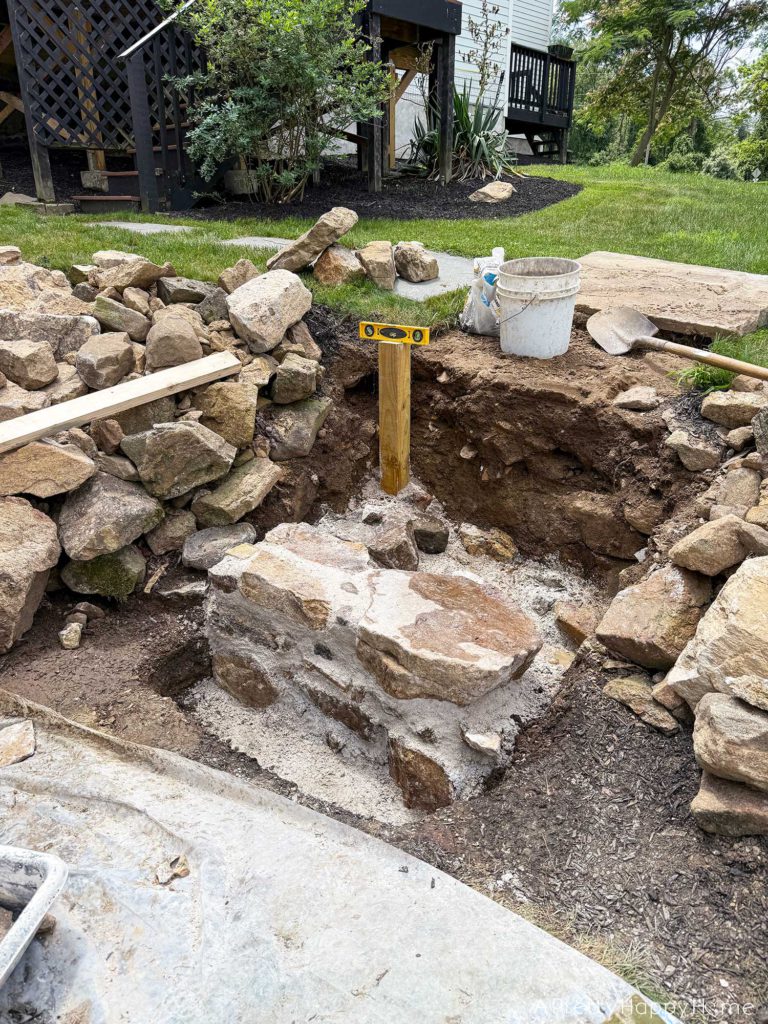
We set the pressure-treated posts for the stair railing.
Not only will our new stairs be made out of fieldstone, they will have a handrail. Fancy, I know. You’re going to need it because those fieldstones have some texture! (That’s my nice way of saying even a flat fieldstone isn’t perfectly flat.)
The stair railing will be metal and we need a place to secure the railing to the ground. We could drill through the stone, but we risk breaking the stones when we do that. The lime mortar itself, unlike concrete, isn’t the best for drilling through for this particular purpose.
Instead, we decided to use pressure-treated, ground contact 4×4 posts to secure our railing to. They are basically mortared into place inside the structure of the stairs. When complete, the top post will be secured in about 4-ft of stones and mortar.
We’ve seen untreated wood survive for hundreds of years inside a lime mortared foundation, and the tops of the post will be covered by the railing, so it should do okay. Again, we’ll find out!
We’re building fieldstone stairs one layer at a time.
Our method is to build one layer or step at a time. Each subsequent layer of stones and lime mortar will be set back 10 inches to make the steps. This allows us to “lock” each step to the one above and below it.
We originally planned to step down from the last step onto grass or a flagstone, but at the last minute decided to add stone at ground level. We may or may not leave this ground level stone exposed going forward though. It depends on whether or not I can figure out a way to keep it from looking dirty all the time.
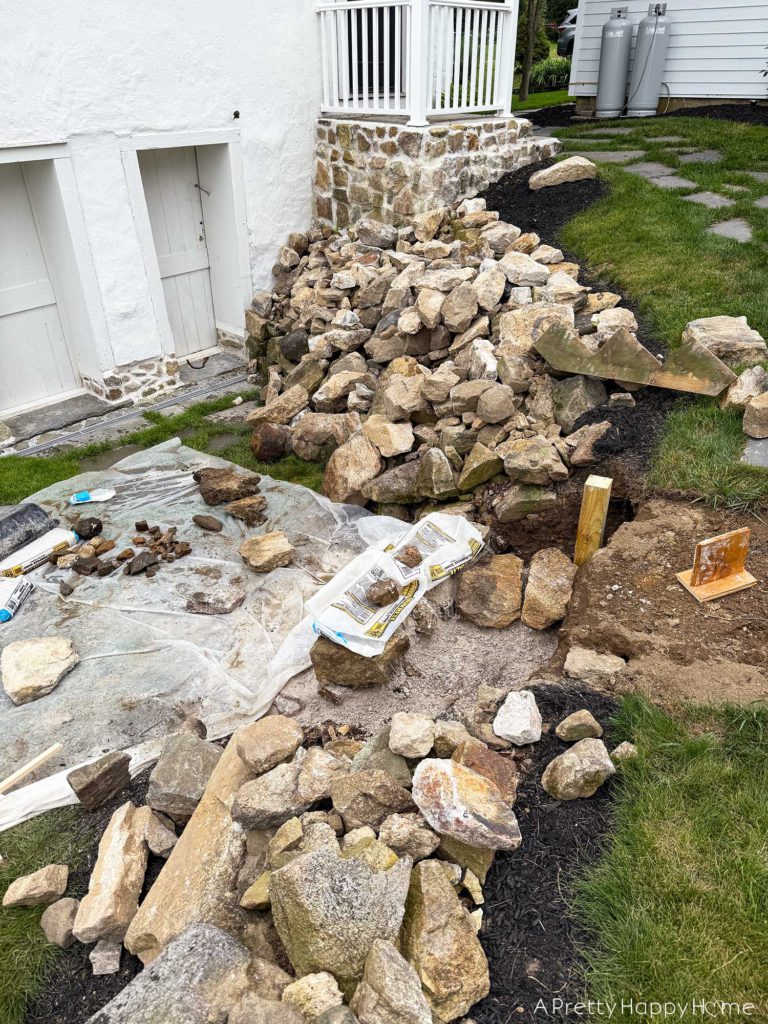
Building fieldstone stairs is like building a 3-D life-size puzzle, and you have to find your puzzle pieces in this rock pile.
There’s a reason why contractors don’t build stairs with fieldstone and instead use concrete, bricks, and flagstones. It’s easier.
The irregularity of using fieldstones that have literally been dug out of the ground and used in their natural form for a project like this makes everything complicated. At times, it was a little maddening, but that might have been the heat. We know this project will be worth it in the end. Guaranteed.
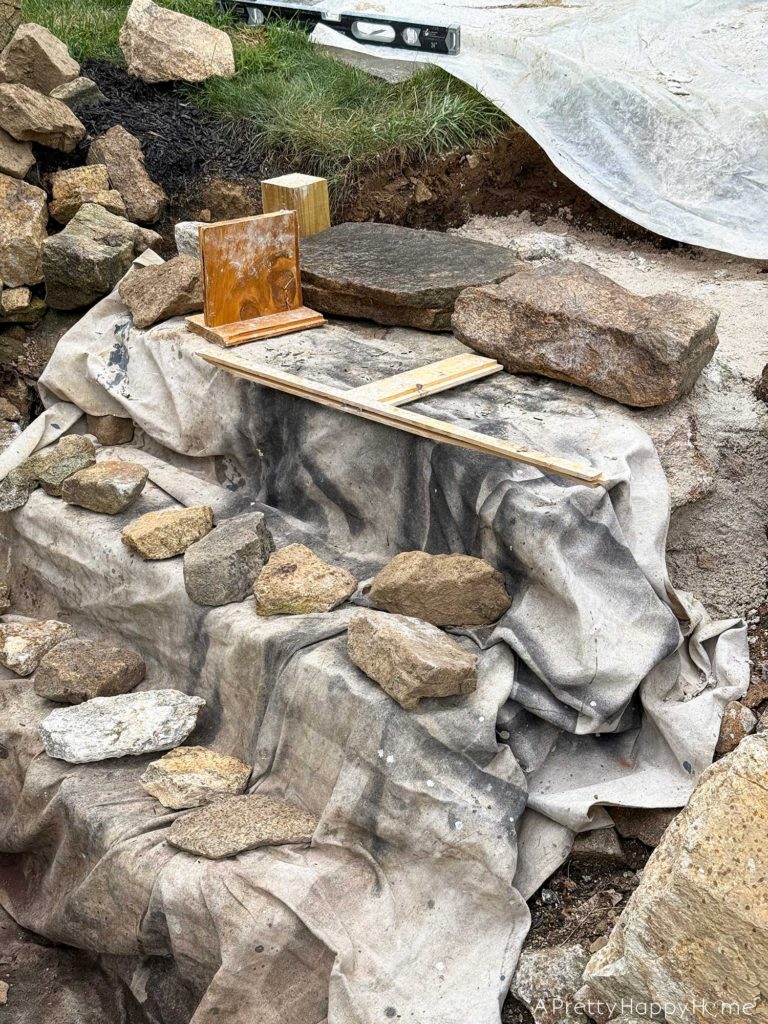
We did fashion some “tools” to assist us in this task. You can see them in the photo below.
We made a wood stand to help us make sure we got the rise correct. If the top of the stand lined up with top of the rocks, we were in good shape. It saved us from getting mortar all over a tape measure.
A t-shaped guide that we fashioned was helpful to make sure the stones were set back 10 inches to make the stairs the correct depth. We also used a long level to make sure there was enough mortar under each rock to bring it up to the correct height.
You can see our tools in action in the photo below. The two large flat(ish) stones on the top step will be great stepping stones, but they aren’t tall enough for our step. All the smaller rocks sitting on the tarp-covered stairs are potential candidates, meaning relatively flat on one side, to help raise up the two larger stones to the correct stair height.
These fieldstone stairs were not built in a day.
We have about four solid days of work into building these fieldstone stairs with four steps, which really isn’t too bad for how our projects usually go.
One person could do this project, but it is definitely helpful to have two people. We did place some extremely heavy stones in these stairs that took two people to lift. It was not necessary to use such large stones. It just filled the space more quickly.
One person could build these fieldstone steps using only rocks that she or he could lift. It just might take a little longer, as so much of the time is spent simply searching for the right rocks to use. It really is a puzzle.
If you notice the tarps in some of the photos, we used those for two purposes. One was to protect the grass while we worked. The other was to protect the mortar from the sun and rain. The tarp helped the mortar dry more slowly in the July sun, which will make it stronger. If we were doing this during April or October when the temperature is cooler, it wouldn’t have mattered much.
The tarp also protected the mortar from rain, since we had a bit of that in the midst of this project.
As I’m writing this, we are putting the finishing touches on the stairs, so my next update will be the reveal! How do you think they look so far? If you have questions about the process, let me know. Please comment on this blog post, email me here, or reach out via Instagram or Facebook. I love hearing from you.
Happy DIYing!
Thanks for hanging out with me for the start of another project! Here are some other blog posts you might enjoy.
Building Fieldstone Stairs: Part 1


You May Also Like

Vinyl Tile Pedestal Stand

DIY Kitchen Cabinet Feet from Scrap Wood
