

It’s time for part 3 of our rockin’ Reconstructing a Fieldstone Wall series. Today, we’re talking about the part of the fieldstone wall that is now sloped.
It’s a small section, only about 3 feet long, but it caused us more headaches than that time we accidentally purchased decaf coffee and didn’t realize it. This sloped wall was like the tiny pebble in your shoe. How something so small can cause so much grief is beyond me. Good thing I have a blog to tell you all about it!

So, let’s get into it with a quick recap to get you up to speed.
The plan for the sloped section of the fieldstone wall:
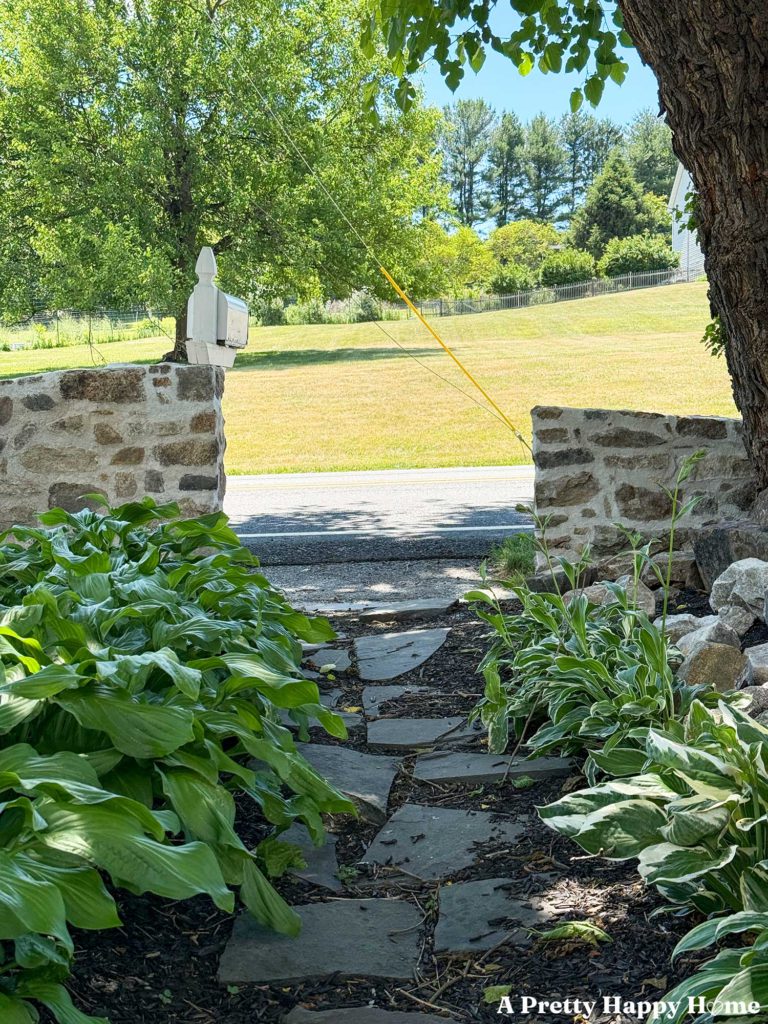
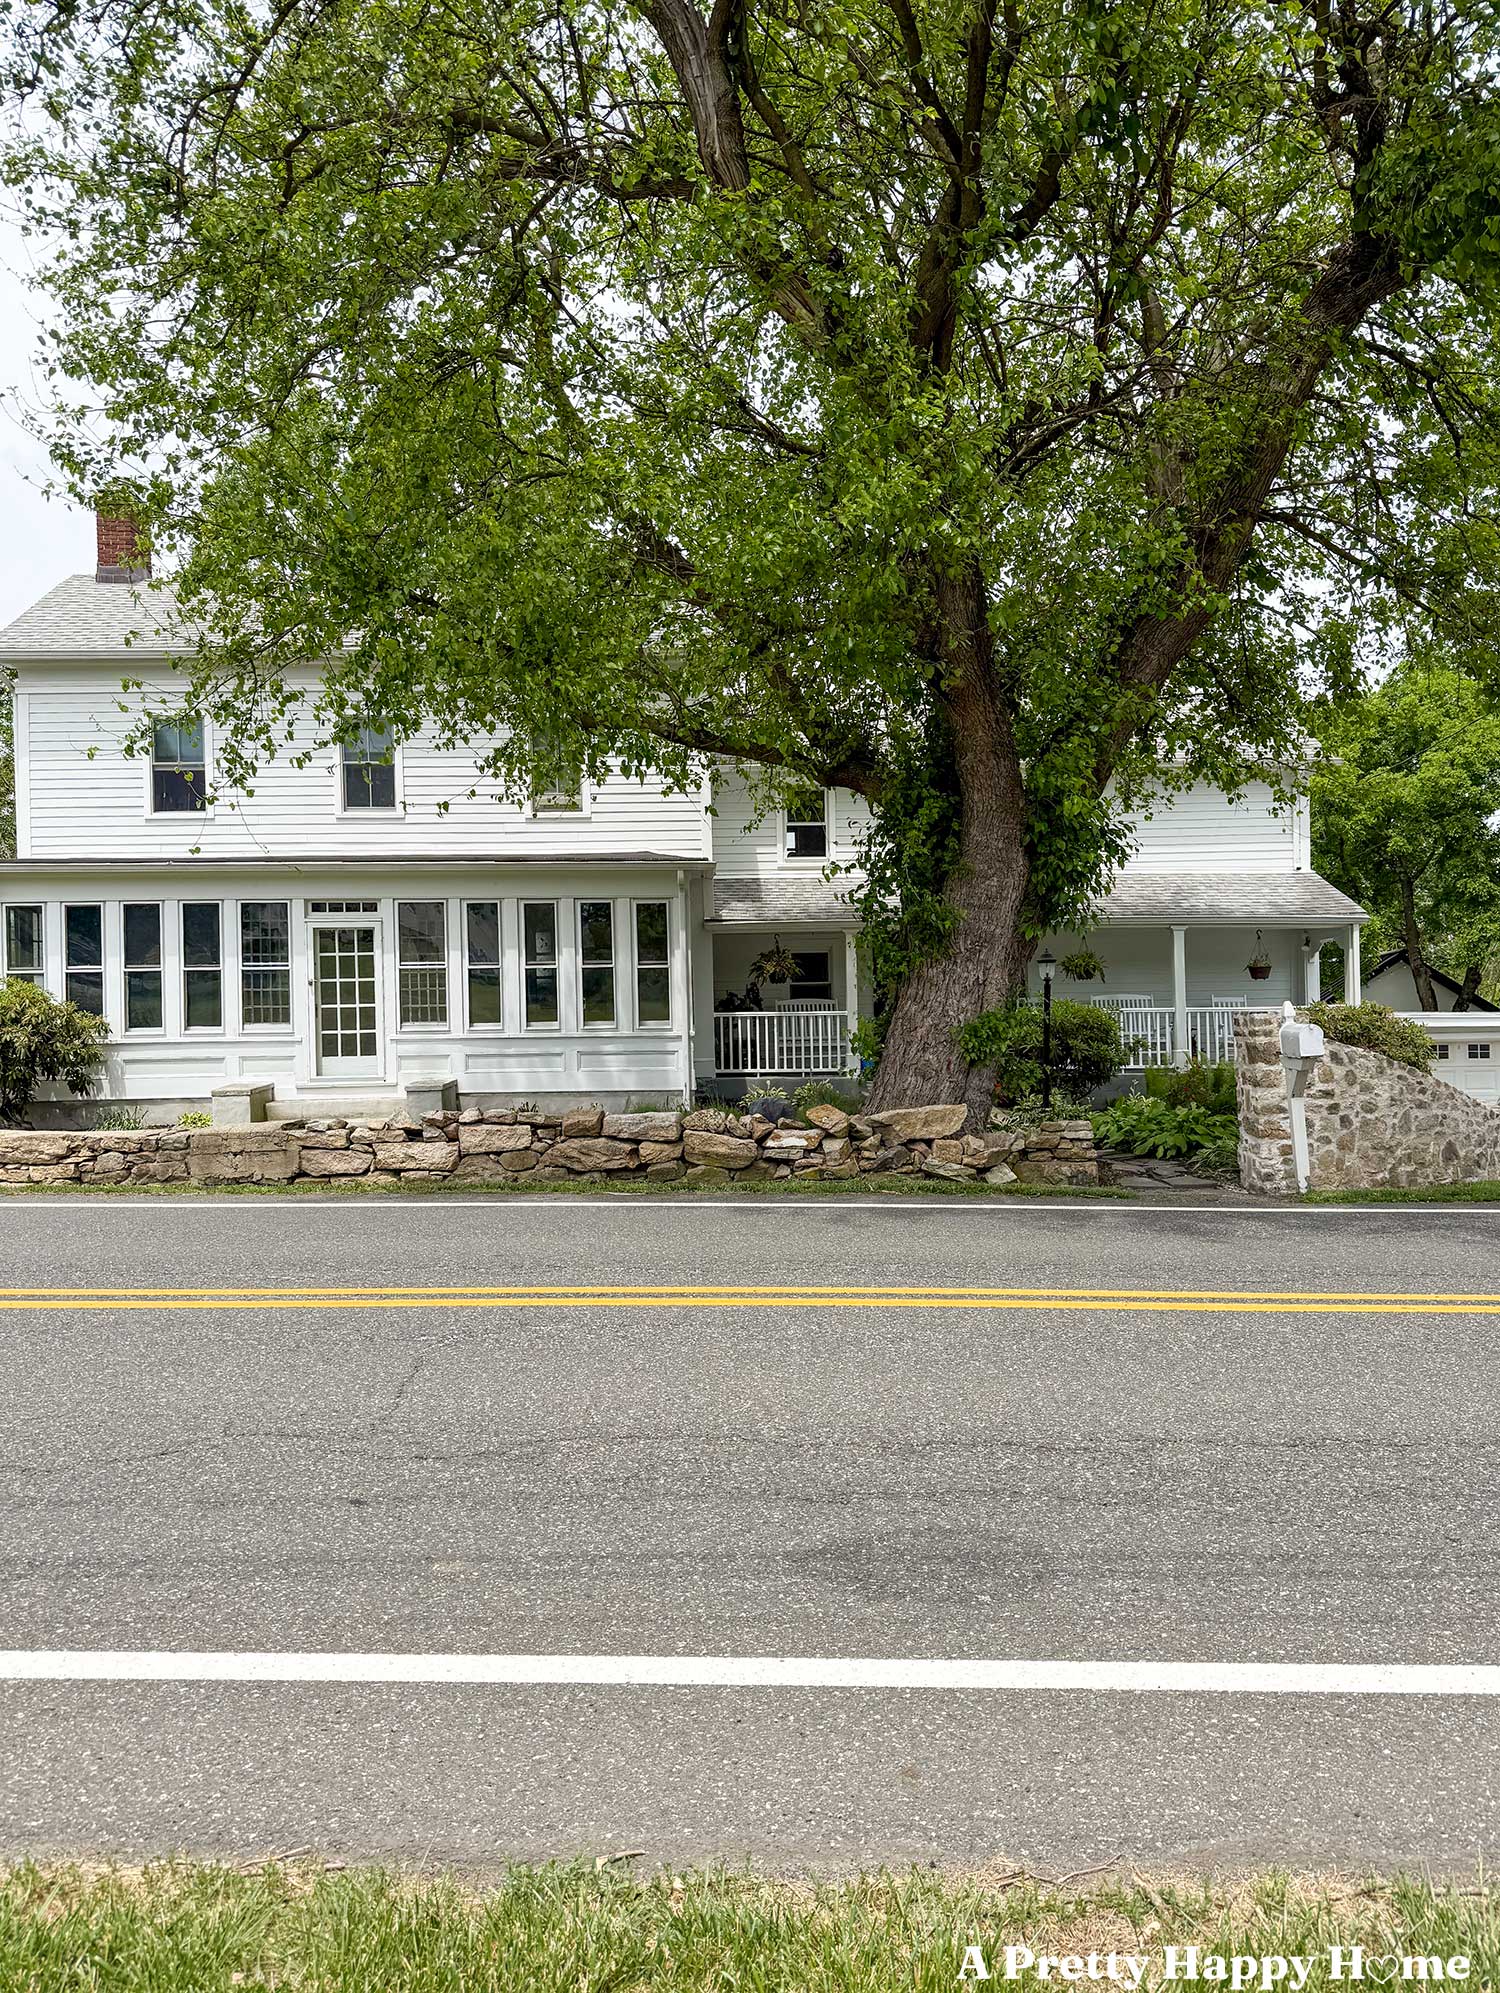
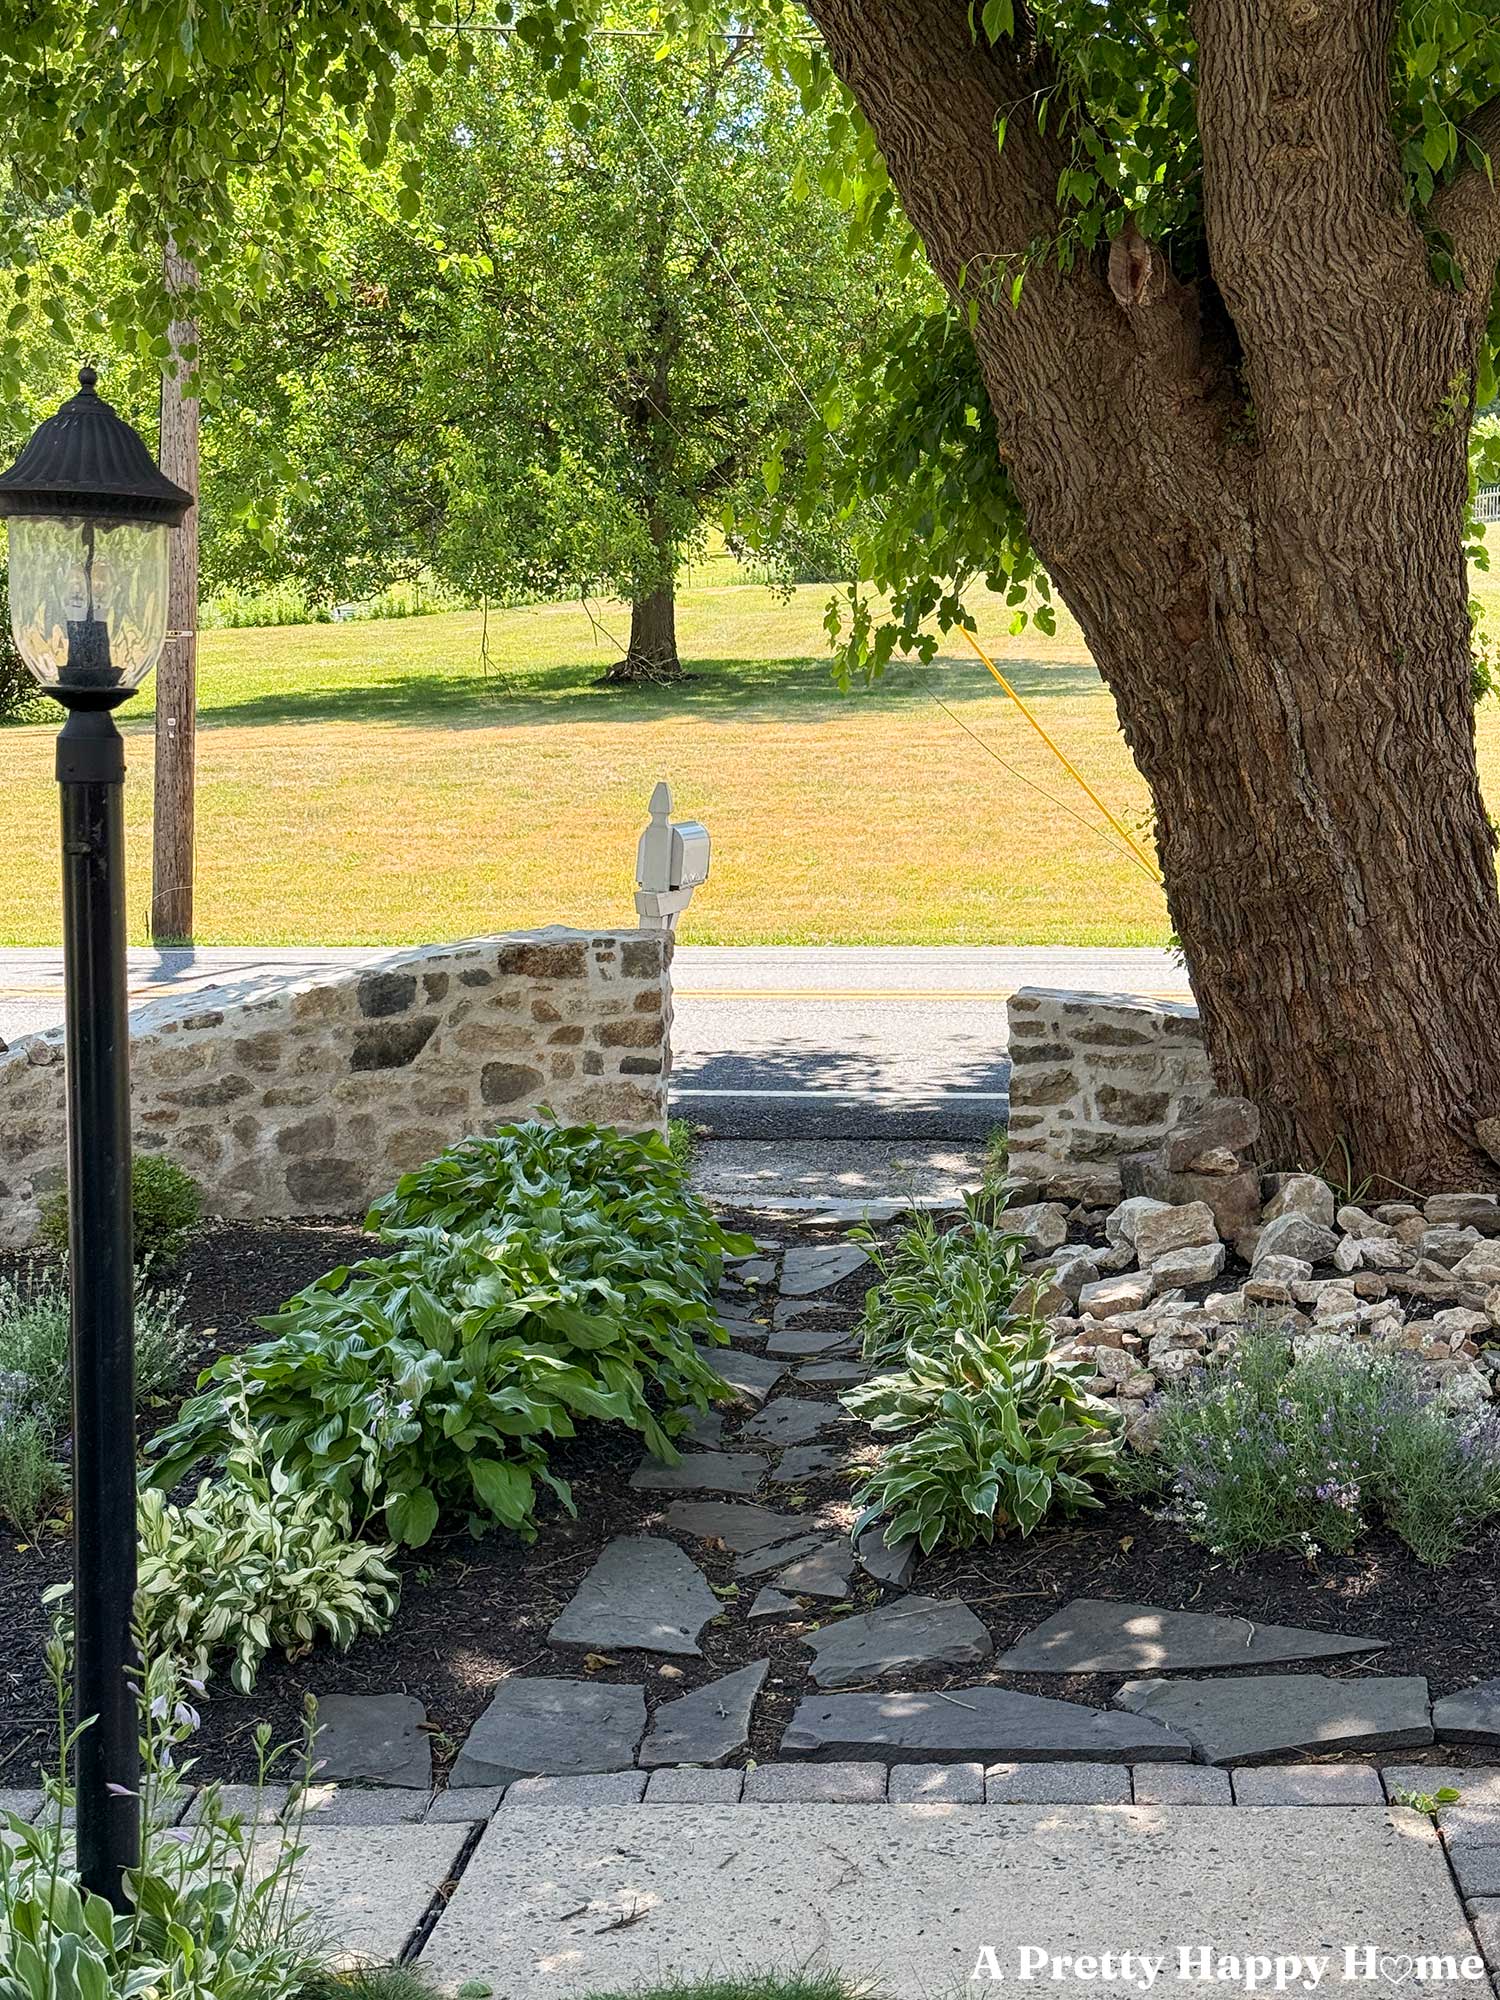
As you’re looking at our house from the road, the right section of the fieldstone wall curves around the flowerbeds and then swoops upward to where it meets the flagstone path leading to the house.
We always intended to duplicate that swoop in reverse on the opposite side of the path to make the wall sections symmetrical. My brain loves symmetry more than caffeinated coffee.
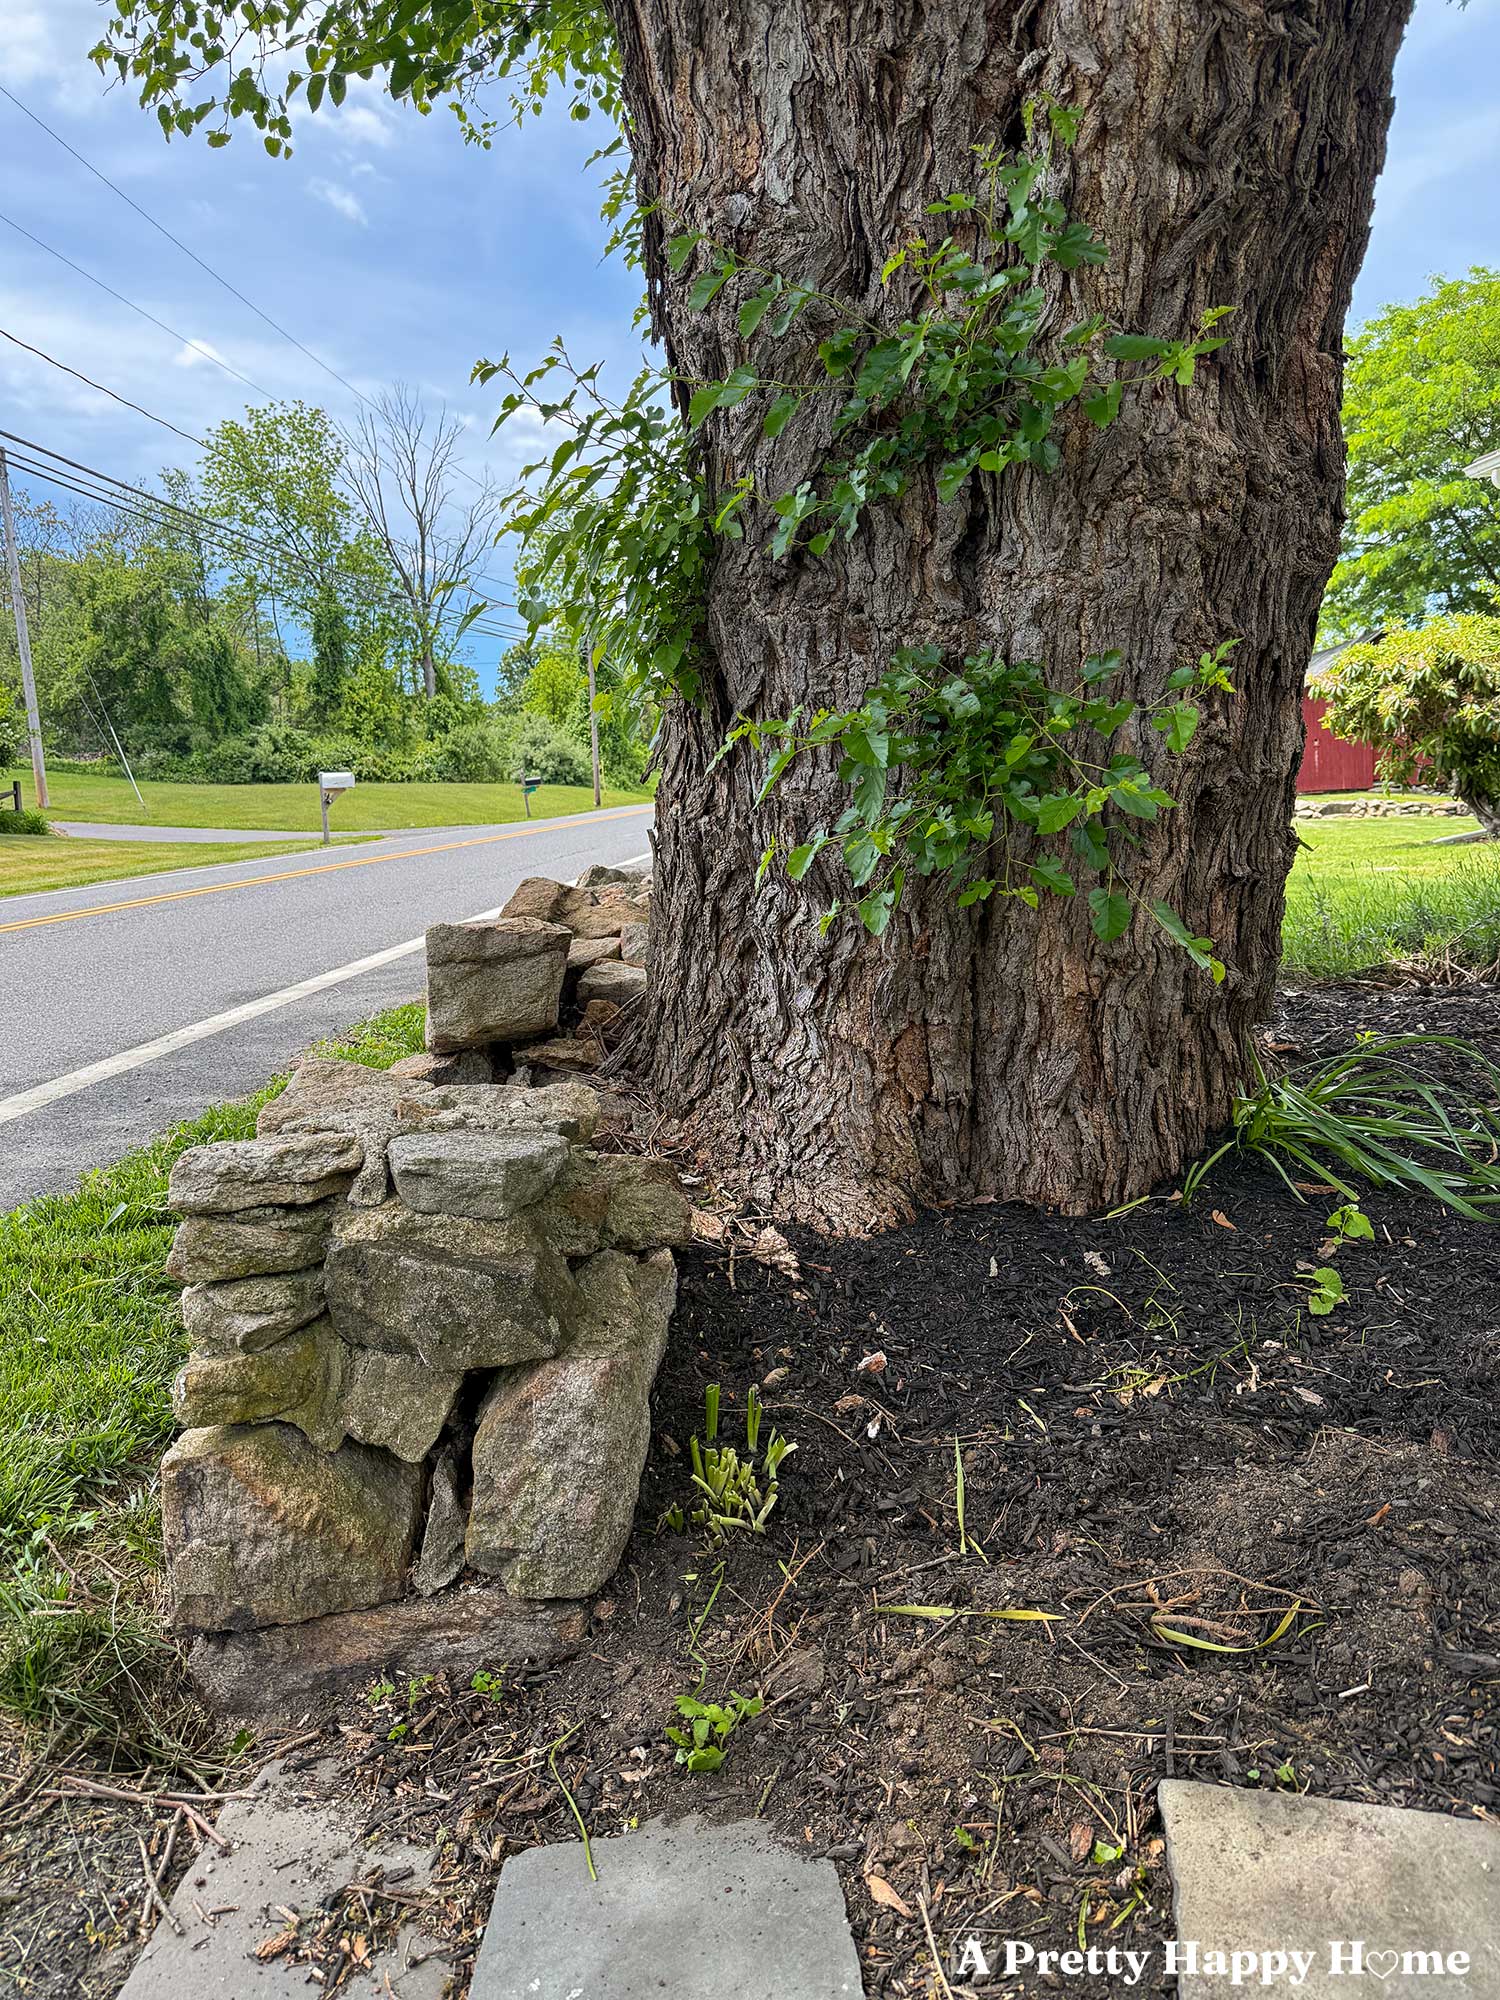
However, the placement of our very old and large elm tree posed a problem, as it grew so close to the wall that it started pushing it toward the road.

But problems are meant to be solved. It’s what we do!
We figured we’d eventually come up with a solution and, over the course of months, tossed around many ideas on how to build the next sloped wall section to match the first wall, but each one had downsides.
Ultimately, we decided that given the size of the tree and its likelihood to continue growing, there wasn’t room to build the wall as we originally intended.
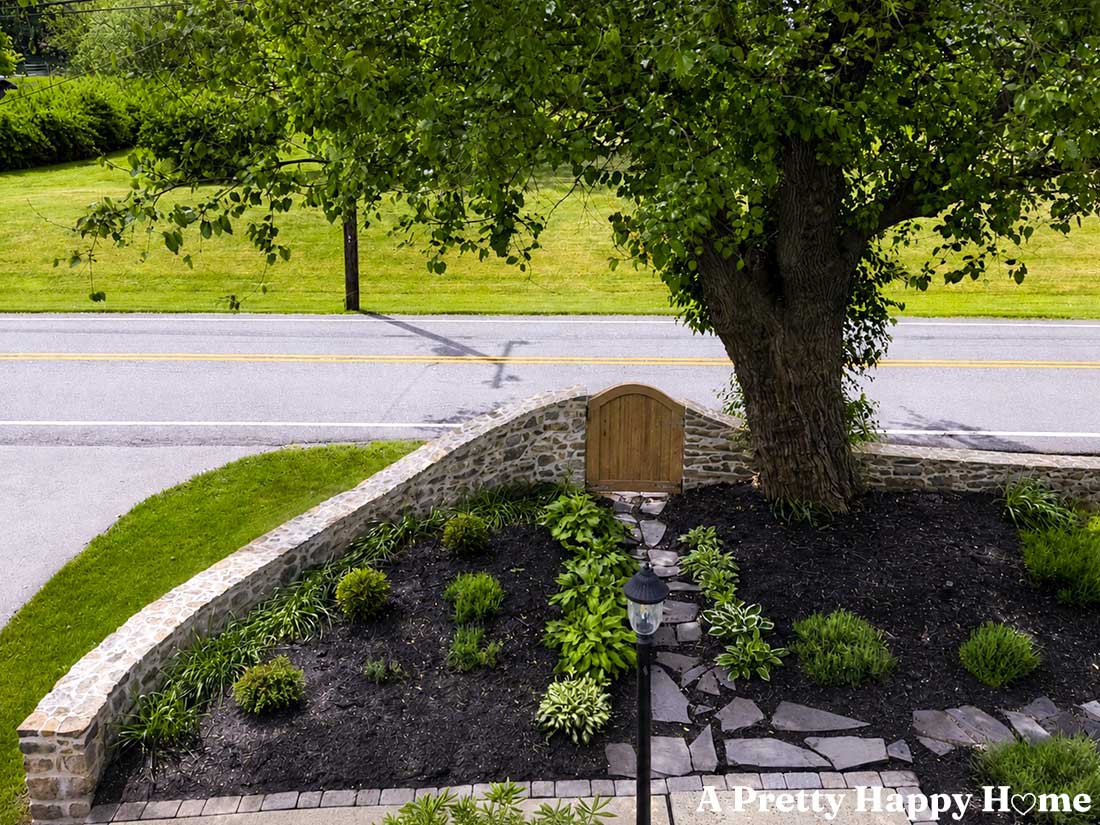
It was time to pivot! With a little off-the-wall thinking, we realized there would be close to enough room to make the upward and downward slope of the wall symmetrical enough if we made the soon-to-be-built gate that will go in between the two wall sections part of that swoop or curve. Basically, we’ll use the gate to trick the eye.
This AI-generated image, shown below, doesn’t quite nail that concept, but it’s close enough for imaginative purposes. Don’t get hung up on the design of the gate or the wall. It won’t look exactly like this when we build it.

How we determined the slope of the fieldstone wall:
You might be shouting at your screen: Math! Rise over run! Use your middle school math to find the slope!
I’ve worked hard to forget middle school, so let’s not open that smelly Pandora’s box.
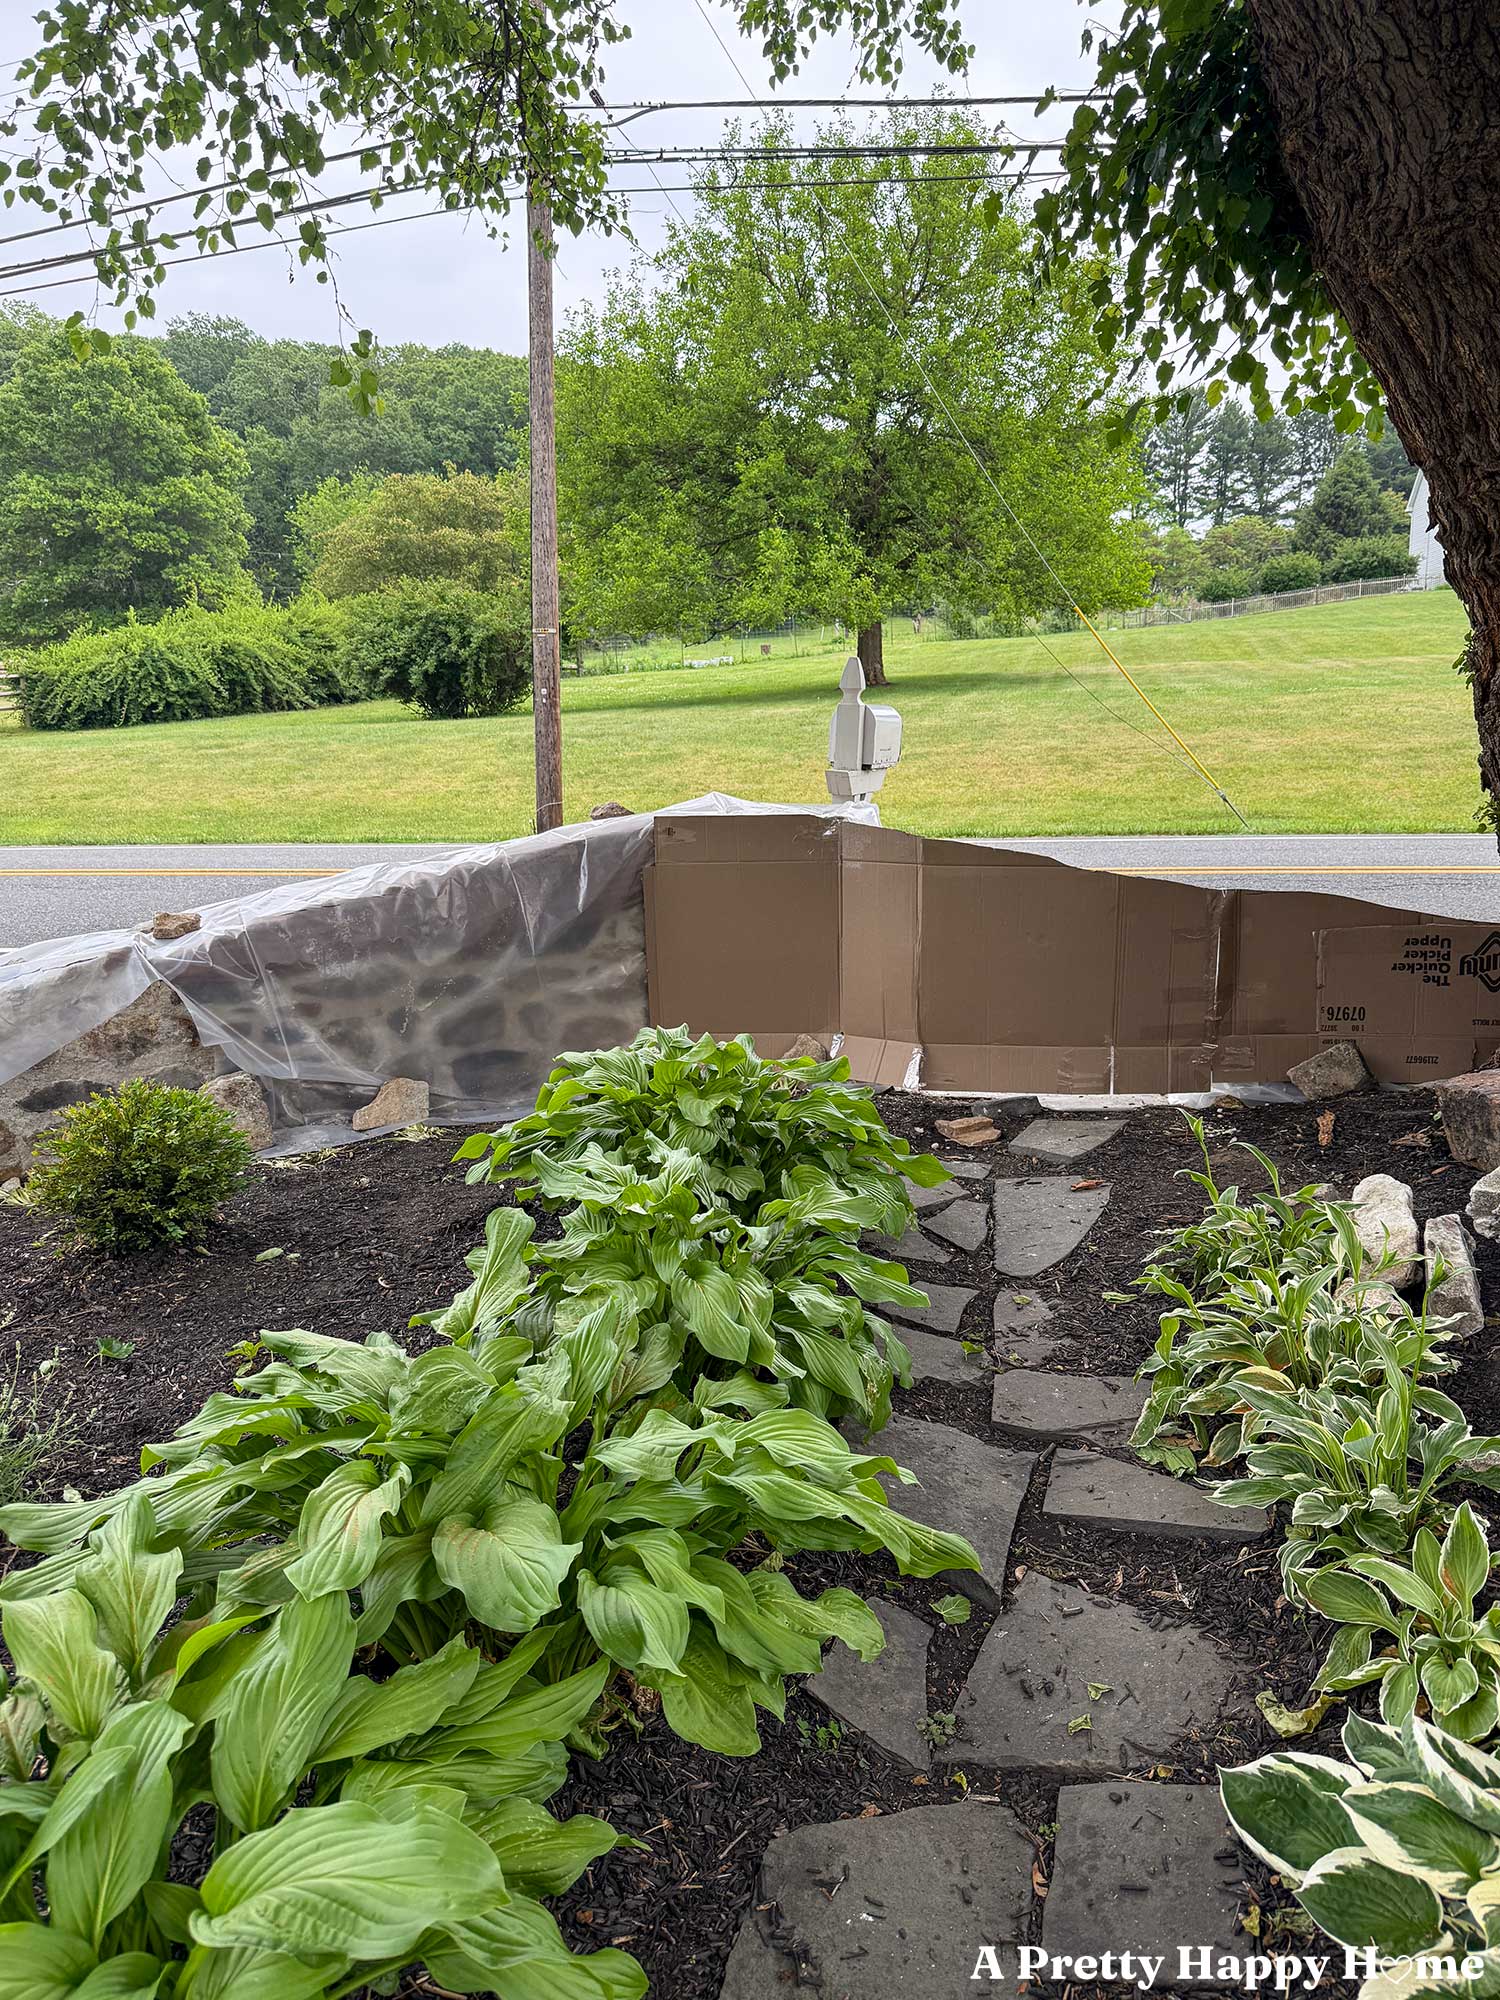
The only box we’re going to open is a gigantic paper towel box because I used it to make a building guide by tracing the slope or shape of the existing wall onto the cardboard.
Then all I had to do was flip the cardboard around to use as my guide and build the wall to match the slope of my cardboard form. Nothing to it. Hahahahaha, says the lady with a proverbial pebble in her shoe.
How to build or reconstruct a sloped fieldstone wall:
If you attempt this project, I’m assuming it’s because your fieldstone wall looks as ours did – like Mario from Super Mario Bros. came along and smashed it to pieces. If only actual coins spit out when this happened so that you could pay to have it fixed.
But, alas, this is not a video game, and your fieldstone wall, sloped or not, is going to need footings that go below the frost line.
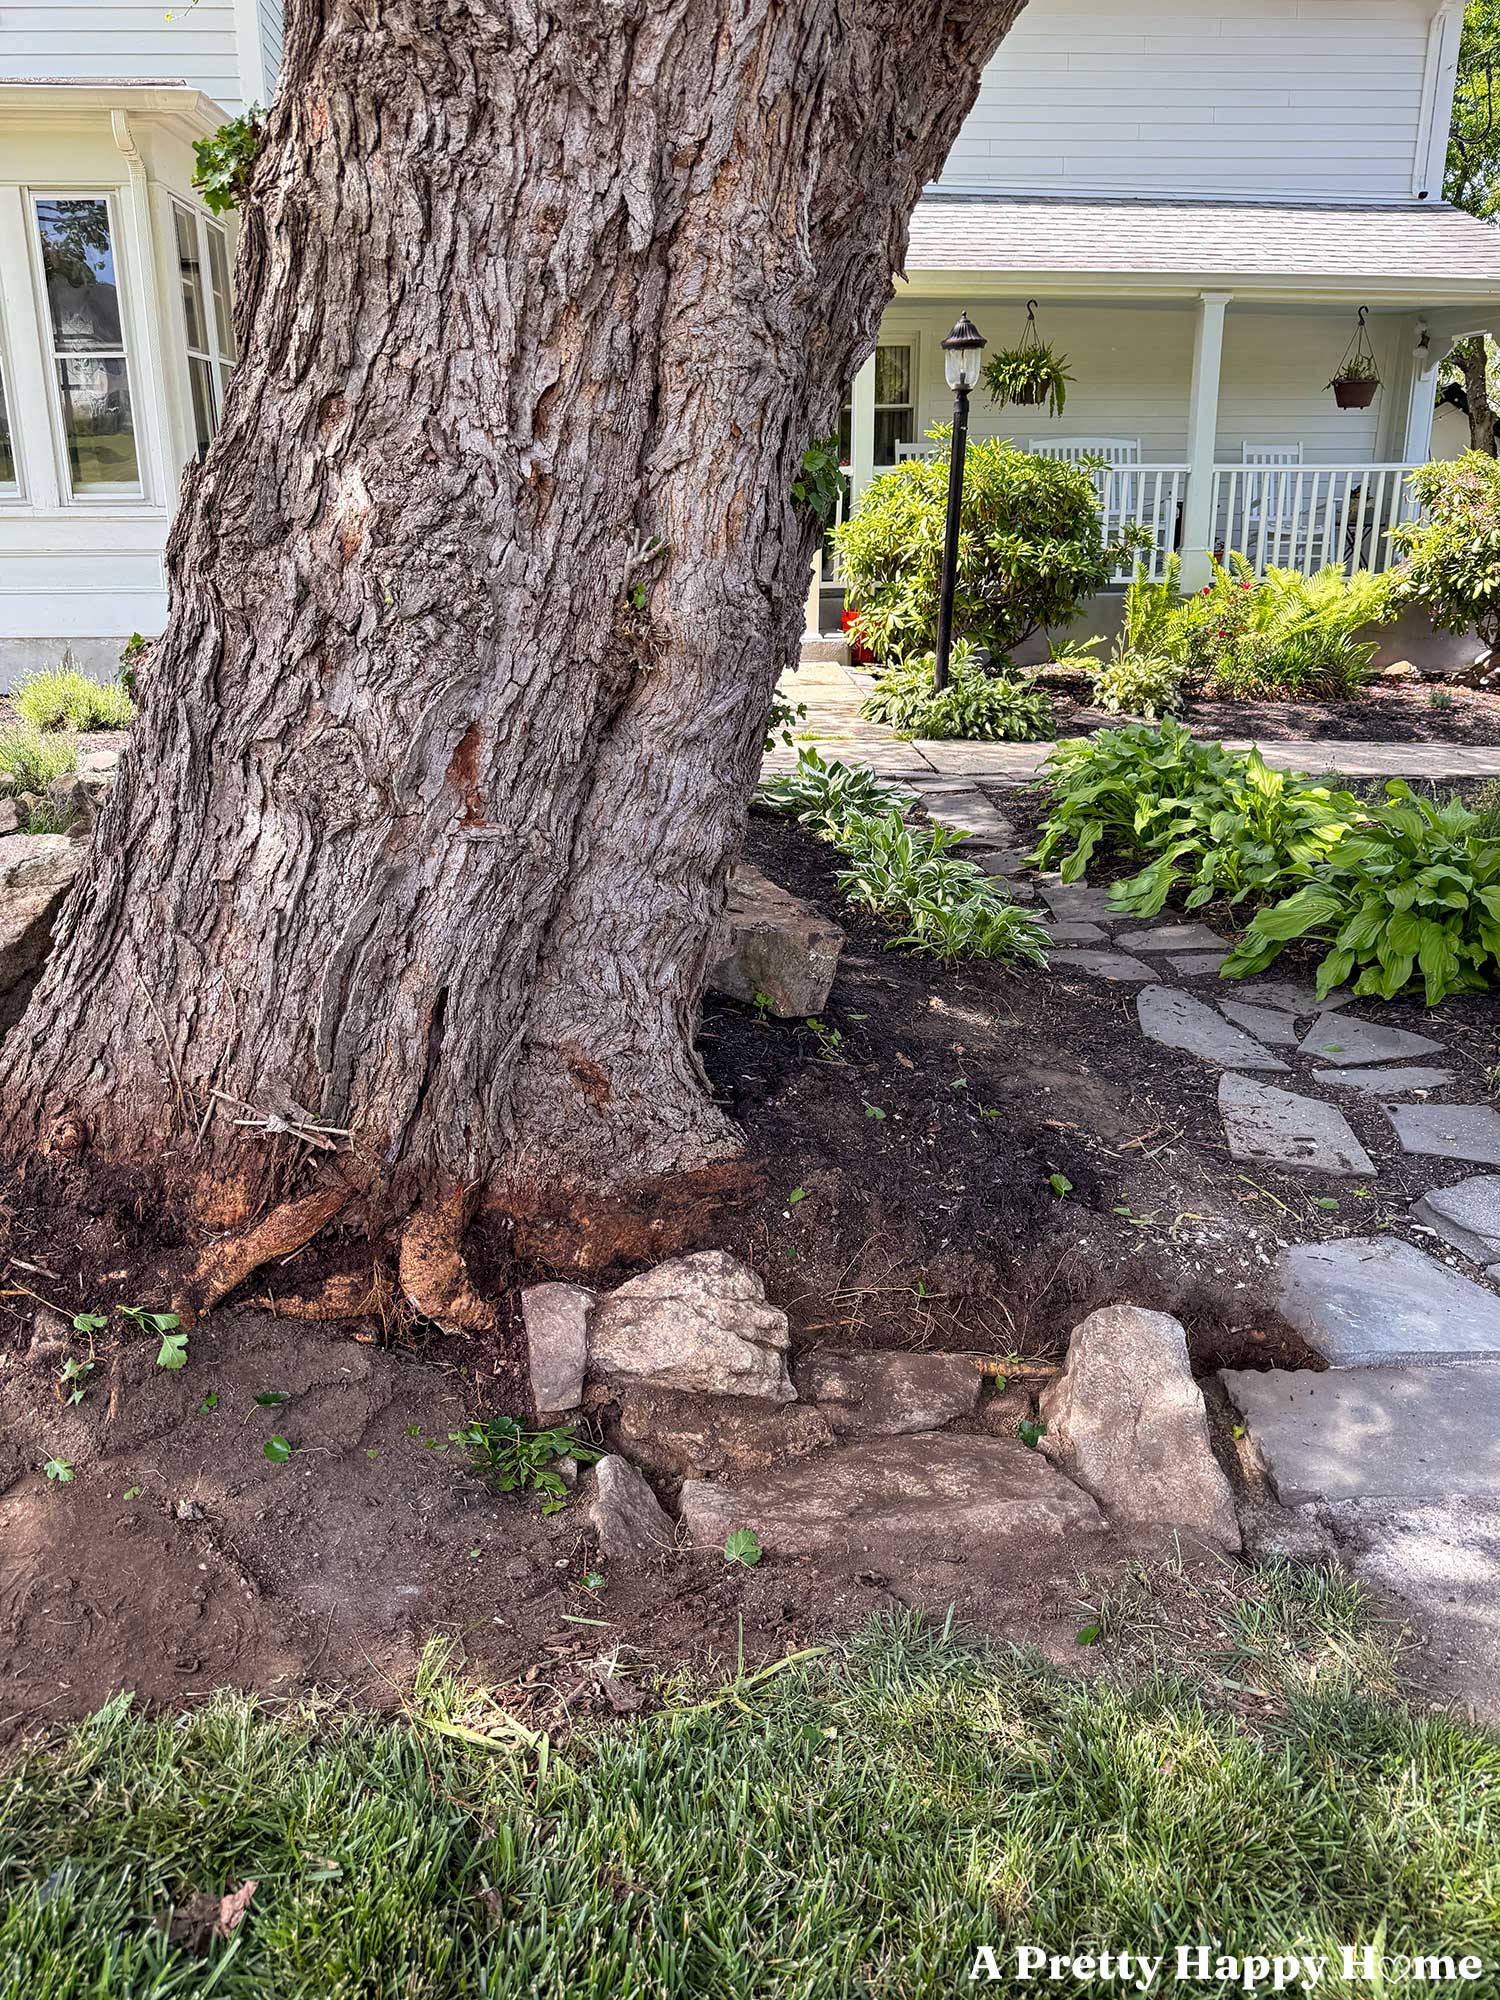
As luck would have it, we found our wall footings after channeling our inner archaeologist and painstakingly removing the top layers of stones and dirt from the wall until we reached ground level. I’m not joking about the painstaking part. Handy Husband was out there vacuuming up the dirt! I’m sure that didn’t look weird or anything.
Not only did we find the footings, but we were pleasantly surprised to see that they were still securely held together with lime mortar.
This is important because it confirms this wall was originally mortared together, not dry-stacked, and it means we can build off of those old footings. No digging for us!
It may not look like it, but this is the footing:
Comparable to the original, I’m using lime mortar made with natural hydraulic lime (NHL 3.5), sharp sand, and water to reconstruct this fieldstone wall using the same rocks that were originally laid here 200 years ago.
Pretty cool, right?
If you want to be technical about things, I don’t know for sure if it was 200 years ago.
No one kept a blog. What a shame. So, the best I can do is narrow it down to sometime between 1780 and 1900. My money is on the mid-1800s, though.
If you’re looking at the house, the right side of the soon-to-be sloped fieldstone wall has 90-degree angles as it will eventually connect to a gate.
However, I decided to round the edges of the left side of the wall where it air hugs the tree. This seemed like a gently intentional way to stop the sloped wall before it will be restarted on the other side of the tree.
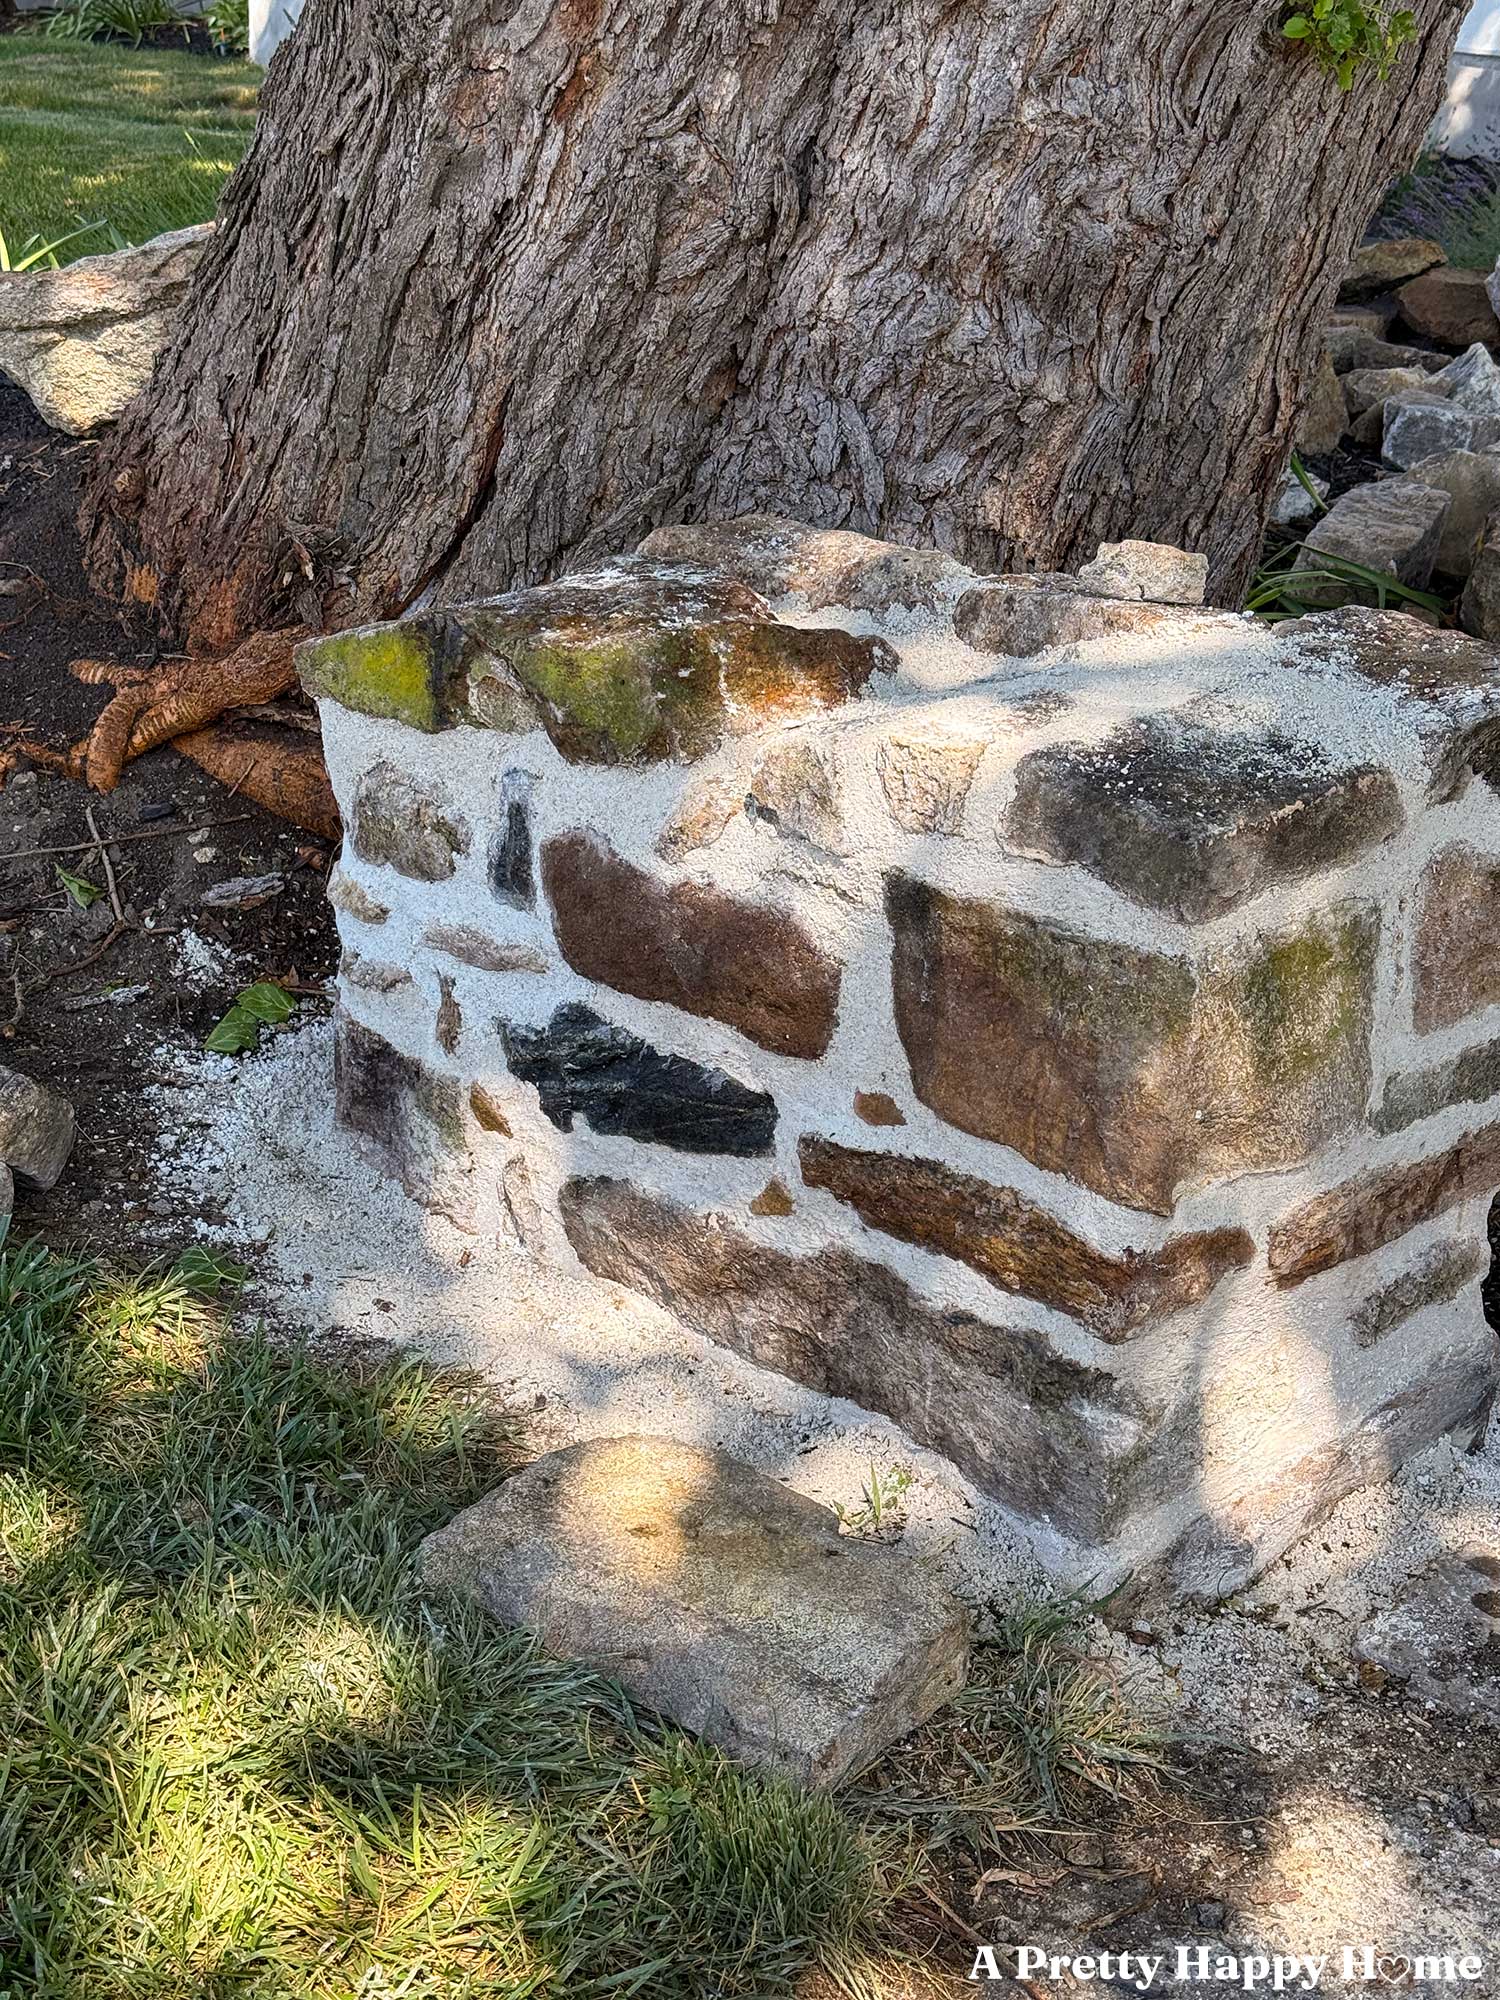
Based on our cardboard form, I built the wall up to 30 inches on the left side, and it slopes down to 24 inches on the right side, stopping just before the tree. When the wall continues on the other side of the tree, it will 24 inches tall when you look at it from the road.
The wall is 18 inches wide because that’s how it was originally built.
I’m actually keeping it between 17 and 18 inches wide. I’m a DIYer working with irregularly sized rocks. I need a little wiggle room, so I’ve given myself an inch. Ha!
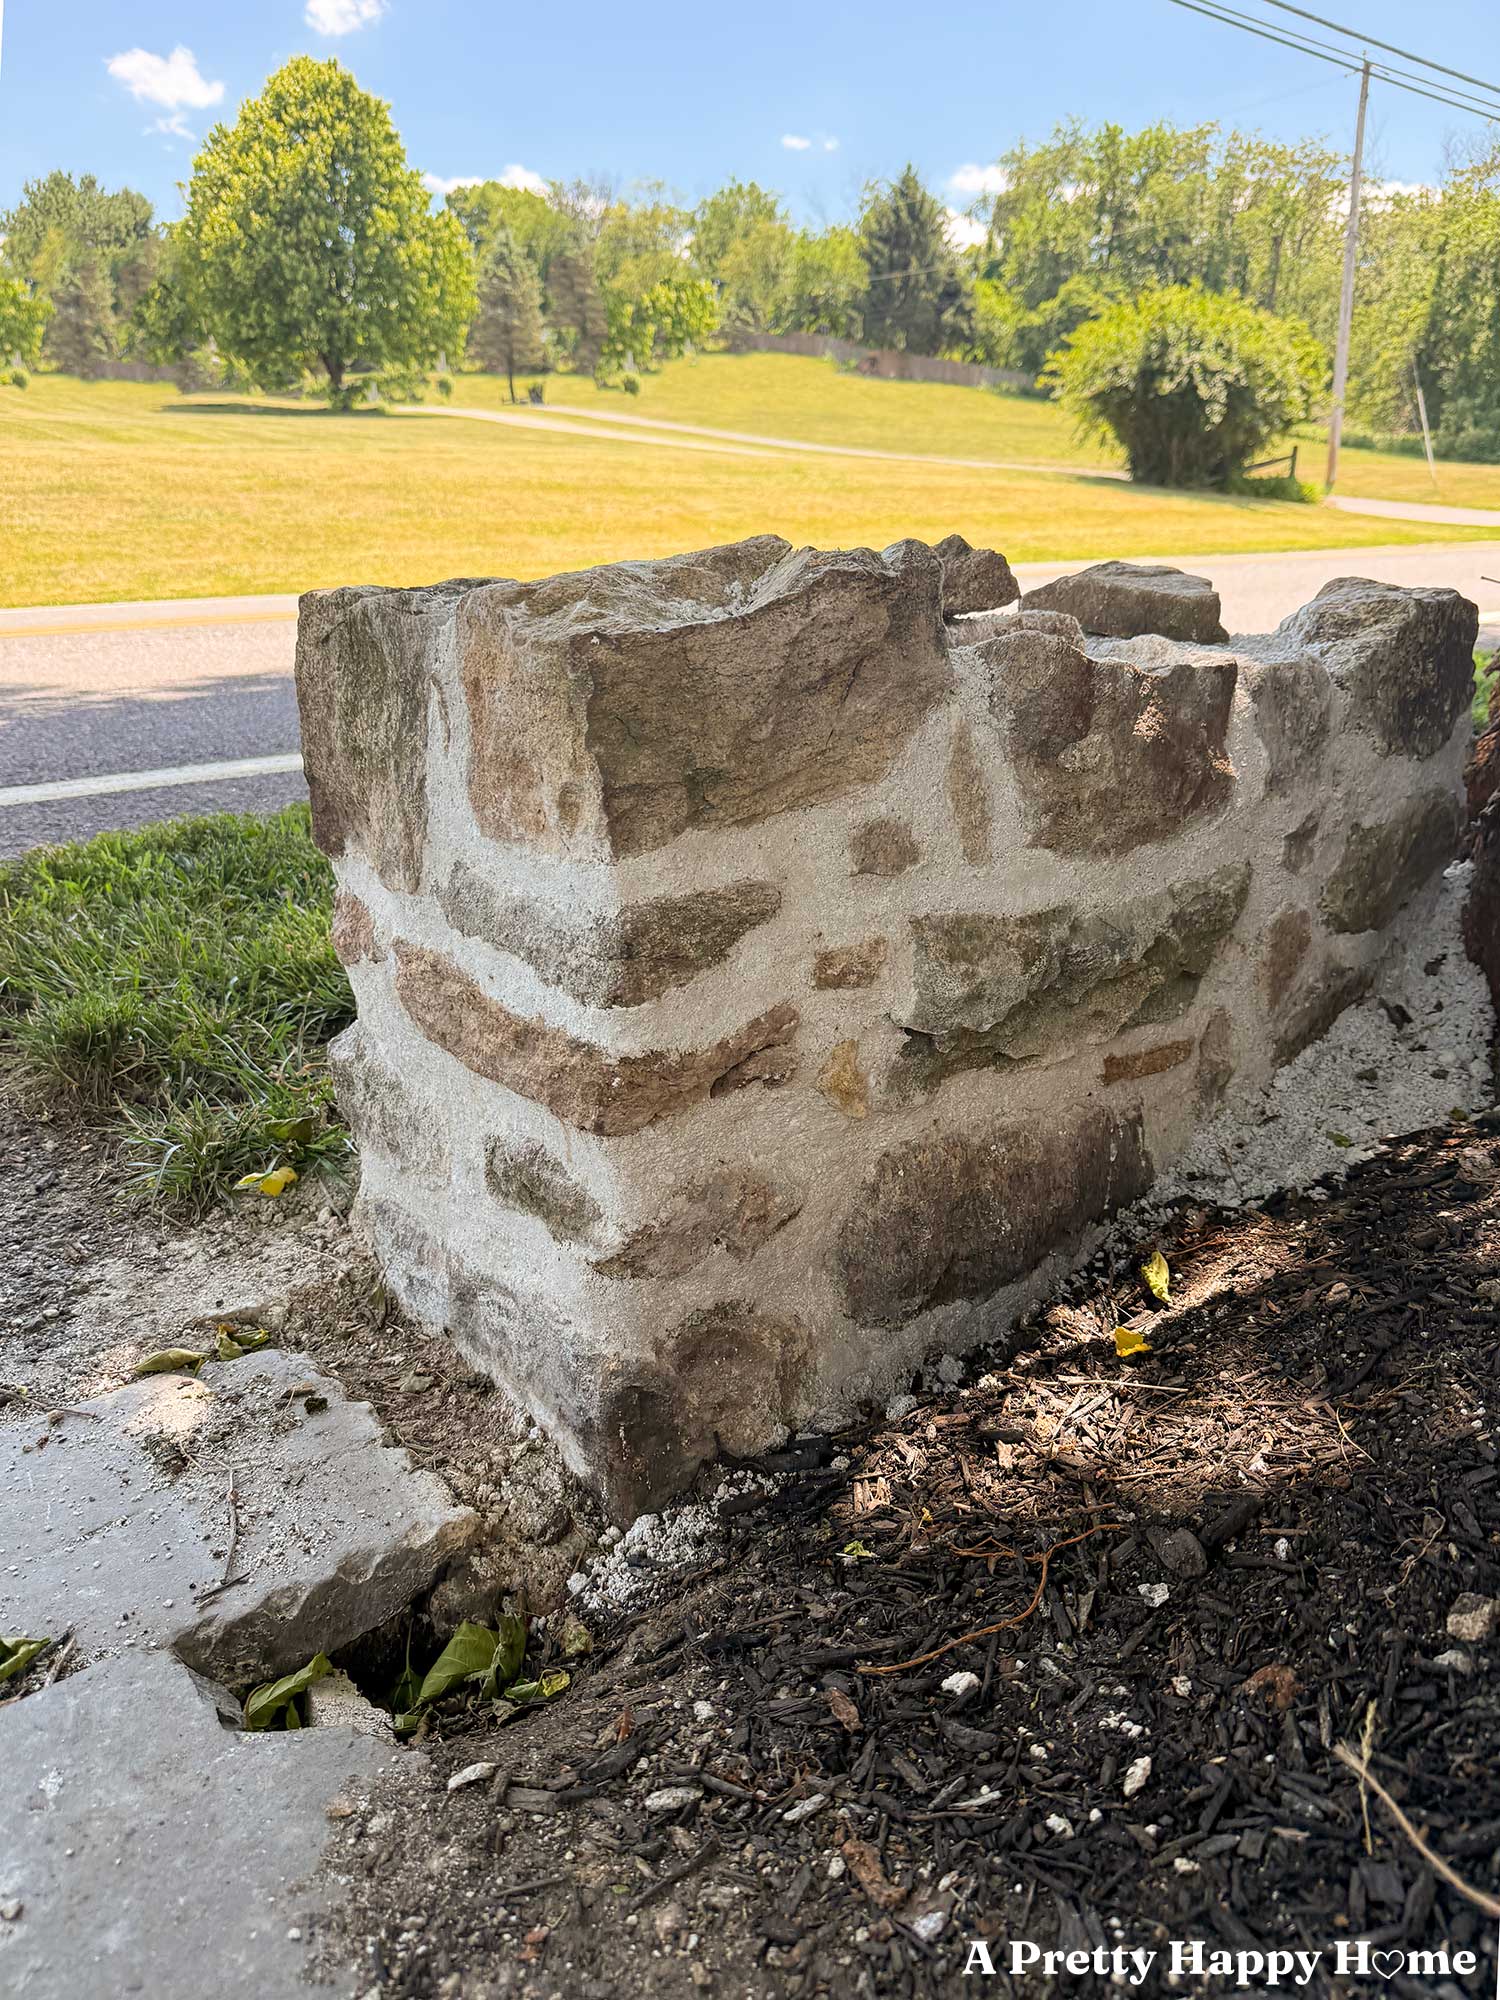
Drum roll, please.
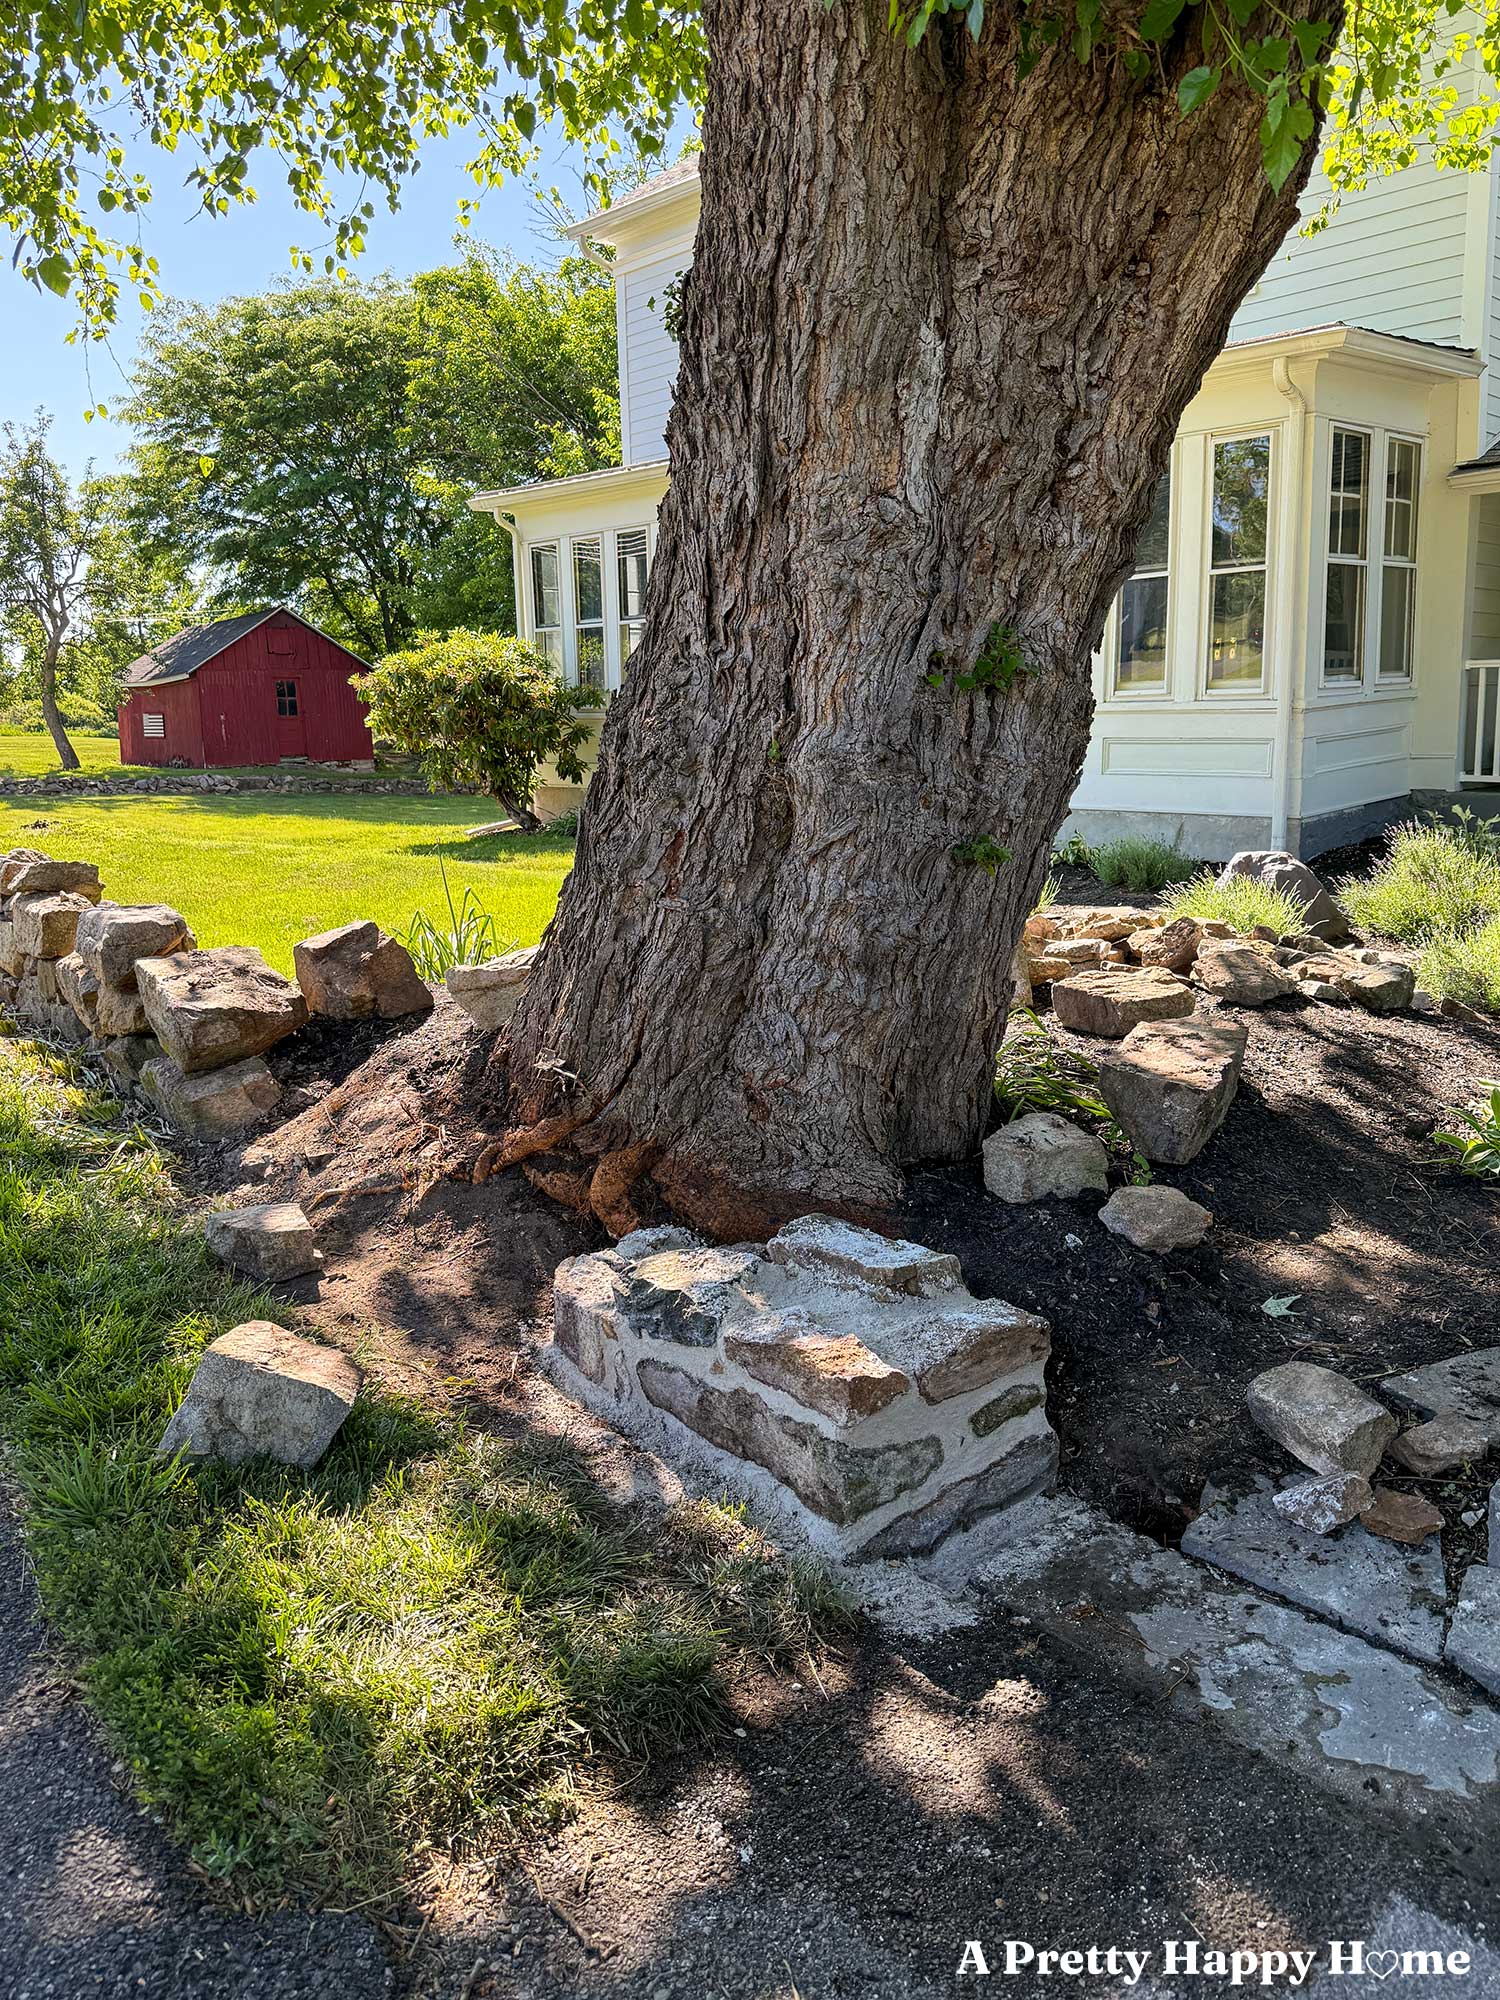
Here is how the sloped section of fieldstone wall turned out!
Not too shabby! You’d never know how much trouble it gave us.
Between you and me, I actually wanted to tweak the angle on the rocks on the end a little, but Handy Husband said some super sensitive words like “you’re obsessing” and “it’s fine.” When I responded that I just wanted to make it easier for him to build the gate so that it completed our vision of how this wall should look, he said, “That will be easy.”
Dear reader, I cannot believe he said the E-word out loud. The fastest way to jinx a project is to say it will be easy before you’ve even started!
While I’m not so sure about the easy part, I do have full confidence that Handy Husband will build an amazing gate. I can picture exactly how it will look in my head. He cannot read my mind yet, so you can bet I will over explain my vision to him and hope he understands what I’m trying to convey from my hand gestures and the rudimentary drawing I’ll definitely be sketching on the back of a paper receipt.
Like he said, easy. So, stay tuned for that!
Did you like my method for figuring out the slope of the new wall? Or would you have used actual math. I’d love to know. You can comment here on this blog post, email me here, or reach out via direct message on Instagram or Facebook.
Happy DIYing.
P.S. If you’d like more information about historic stone masonry, please check out our Lime Mortar FAQs or our Where To Buy Natural Hydraulic Lime Directory.
Thank you for following along with our DIY adventures. I appreciate you! If you missed any of the posts in our fieldstone wall series, you can catch up here, and I have saved our work to story highlights on Instagram.
Reconstructing a Fieldstone Wall: Part 2, Demo
Reconstructing a Fieldstone Wall: Part 1, The Plan
Curved Fieldstone Wall: Part 1, The Plan
Curved Fieldstone Wall: Part 2, Demo Section 1
Curved Fieldstone Wall: Part 3: Progress Section 1
Curved Fieldstone Wall: Part 4: Reveal Section 1
Curved Fieldstone Wall: Part 5: Porch Wall
Curved Fieldstone Wall: Part 6, Demo Section 2
Curved Fieldstone Wall: Part 7, The Stairs
Curved Fieldstone Wall: Part 8, Progress Section 2
Curved Fieldstone Wall: Part 9, The Salt Problem
Curved Fieldstone Wall: Part 10, Mailbox and Gate Plan