Curved Fieldstone Wall: Part 4, REVEAL Section 1
It’s reveal day for section 1 of our curved fieldstone wall!
Can I get a WOO to the HOO?
I know some of you made a woohoo sound in your head, so thank you for that!
We are fortunate to live on a property that is framed by low fieldstone walls. 250 years ago, our property was much larger than it is now and would have been farmed. We assume the stone walls or fences were built as a practical way of dealing with all of the stones that were pulled out of the soil to make it arable.
Fast forward to the present, and there are multiple sections of our fieldstone walls that need to be rebuilt because they are in a sorry shape.
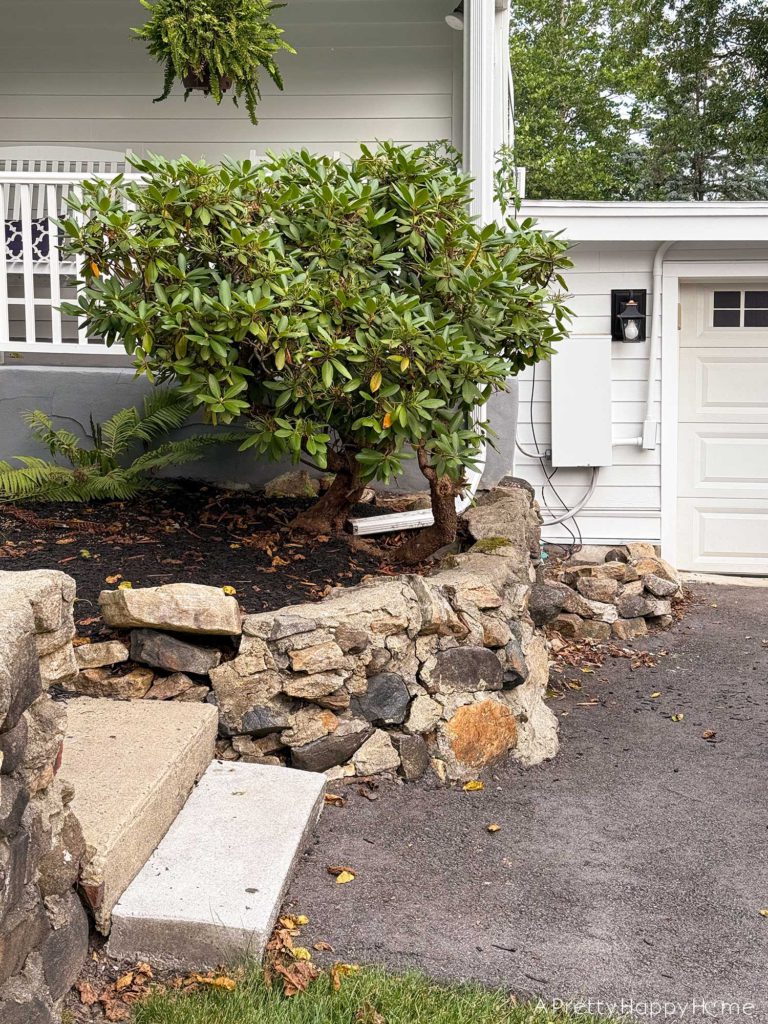
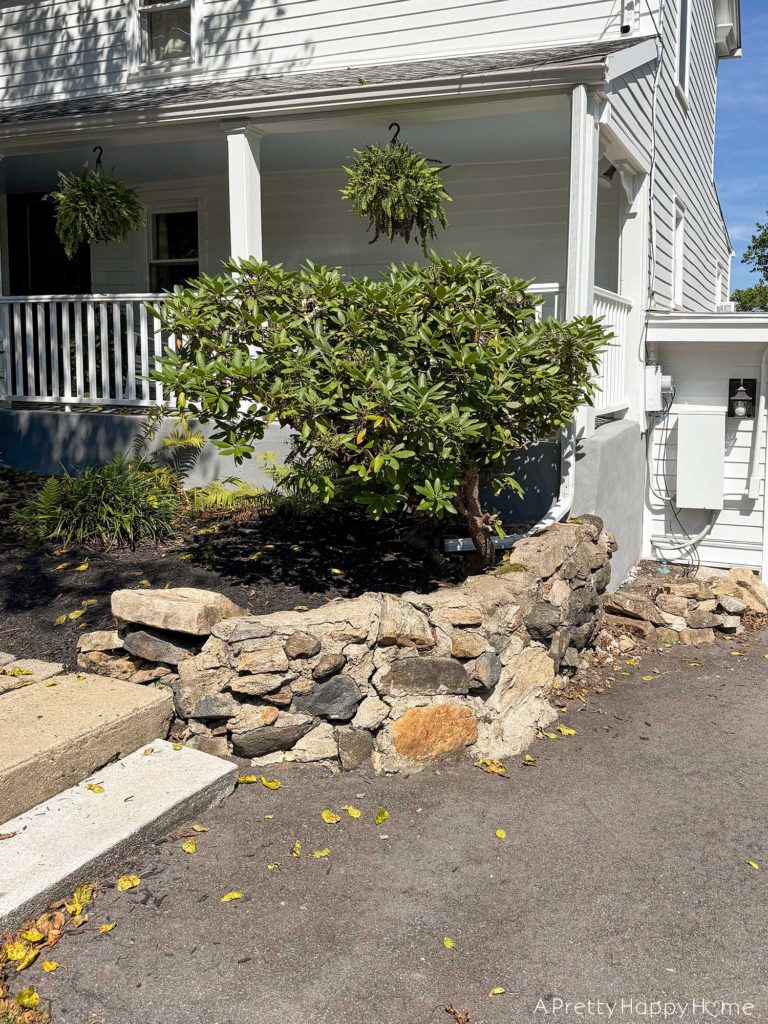
Section 1 looked like this. The only thing that was more cracked than this wall was the pepper on my salad.
It took 3 hours to take down the cracked fieldstone wall using the chisel attachment on our hammer drill and a shovel to dig everything out.
Glamorous work it was not.
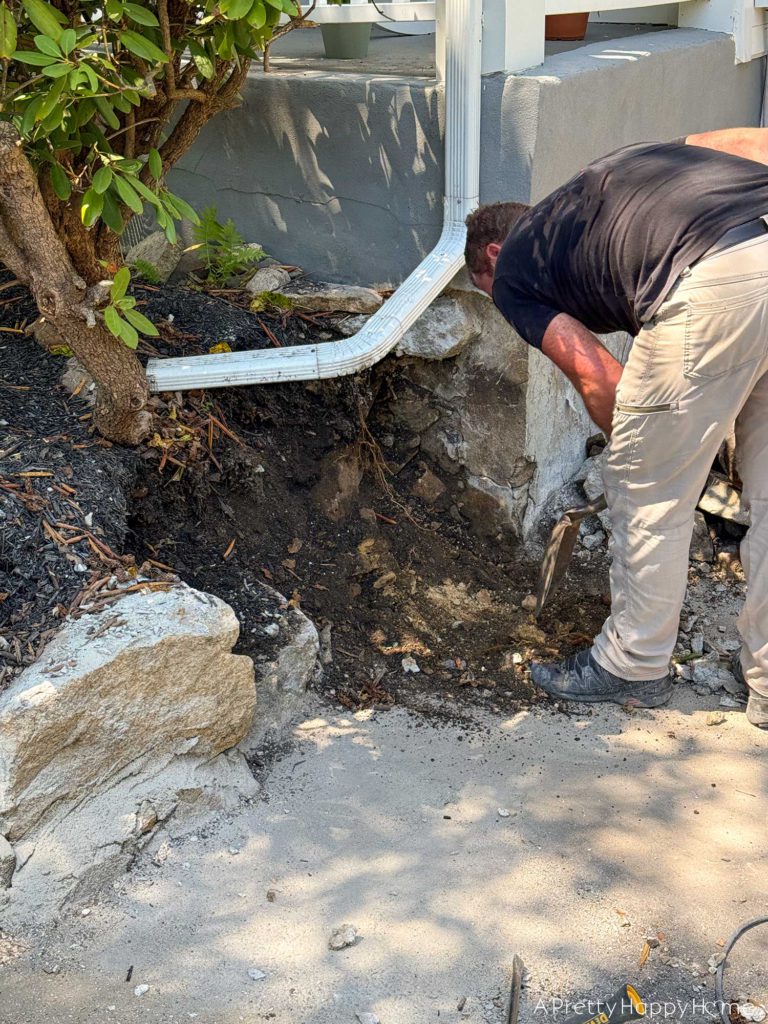
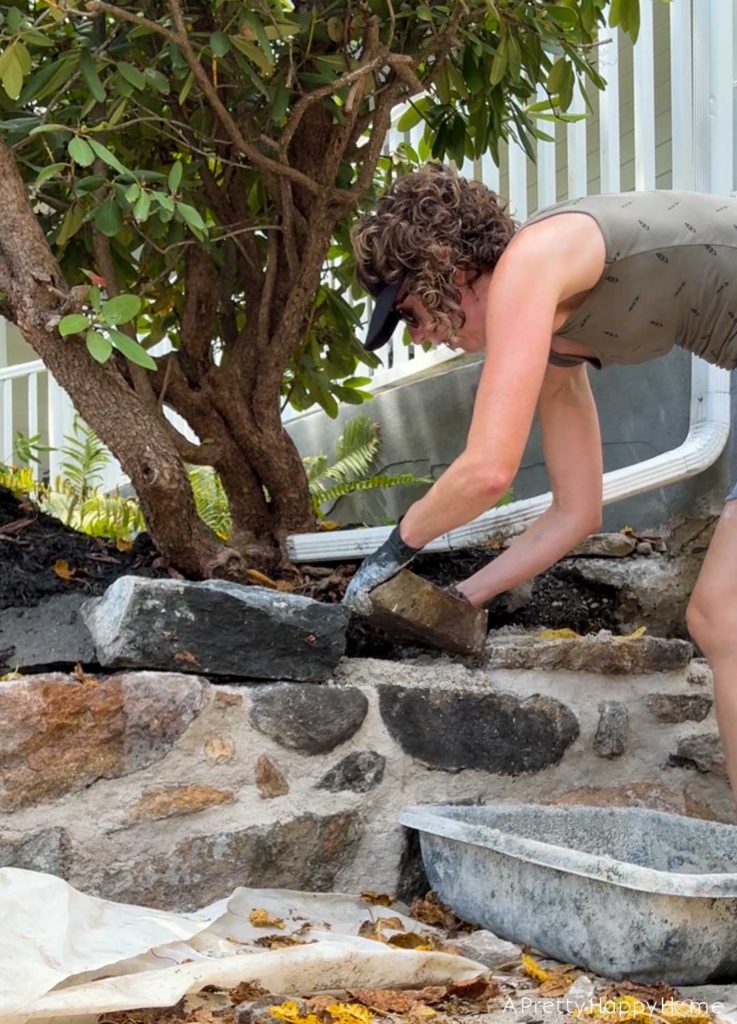
Speaking of not glamorous, it took 20 hours (at least) to rebuild the wall using the same rocks to 16 inches deep x 24 inches tall x 10 feet long.
But that effort was worth it!
I hope you’re sitting down for this.
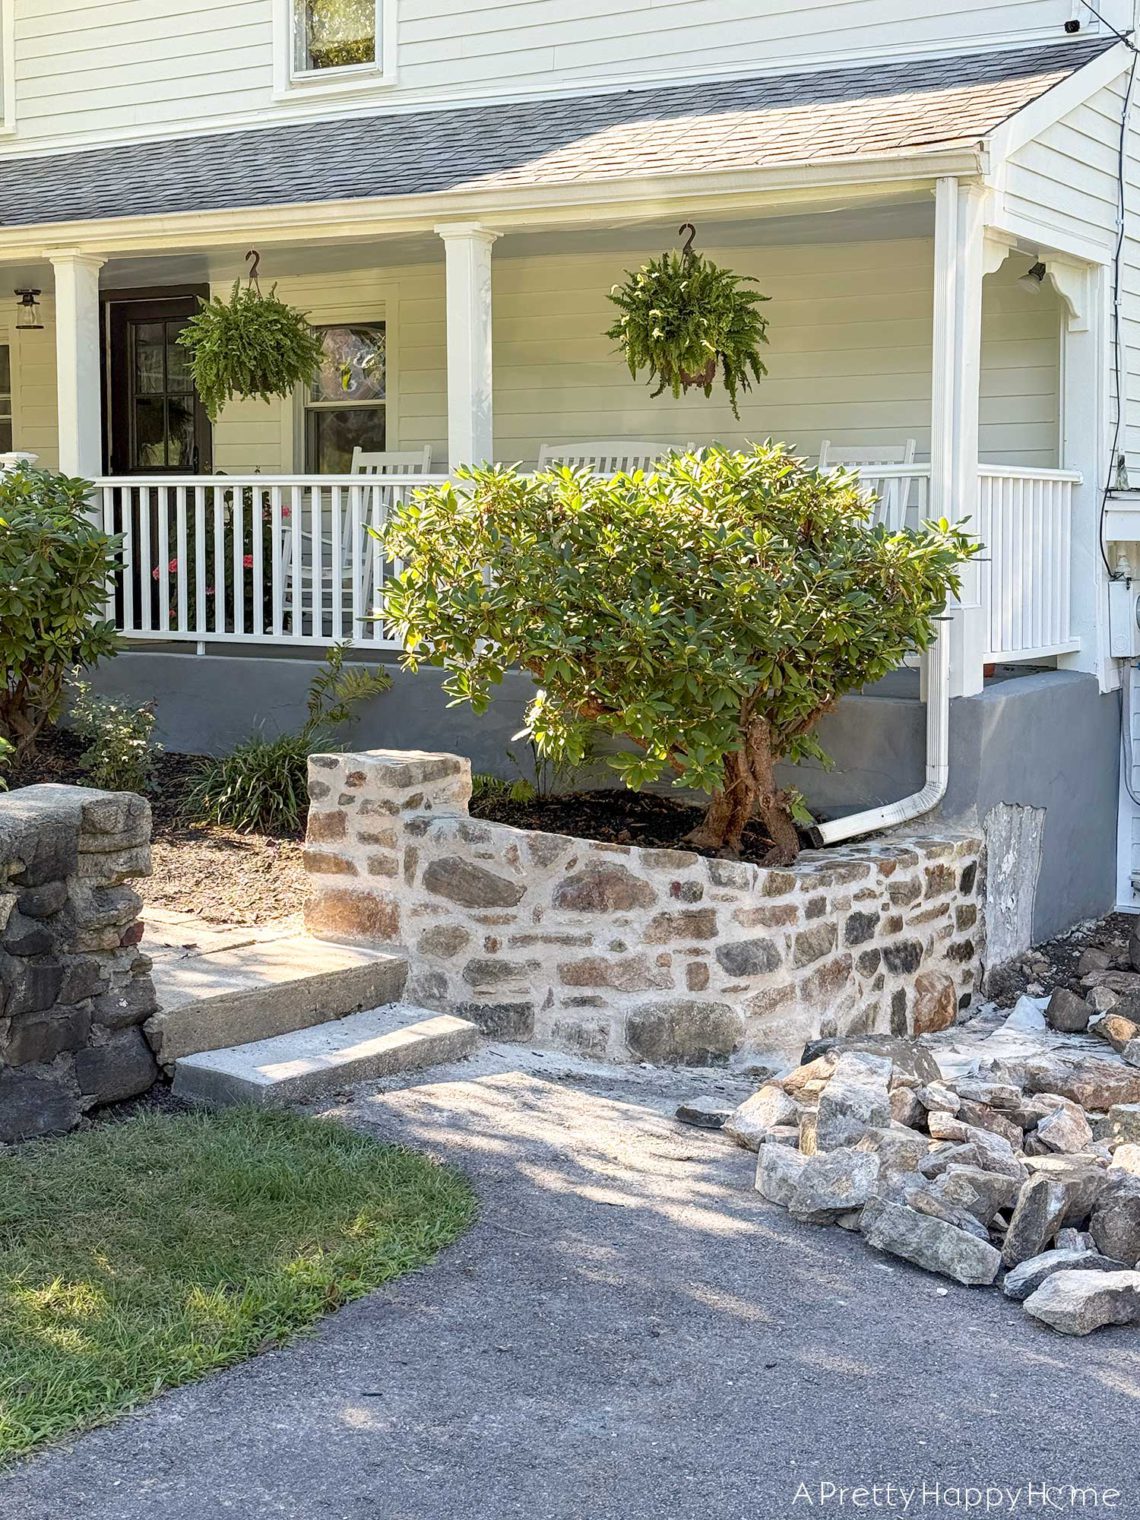
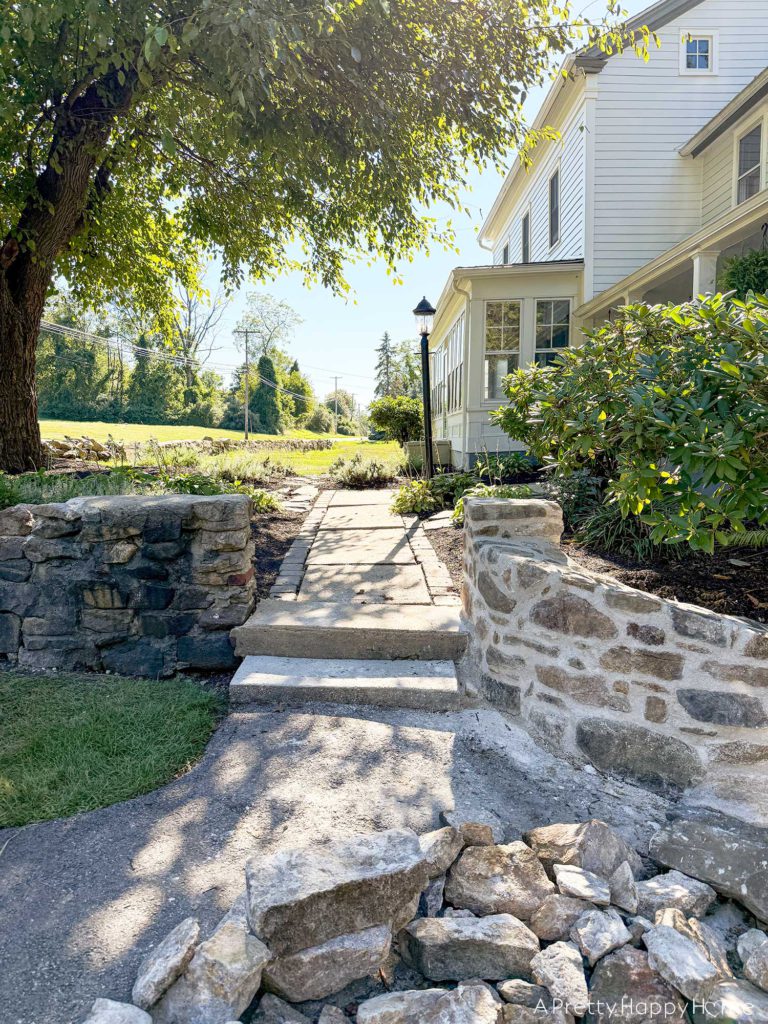
Here it is now!
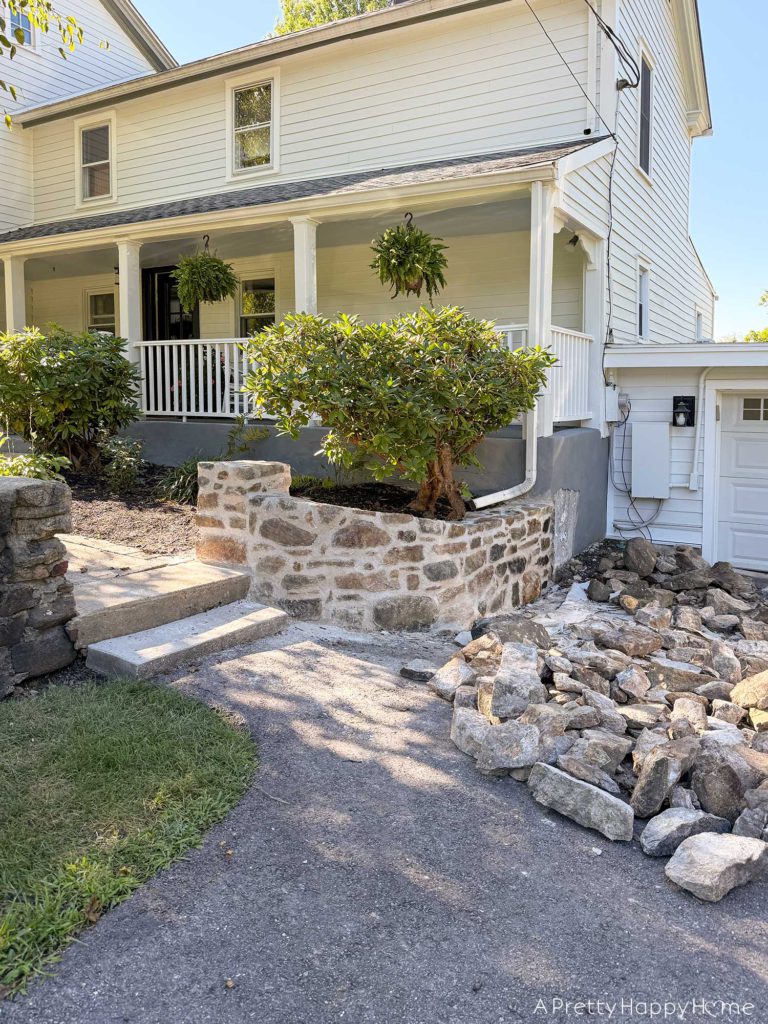
Please excuse the rocks piled on the driveway in front of the wall. I will do a lot of things for this blog.
Some of you even think I’m a glutton for punishment, but I will not move 200 rocks for the sake of a few photos.
The rocks are there because work is about to commence on the second section of wall.
Handy Husband lays the rocks out flat like that when he demos a wall so I can better see what I have to work with when I rebuild the wall. It’s kind of sweet when you think about it.
I took these photos in the early evening when the August sun shines straight down the sidewalk and illuminates part of the wall.
It’s as if the sun is also approving the change.
The difference between the new wall and the old wall is SO STARK in this photo. I can scarcely believe the change, and I was the one who built the darn thing.
I aim to be respectful of the historical nature of this property when we make improvements. However, that doesn’t mean we keep every detail exactly the same. This house is not historically protected by the government. It is okay to put our stamp on things as has every homeowner before us.
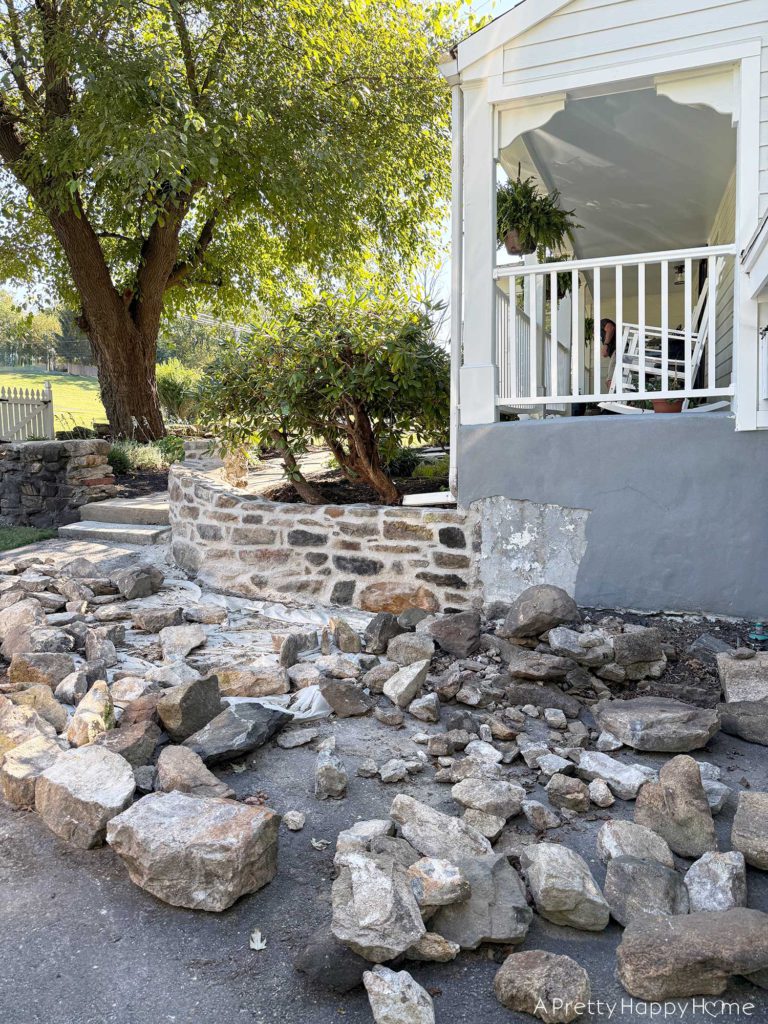
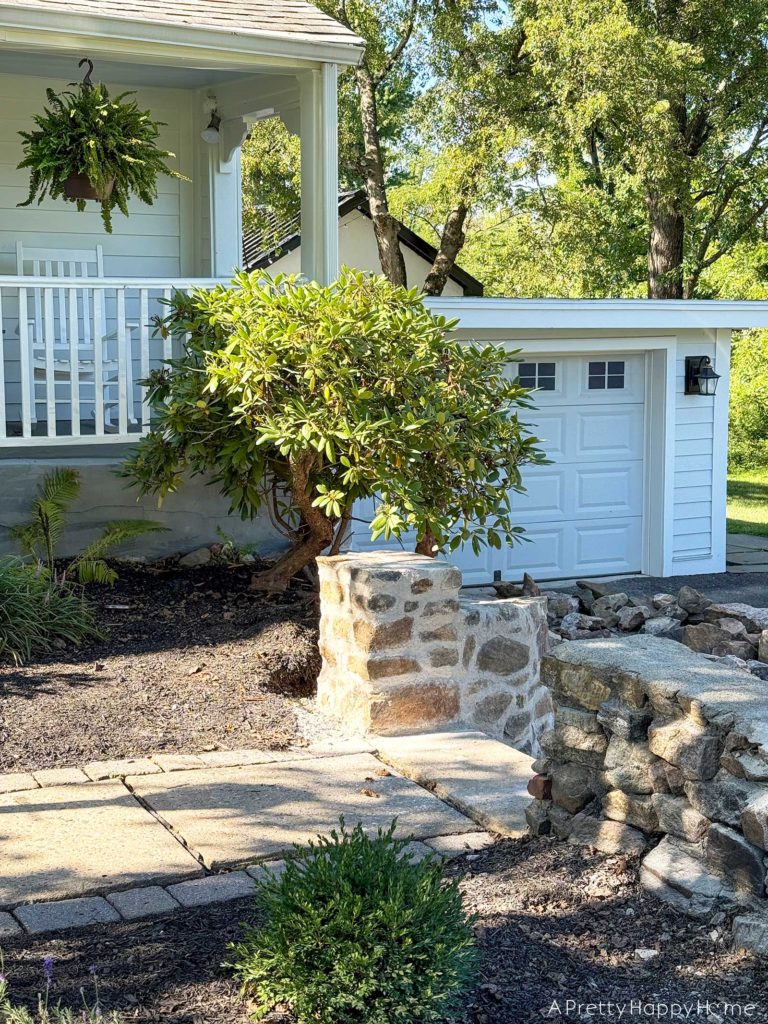
One change I did take the liberty of making while rebuilding section 1 was to build a column at the top of the steps.
That didn’t exist before.
It’s a little hard to tell from the angle of the below “before” photo, but the wall was basically flat on top, and barely above ground level on the flowerbed side.
We had always thought that the walls should be the same height on either side of the sidewalk, which is 24 inches above the top step.
We took this opportunity to make that change happen, and I think it was the right call. It feels better in person.
When I rebuild the section to the left of the steps, the plan is for it to look the same as it does now. However, we’ll replicate the ‘column and swoop’ feature next to the gate, which is out-of-frame in the below photo.
Speaking of Section 2, at the time I’m writing this, I have not started to rebuild it. To put it vaguely, that’s because we underestimated a certain aspect of this process, and I’ll tell you more about that later.
In the meantime, we are enjoying seeing our vision slowly come to life one stone at a time.
The creative vision is the easy part. Executing on that vision is the challenge because this entire wall building process is one continuous hands-on learning experience. We’ve done similar things in the past year, but nothing like this.
This is the first wall I’ve ever built, so of course, there are things I’d like to improve. However, I’m not about to diminish the accomplishment either. I’m proud of myself for learning, trying, and seeing it through.
Now, I’ve just got to do the same thing for a bigger, longer section of wall. No pressure.
Let me know what you think about this first section of our curved fieldstone wall! You can comment on this blog post, email me here, or reach out via direct message on Instagram or Facebook.
Happy DIYing.
P.S We are using NHL5 lime for this project in a 1:3 ratio with all purpose sand. We buy our lime from Limeworks.us in Pennsylvania. That’s not an affiliated link. They don’t know anything about our projects or that I’m mentioning them here.
If you missed anything, you can catch up on past blog post in this series.
Curved Fieldstone Wall: Part 1, The Plan


6 Comments
Laura L
OMG! I cannot believe how good that turned out. I do not know why I am surprised however – you are so good at this! Congratulations!
annisa
Thank you, Laura! I was kind of nervous to share it because…I don’t know why. Maybe because there are actual professionals out there. So, thanks for the confidence boost!
Nancy B
I am seriously impressed! That is a fantastic looking wall, never mind it being your first. Woohoo is the least I can offer you!
I also really enjoyed the wittiness of this post…is that a word? Pepper on my salad…haha!
annisa
I do LOVE my pepper. Black pepper. Cayenne pepper. I’m not picky. There just needs to be a lot of it. Thank you for the love of the wall. That boosts my confidence.
Pamela
It looks FABULOUS…woohoo!!!! Great job. Makes me tired thinking about it 😉
annisa
Thank you for the woohoo!! Now I have to gear up the energy to keep going.