

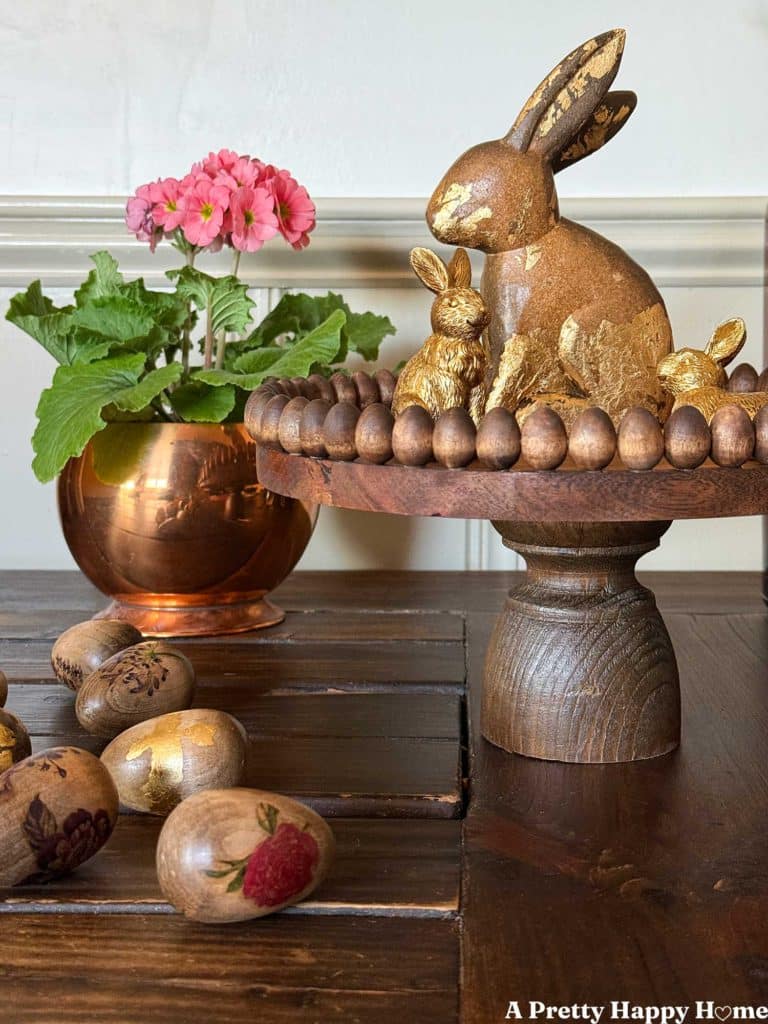
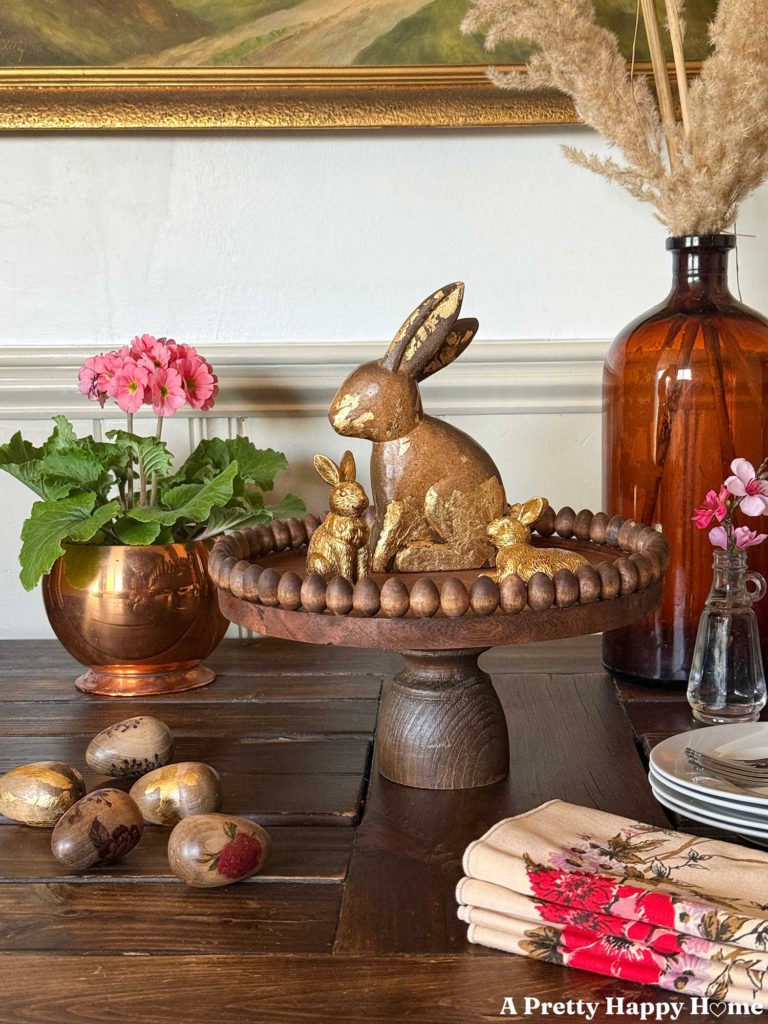
Did you know mini wood eggs for Easter are a thing? Dare I say, the greatest thing? Well, you do now! Today’s project, a DIY Wood Pedestal With Mini Egg Trim, was a thrifted find that I made over for Easter, using mini wood eggs for a festive trim detail.
Click here to jump to the supply list.
Click here to jump to the project directions.
There was nothing wrong with the wood pedestal when I spotted it on the ubiquitous dusty thrift store shelf, especially not for the price. It was $6.
But I had a makeover idea hatching in my brain, and I couldn’t rest until I knew if it would work or not. You’d be surprised by how many of my ideas are a bust. Ha!
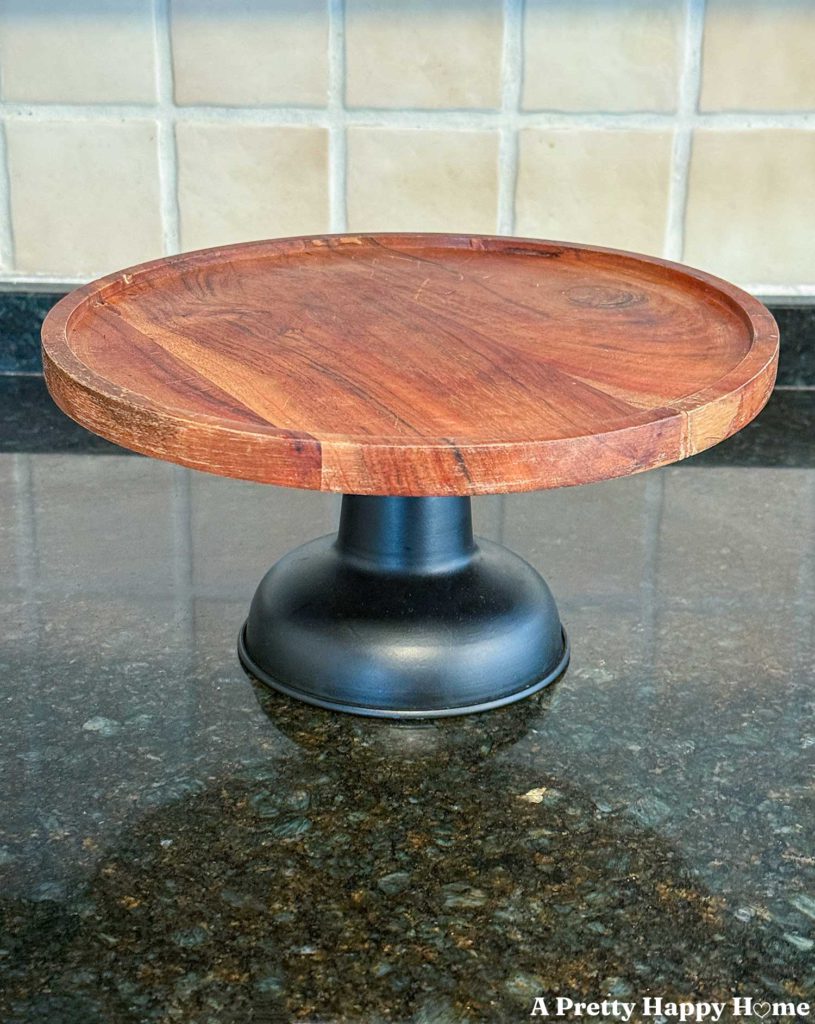

For the record, I did try to keep the metal base on this pedestal. I even mixed a custom paint color (mint green) and gave it a couple of coats because it’s spring, and spring means color!
In my zeal to bring spring color to the dreary backdrop of a deep, cold winter in the northeastern USA, I did forget one important detail. Anything made of smooth metal looks way better if you spray paint it. A paintbrush leaves brush strokes, and the paint job, at least mine, never looks polished.
Color aside, the paint snafu was probably for the best because I came up with an inspired and classy plan for the pedestal base.
I had been saving a wood finial or newel post cap (not exactly sure what it was) that I thrifted a few years ago for $1. I knew I could do something amazing with it, but it might take a while for the idea to incubate. Fast forward a few years (I have a loose definition of a while), and I realized that finial would be perfect as a base for my Easter-themed wood pedestal.
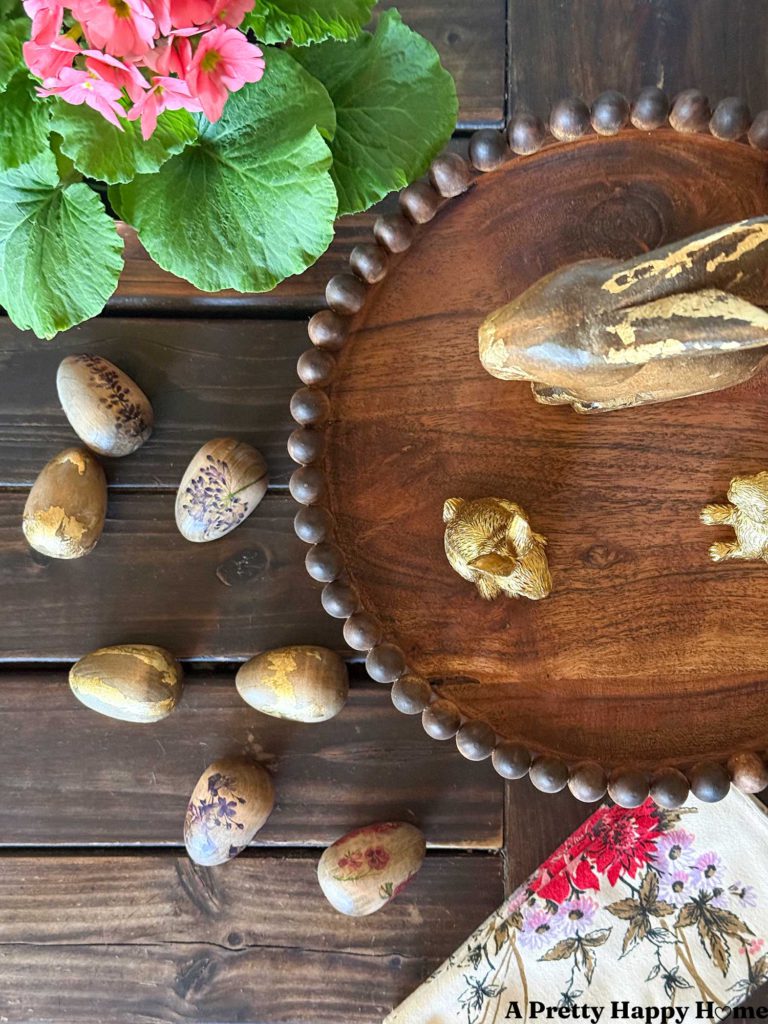
After I stained and attached the new base, it was time to add the mini wood eggs to the edge of the wood pedestal. I was pretty sure my idea to glue the eggs to the wooden top with wood glue would work. I just didn’t know how well it would work. I would be happy with anything above a “look, but don’t touch” level of fragility.
Now that the glue has had time to cure, I’m sure I could pry one of the mini wood eggs off if I were trying, but I’m not going to do that. The eggs survived attaching the new base to the pedestal, and it seems sturdy enough for how I want to use it as a display stand. Plus, it looks egg-ceptionally pretty.
If you want to make something similar, you don’t need to take my circuitous route to get there.
Grab yourself a wooden bowl, stand, or tray. Then glue these mini wood eggs around the edge, and voila! You’ve got yourself an Easter stand or other such festive item.
My goal is to create something where a friend might ask, “That’s so pretty. Where did you get that?” Then I, because I have zero chill, can say, “I didn’t buy it, I made it!”
I think this Wood Pedestal With Mini Egg Trim passes that test, but you can tell me what you think! Comments are like Easter candy. They are super sweet! You can comment on this blog post, email me here, or reach out via direct message on Instagram or Facebook.
Happy Easter!
Supplies needed to make a DIY Wood Pedestal With Mini Egg Trim:
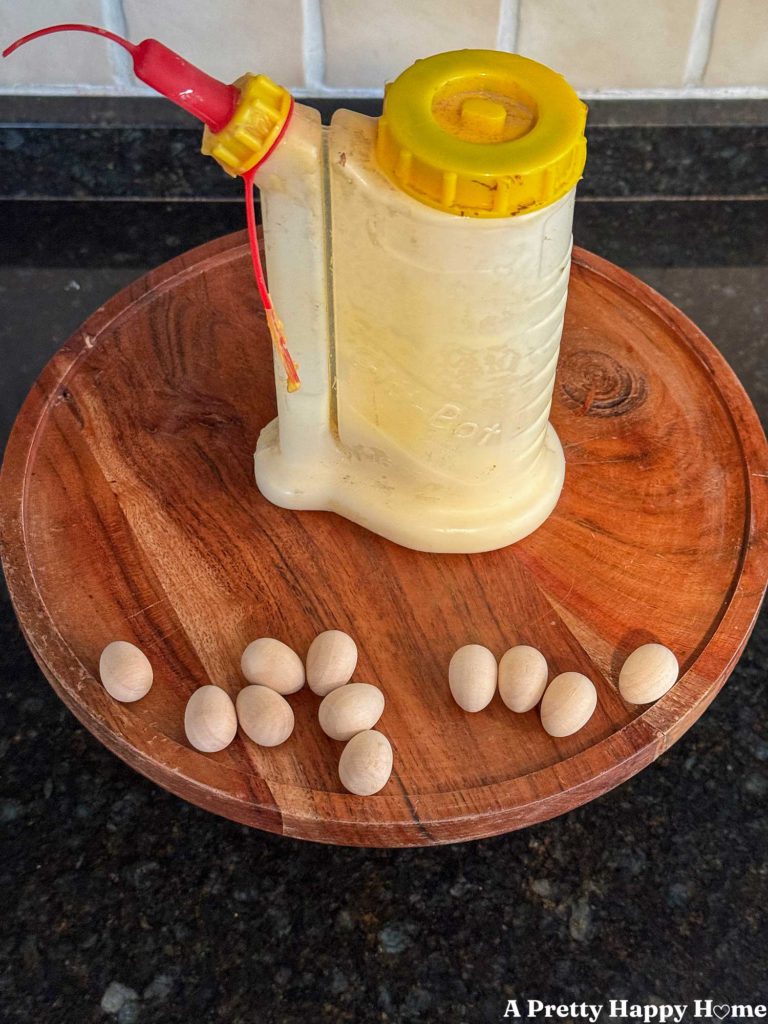
mini wood eggs
wooden stand, bowl, or tray
wood glue
stain or paint (optional, but affects food safety)
clear sealant (optional, but affects food safety)
a small paintbrush to help apply wood glue
Directions to make a DIY Wood Pedestal With Mini Egg Trim:
First, prep your wood pedestal, stand, bowl, or tray as needed. I sanded my pedestal stand and restained and sealed the wood part. I removed the metal base, as I would not need that for this makeover.
Make sure you are selecting a wood stand, bowl, or tray that has an edge wide enough for your mini wood eggs to sit on.
Keep in mind that stain or sealant can affect whether or not the wood is now food safe, should you want to use it for that purpose.
Second, stain or paint your mini wood eggs. I stained my wood eggs. I found it’s easiest to dunk the eggs in the can of stain and then rub the excess off with a rag. Once your rag has plenty of stain on it from rubbing the excess off the eggs, you can skip the dunking part and just roll the wood eggs around on the rag. If you choose to seal the eggs, use something that you can rub on the eggs instead of painting on, like Waterlox. Waterlox only seals stained wood, not painted wood.
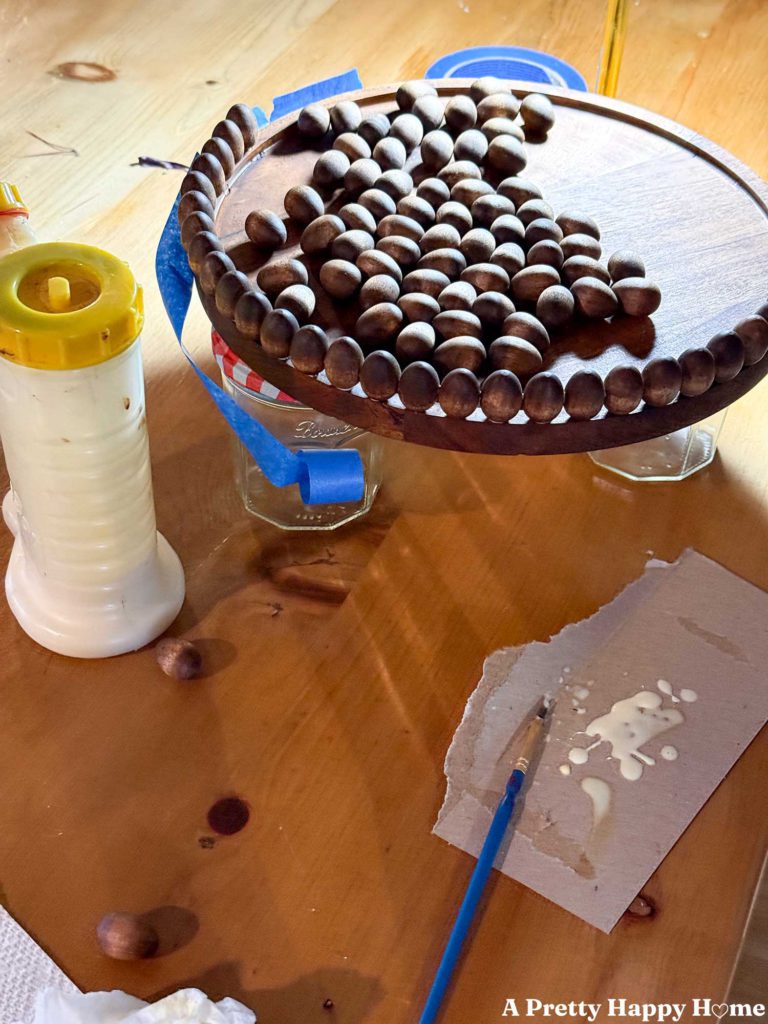
Third, use wood glue to glue your wood eggs to your wood stand, bowl, or tray. My eggs are also glued to each other for added stability. Be careful not to go overboard with the wood glue. Otherwise, you’ll see it when it dries. I used a small paintbrush to apply the glue. The wood eggs are more stable than I thought they’d be, but I’d still be careful about how you handle this pedestal.
If you choose to use hot glue, keep in mind that the hot glue might be more visible.
My photo below does show painter’s tape. I thought I’d need it to stabilize the eggs while the glue dried, but it wasn’t necessary.
That’s it! Once your wood glue is dry, your wood pedestal with mini egg trim is now ready to use!
Five other ways to use these mini wood eggs:
The eggs are almost the exact size as those delicious mini chocolate Cadbury eggs.
- Drill a hole through the center and string them on a garland.
- Paint them and put them in a bird’s nest for spring decor.
- Drill a hole through them and create a chunky Easter egg bracelet.
- Glue to a frame to create an Easter frame.
- Use as a vase filler.
Thank you for spending part of your day here! If you’d like another blog post or two to read, I’ve got you covered.
Vintage Floral Easter Eggs Using Temporary Tattoos
*affiliate links in this blog post*