Basement Workshop Repointing: Part 9, The Reveal
Today is the big TADA! This is the finale of our Basement Workshop Repointing Project series and the grand reveal of how the finished space turned out!
I’m using a lot of exclamation points because I’m very happy that we’ve checked another project off the list. Sure, I added ten more projects to the list in the time it took us to finish this one, but that’s the “perk” of homeownership!
Why We Were Repointing Our Stone Foundation
If you’re new here (welcome!), we’ve been repointing the stone foundation in our basement workshop, which is the oldest section of our house dating back to the 1780s. If you’re keeping track, America was in its infancy then and indoor plumbing and electricity were not a thing.
Many things have changed since then (thank goodness), but repointing is not one of them. Repointing just means removing the outer layer of lime mortar in the joints between the stones and installing new “pointing” with lime mortar.
Repointing has to be done every one hundred years or so, depending on conditions. It doesn’t necessarily mean anything is wrong with your foundation. It’s a maintenance task to ensure that nothing goes wrong with your foundation. It’s similar to how you keep exterior wood surfaces stained or painted to protect them from weather, pests, etc.
If you’re curious about what type of lime we use, where we get it, how to mix it, etc., I wrote a Lime Mortar FAQs blog post. Find it here.
How We Knew It Was Time to Repoint Our Stone Foundation
You usually have to get up close to see if a stone foundation needs repointing. The stone foundation walls in our Basement Workshop were fine from a distance, even if it looked like a toddler had finger-painted mortar on the joints.
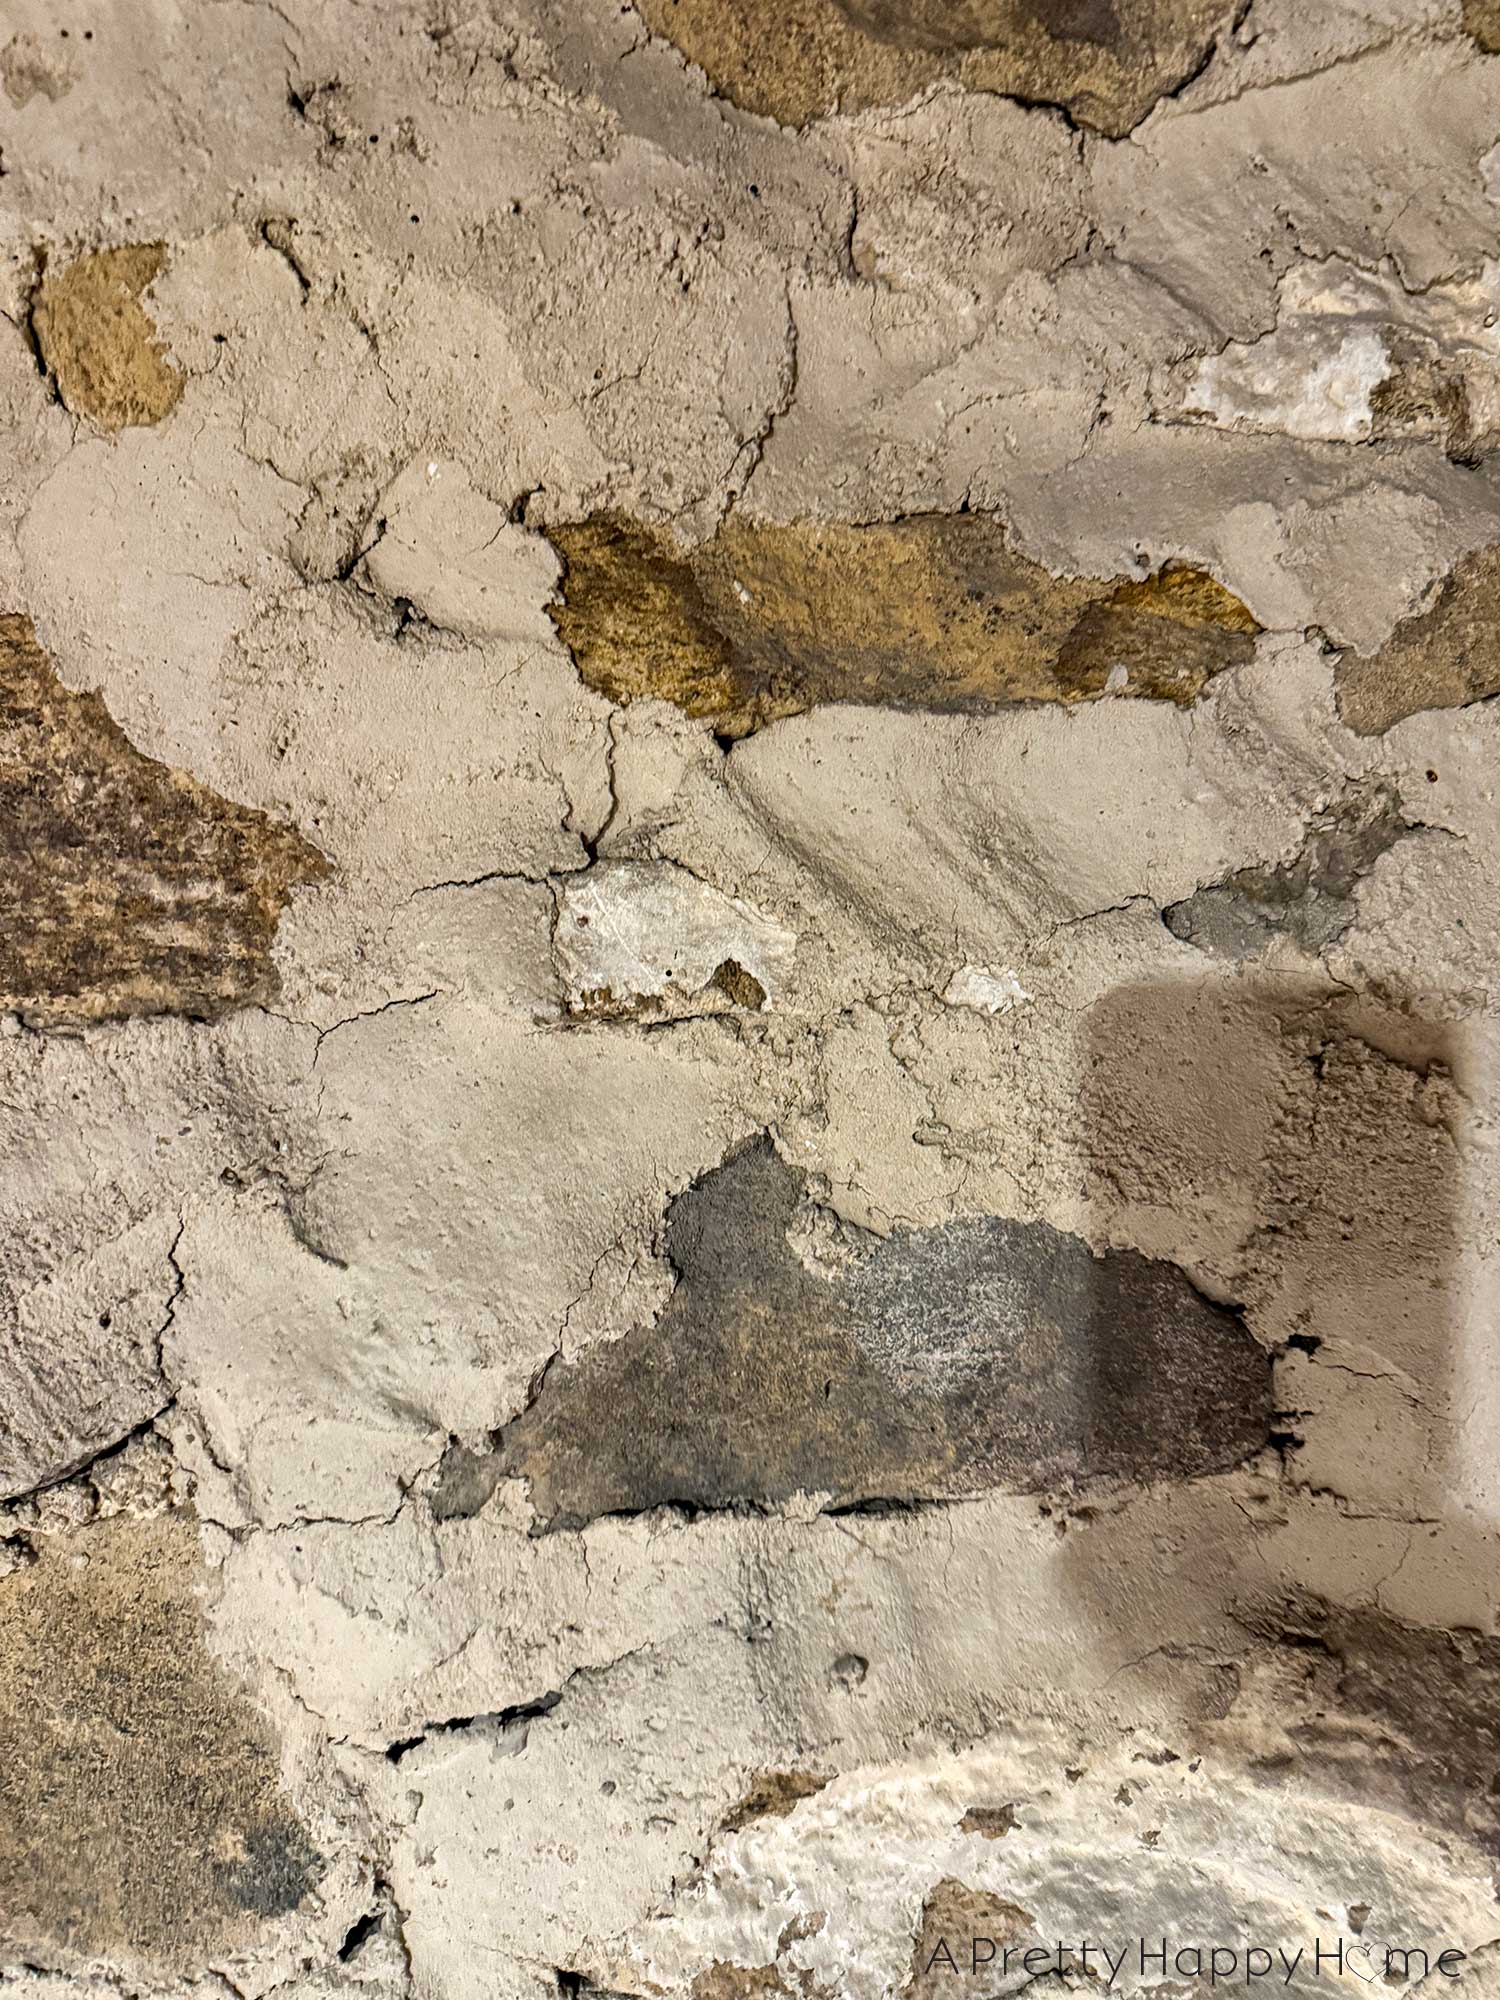
When you got up close, it was easy to see there were cracks in the mortar, easily removable pieces, and piles of sand (lime mortar is mostly sand) that were accumulating at the base of the floor. These are signs the stone foundation needs to be repointed.
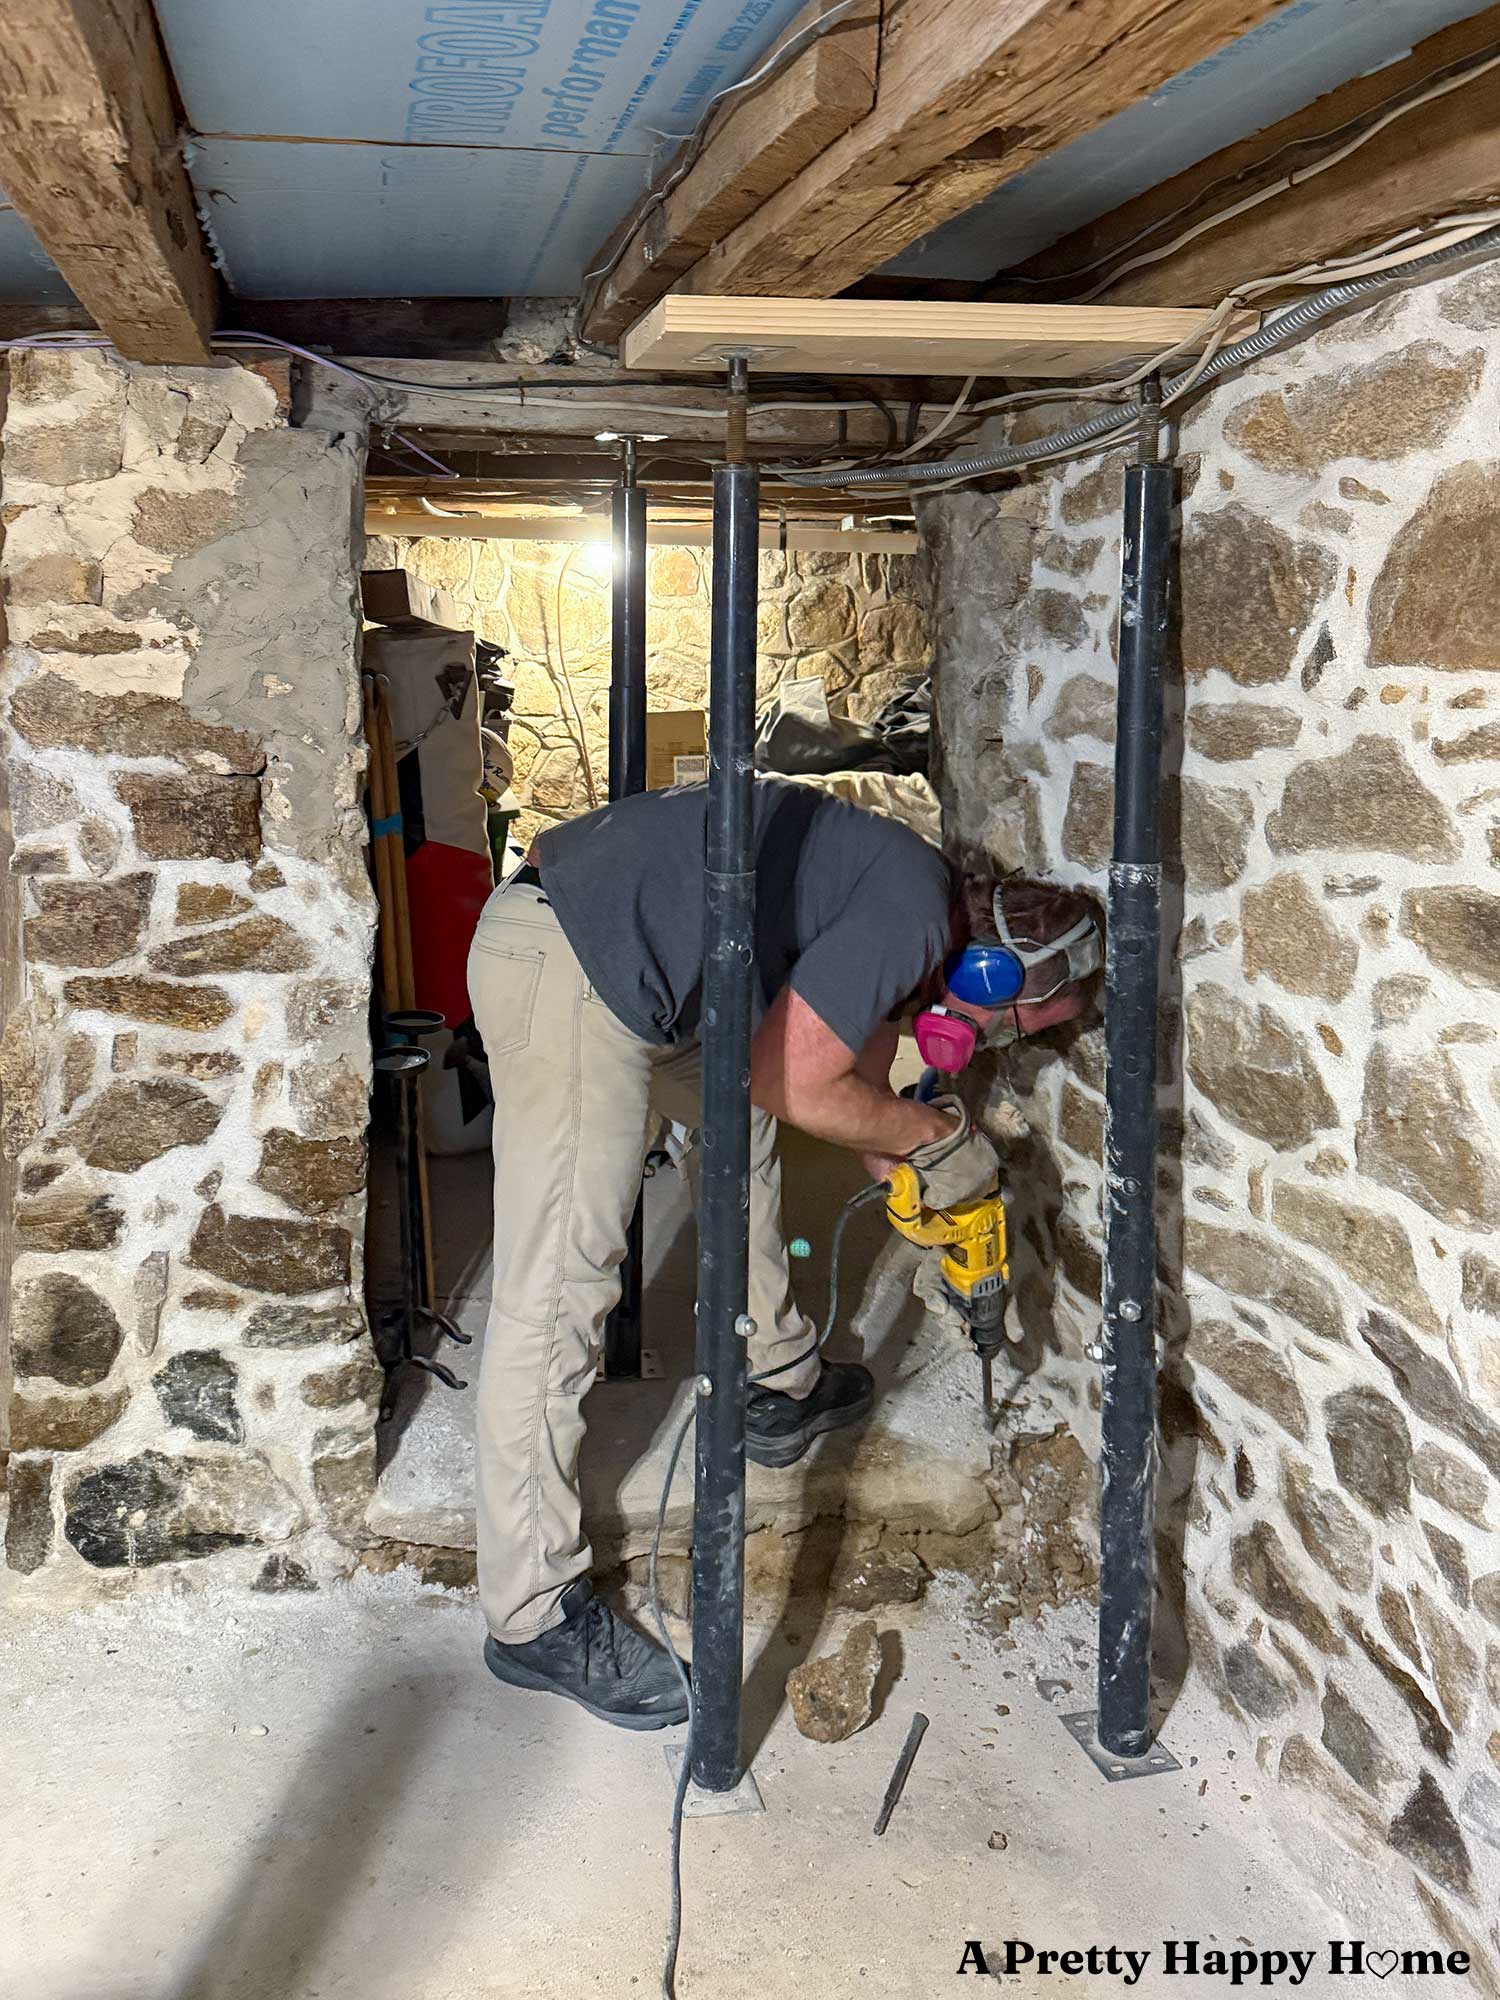
Several areas of this foundation were also patched with concrete. Concrete is made with Portland cement, and Portland cement is bad for historic stone foundations. It traps moisture in the walls that are designed to breathe (take on and release moisture). Portland cement is also harder than the fieldstone the foundation was built with. The general rule of thumb for any structural masonry is that the mortar can’t be harder than the stones or bricks. If it is harder, it can break the stones. This is sometimes referred to as spalling.
Also, we wanted to make this Basement Workshop more functional by building shelves for storage. It made sense to repoint the walls before building new shelves that have to be secured to the wall or ceiling to be safe and secure.
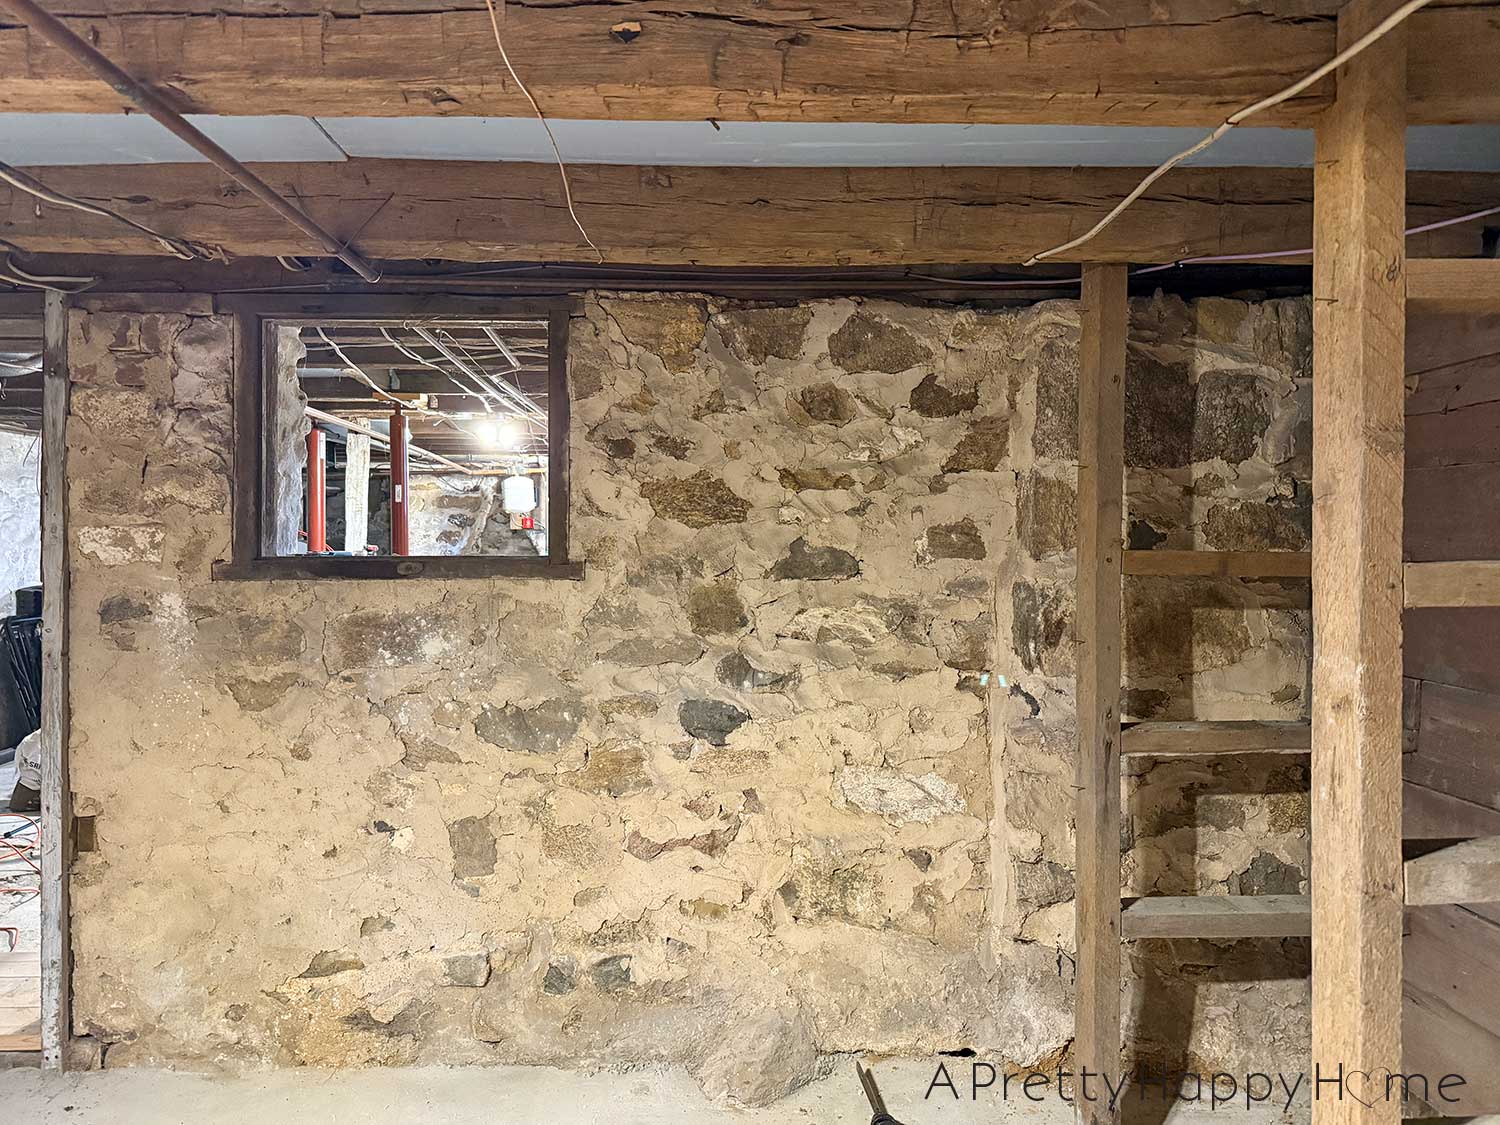
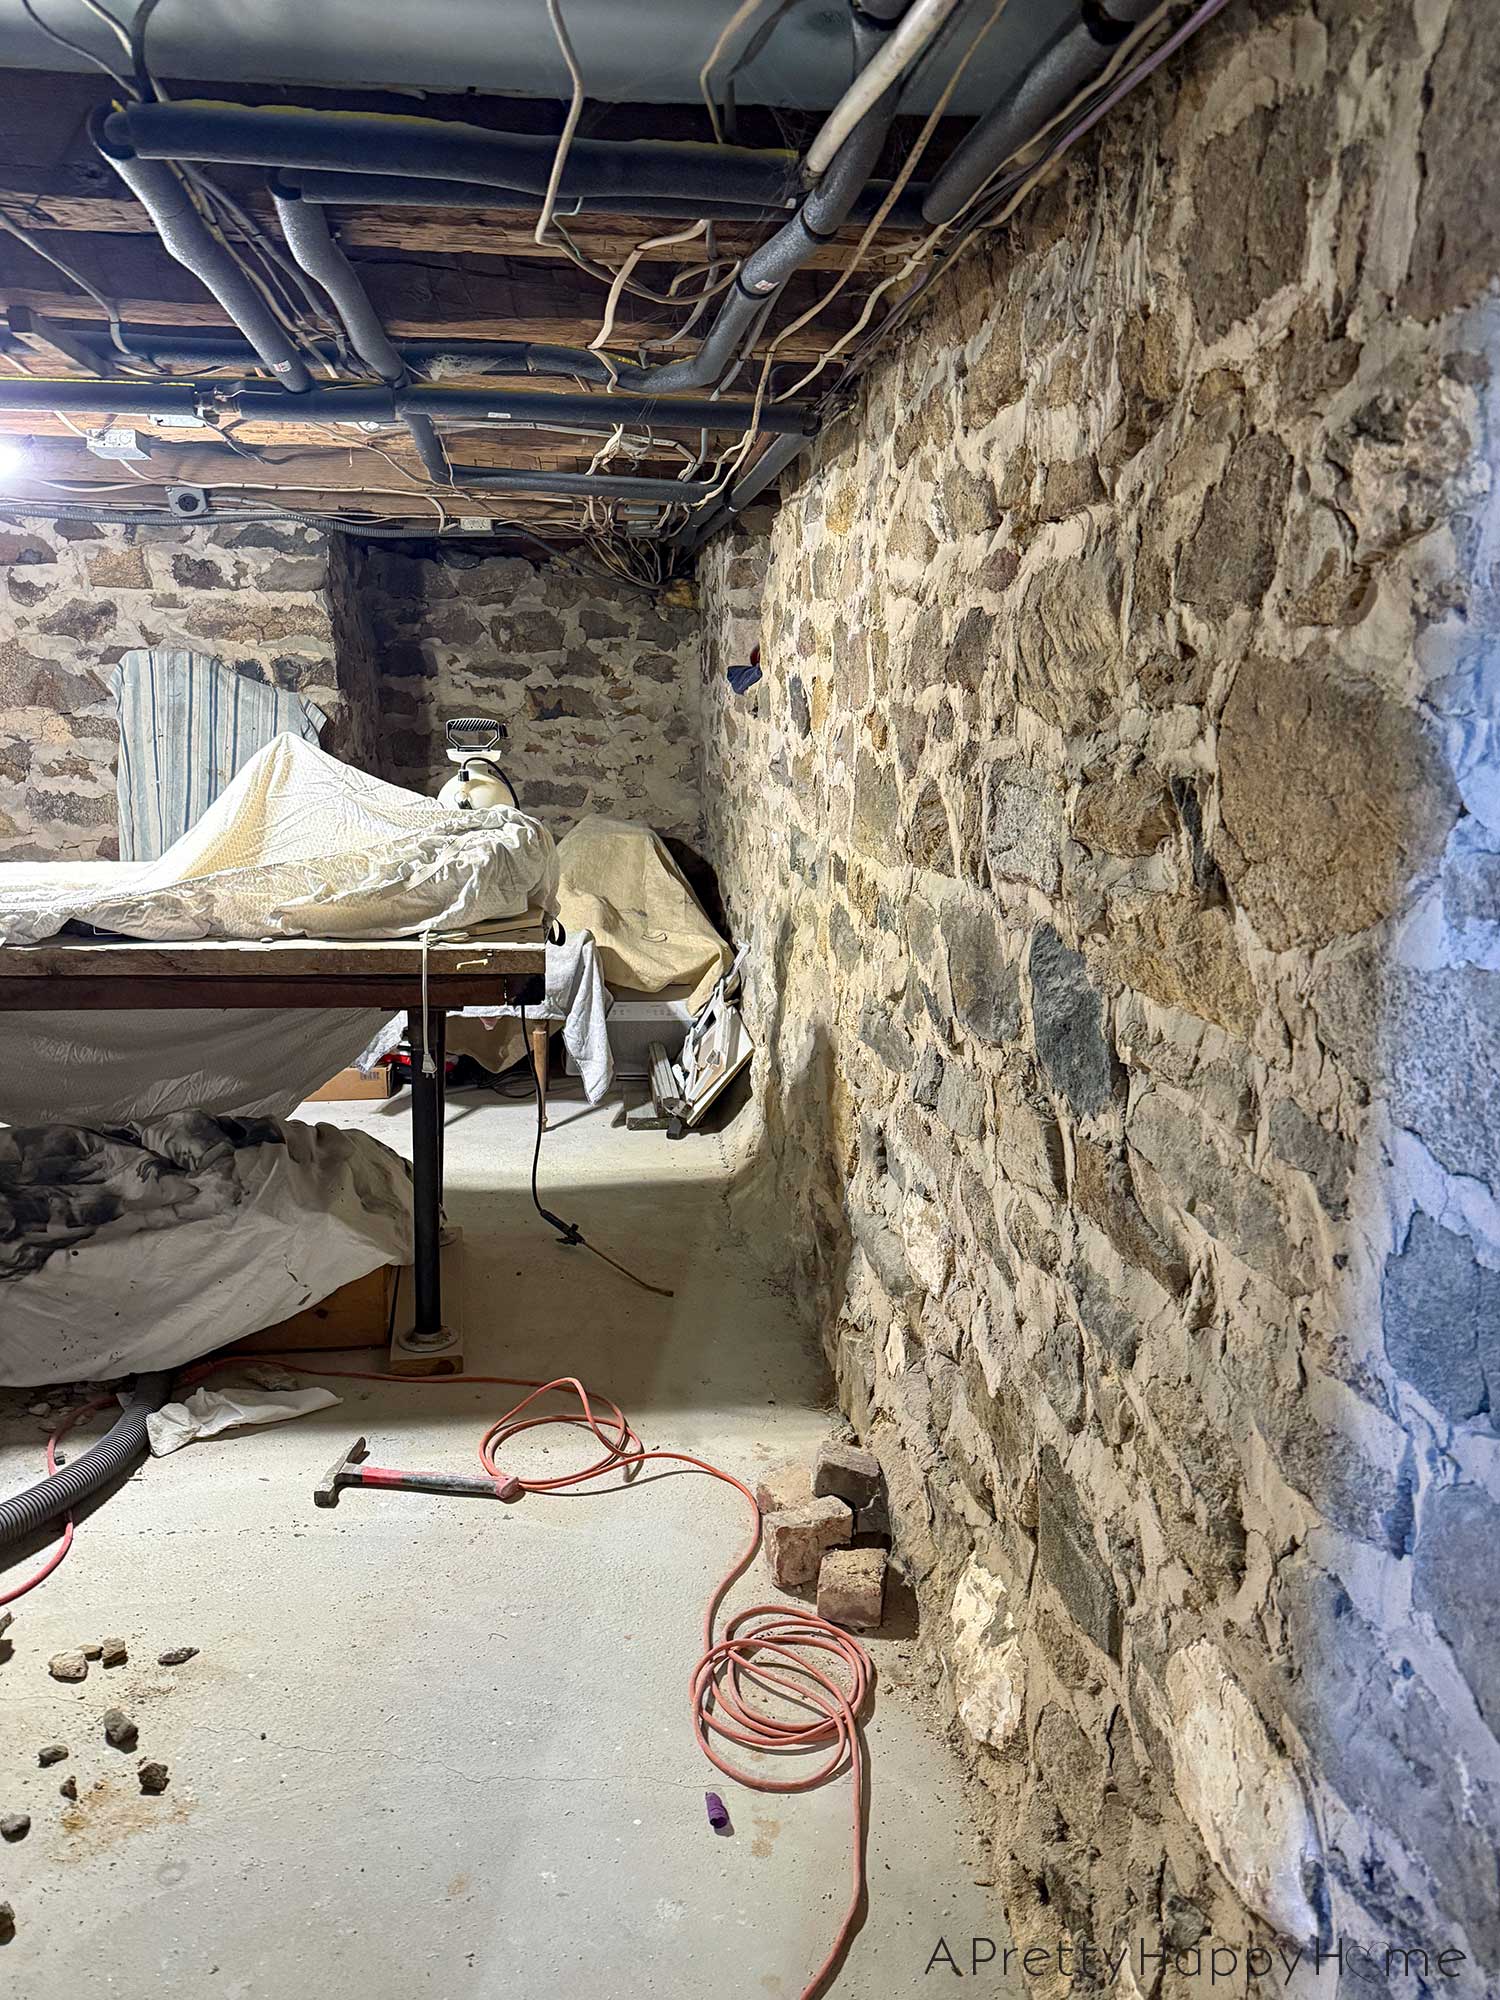
The Before Photos Certainly Tell a Story For This Stone Foundation
The story is one of benign neglect.
These stone walls had needed to be repointed for a long time, and it’s an overwhelming and, potentially, costly project if you’re hiring someone to do it for you.
The only reason we started down this road of DIY repointing is that I watched someone – a regular person and their teens – repoint their stone walls on social media.
I thought, if they could do it, surely I could do it.
There has been a learning curve. As it turns out, watching YouTube videos does not automatically make you an expert at anything, especially historic masonry. That was a real letdown.

This basement workshop is not the first space in our home that I’ve repointed.
I’d really, really like to redo the first wall I ever repointed in our home, but it is a reminder that my technique has improved. There’s no way that I’d compare myself to the skill and craftsmanship of a professional mason. Tip of my trowel to them!
But I do know that the walls I have repointed are secure and will stay that way for decades to come. That’s the most important thing.

The purpose of repointing a stone foundation is not really to change how it looks, although, that might be a side perk in the case of our foundation.
The point is to make sure that the stone foundation is secure and protected for another century. At the risk of stating the obvious, a foundation holds up your entire house. Without it, you have no house. It’s imperative that your foundation stays in good shape.
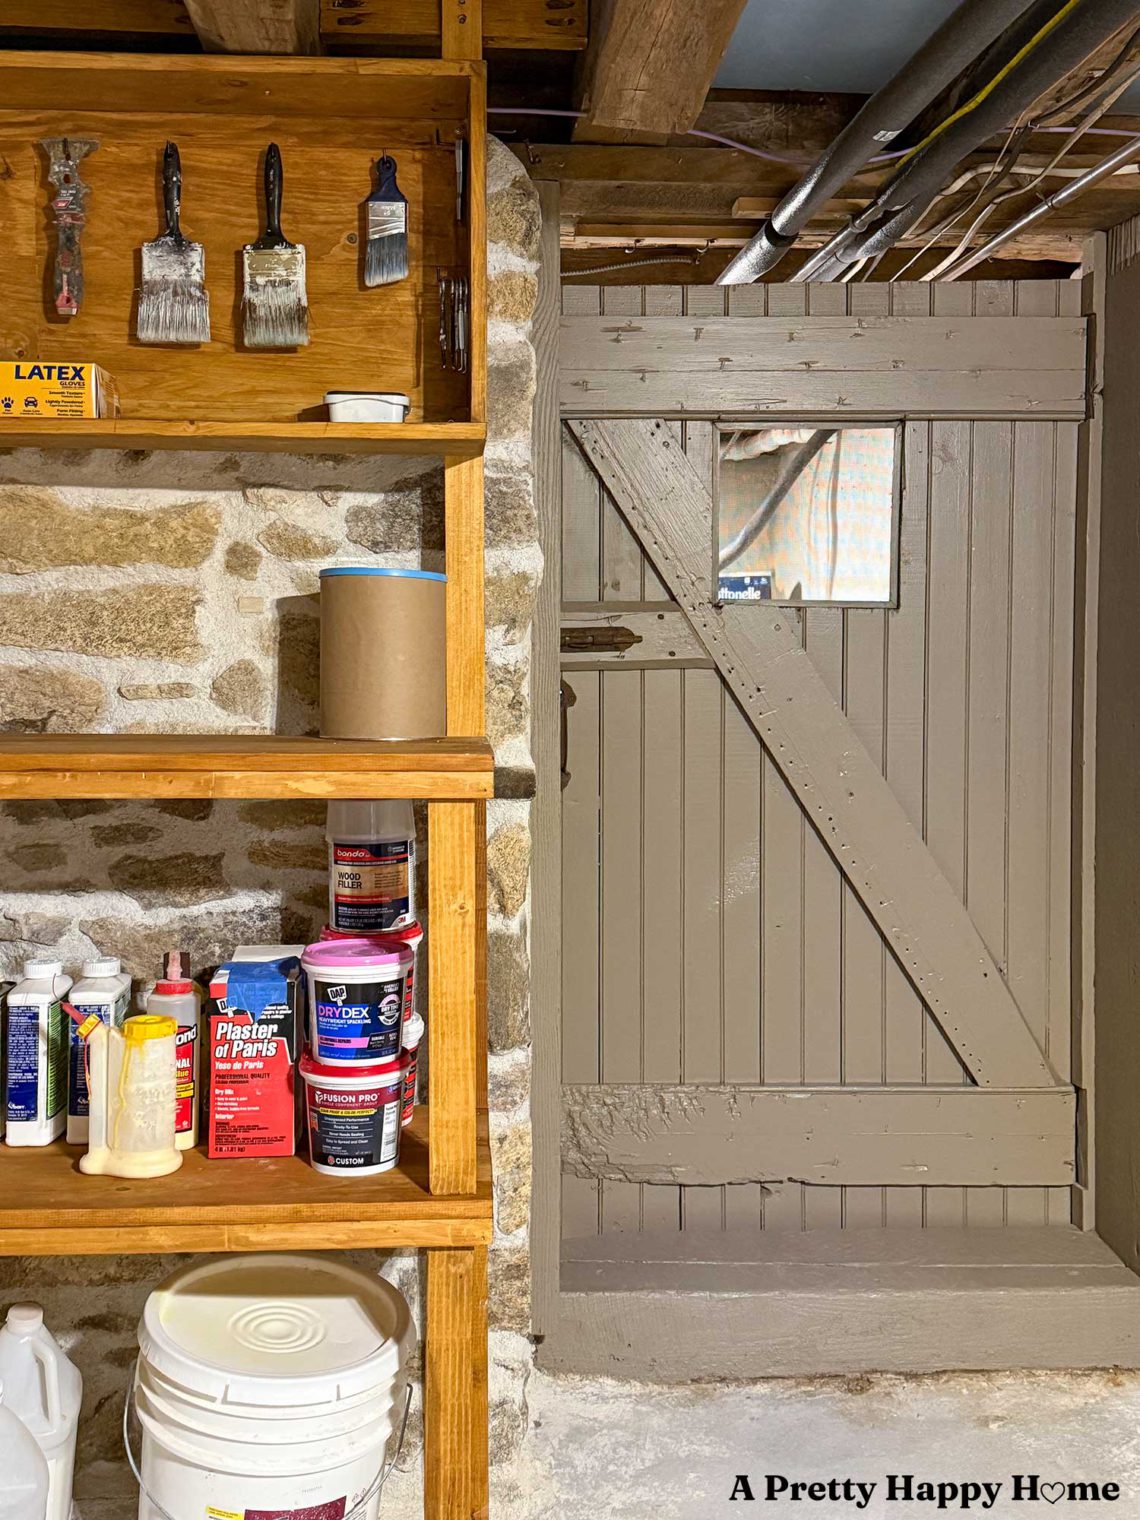
The Newly Repointed Stone Foundation Walls and Finished Shelves
Without further ado, here’s the transformed space!
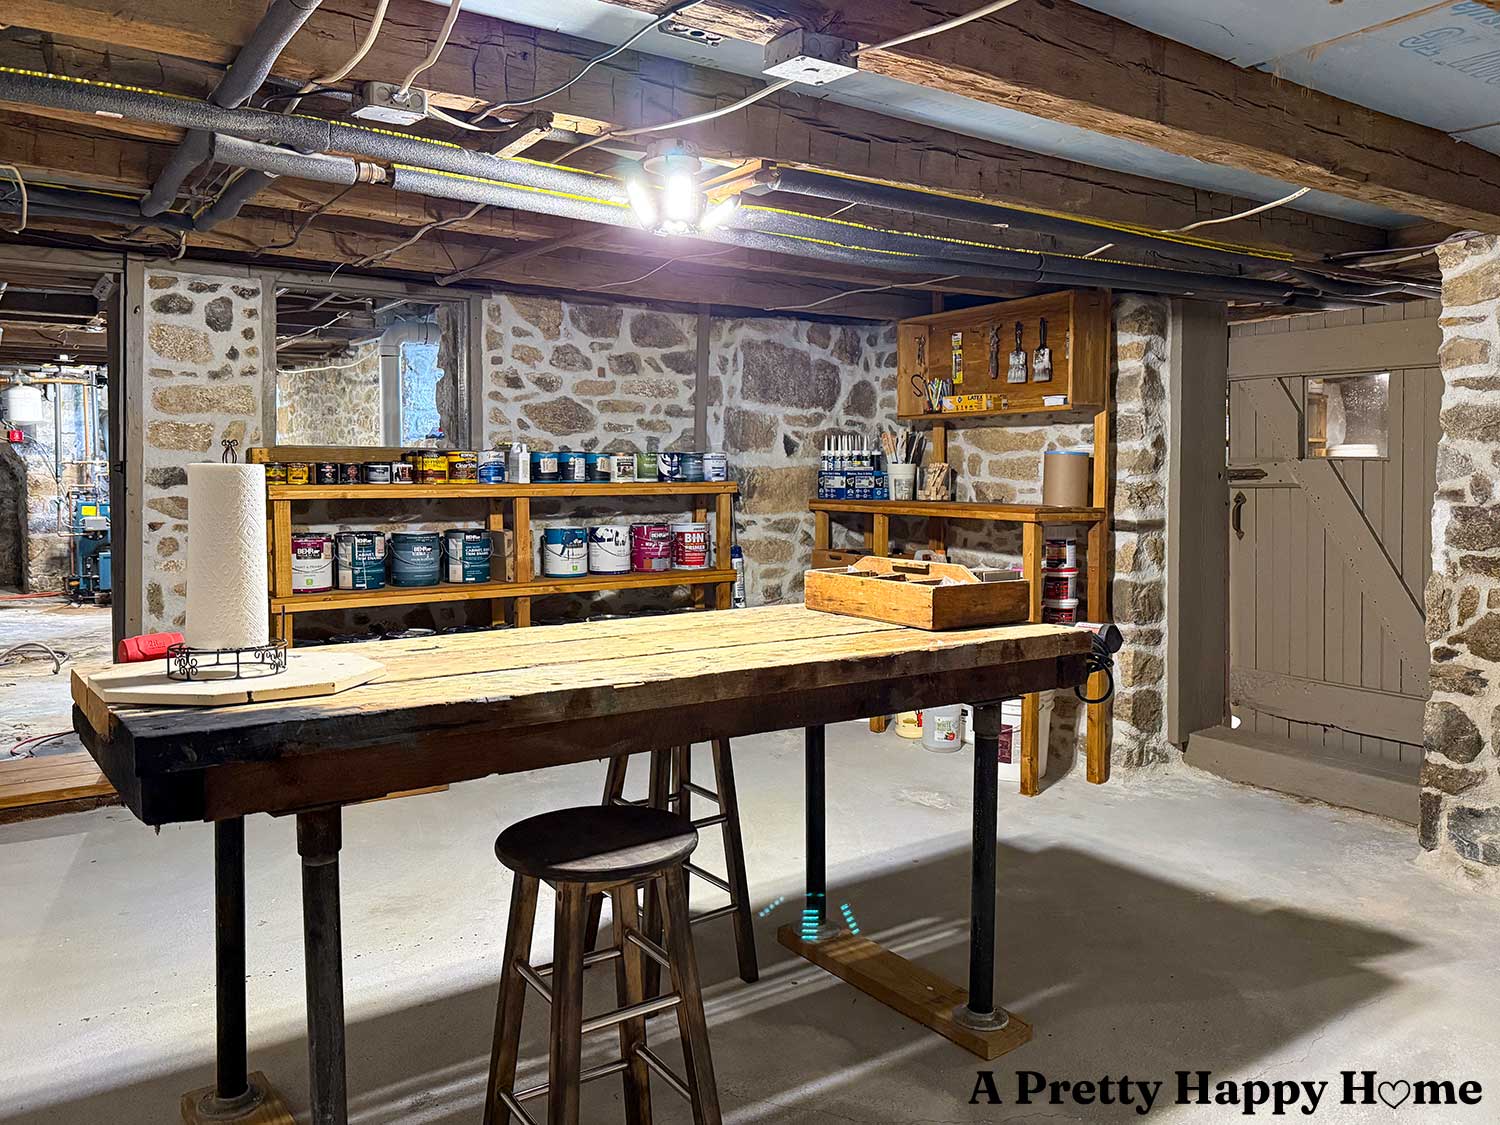
Of course, the walls are what we spent the most time on, and they are the star of the show.
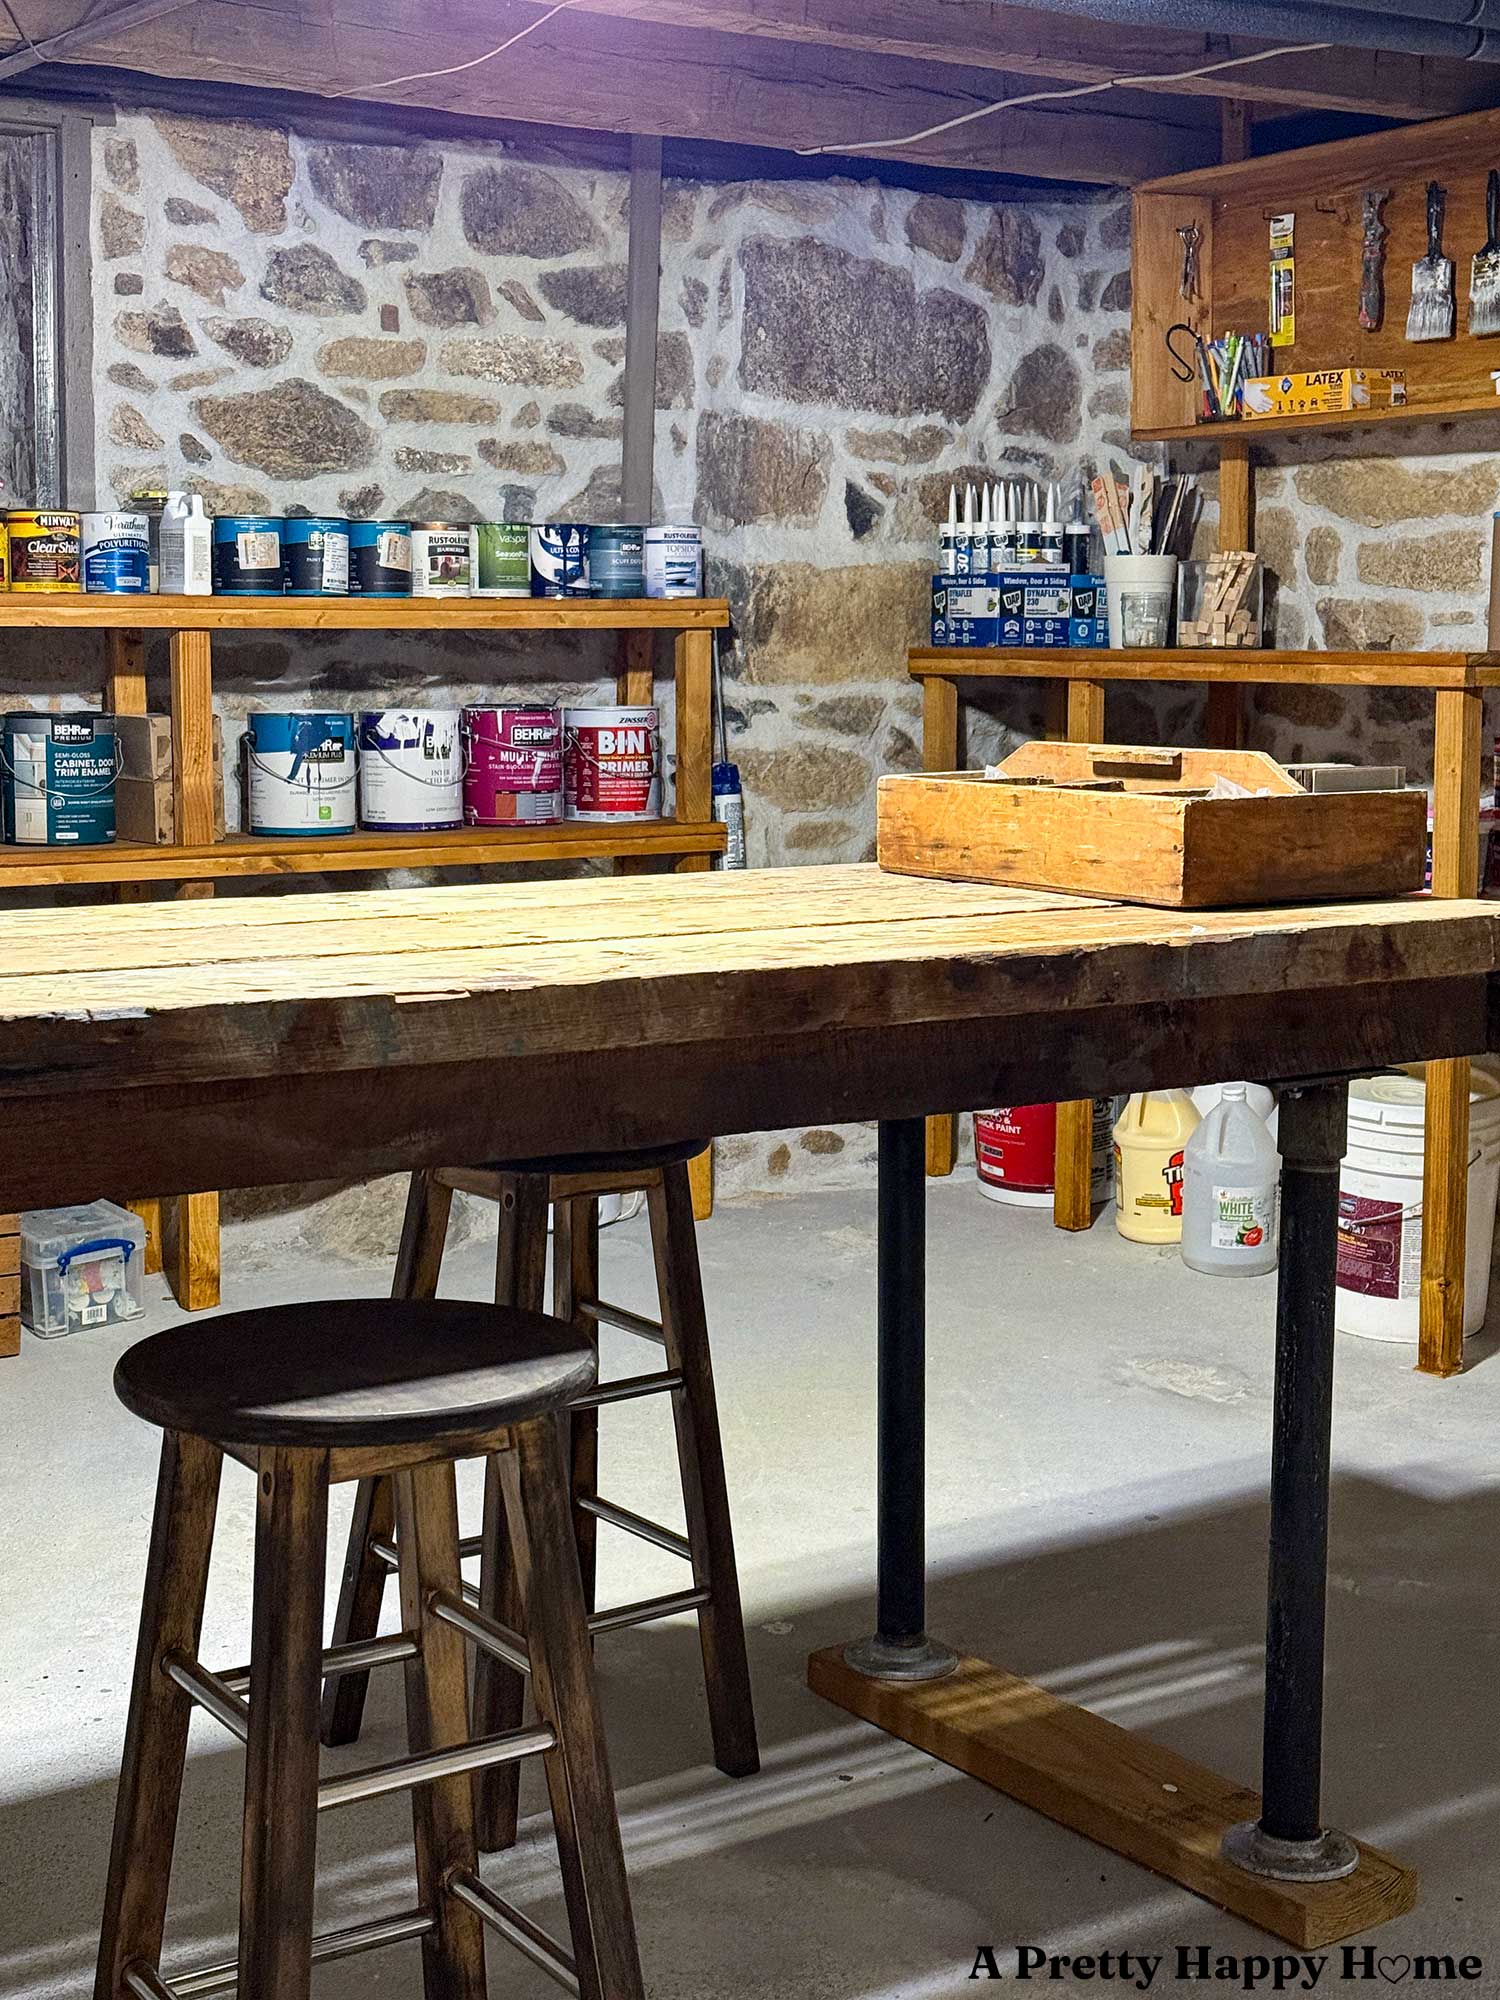
But what is different from our last post in this series is that we have purpose-built shelves. They are a game-changer for how this basement workshop functions.
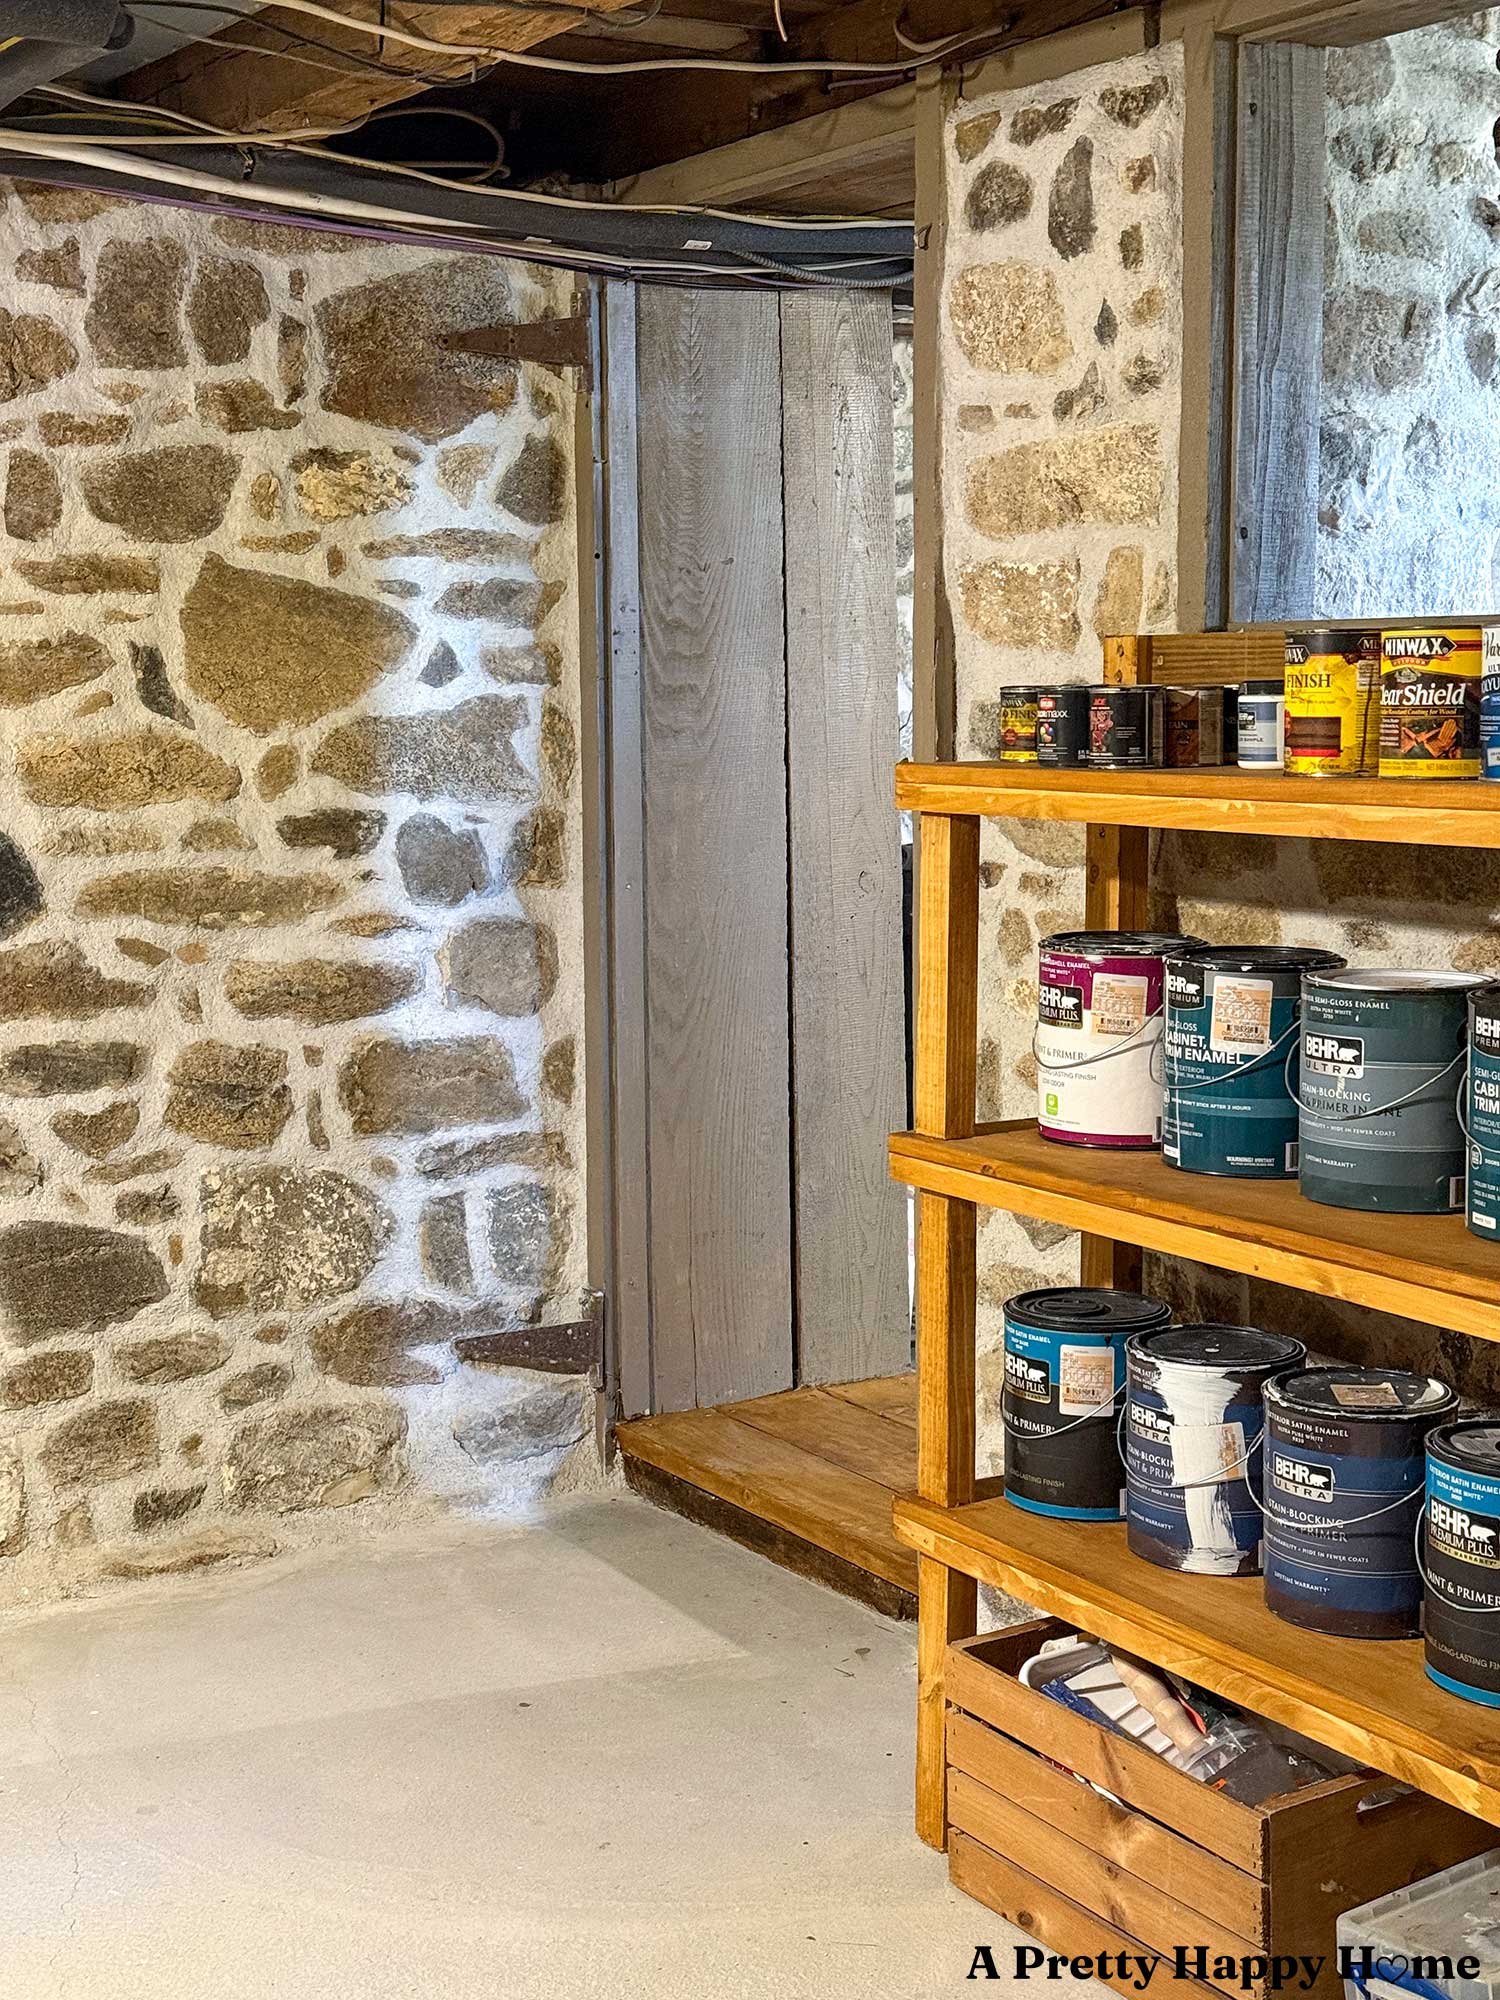
The shelves for the paint cans were designed to be deep enough for a gallon of paint, and that’s it. I didn’t want to have to move gallons of paint around to find the can I need.
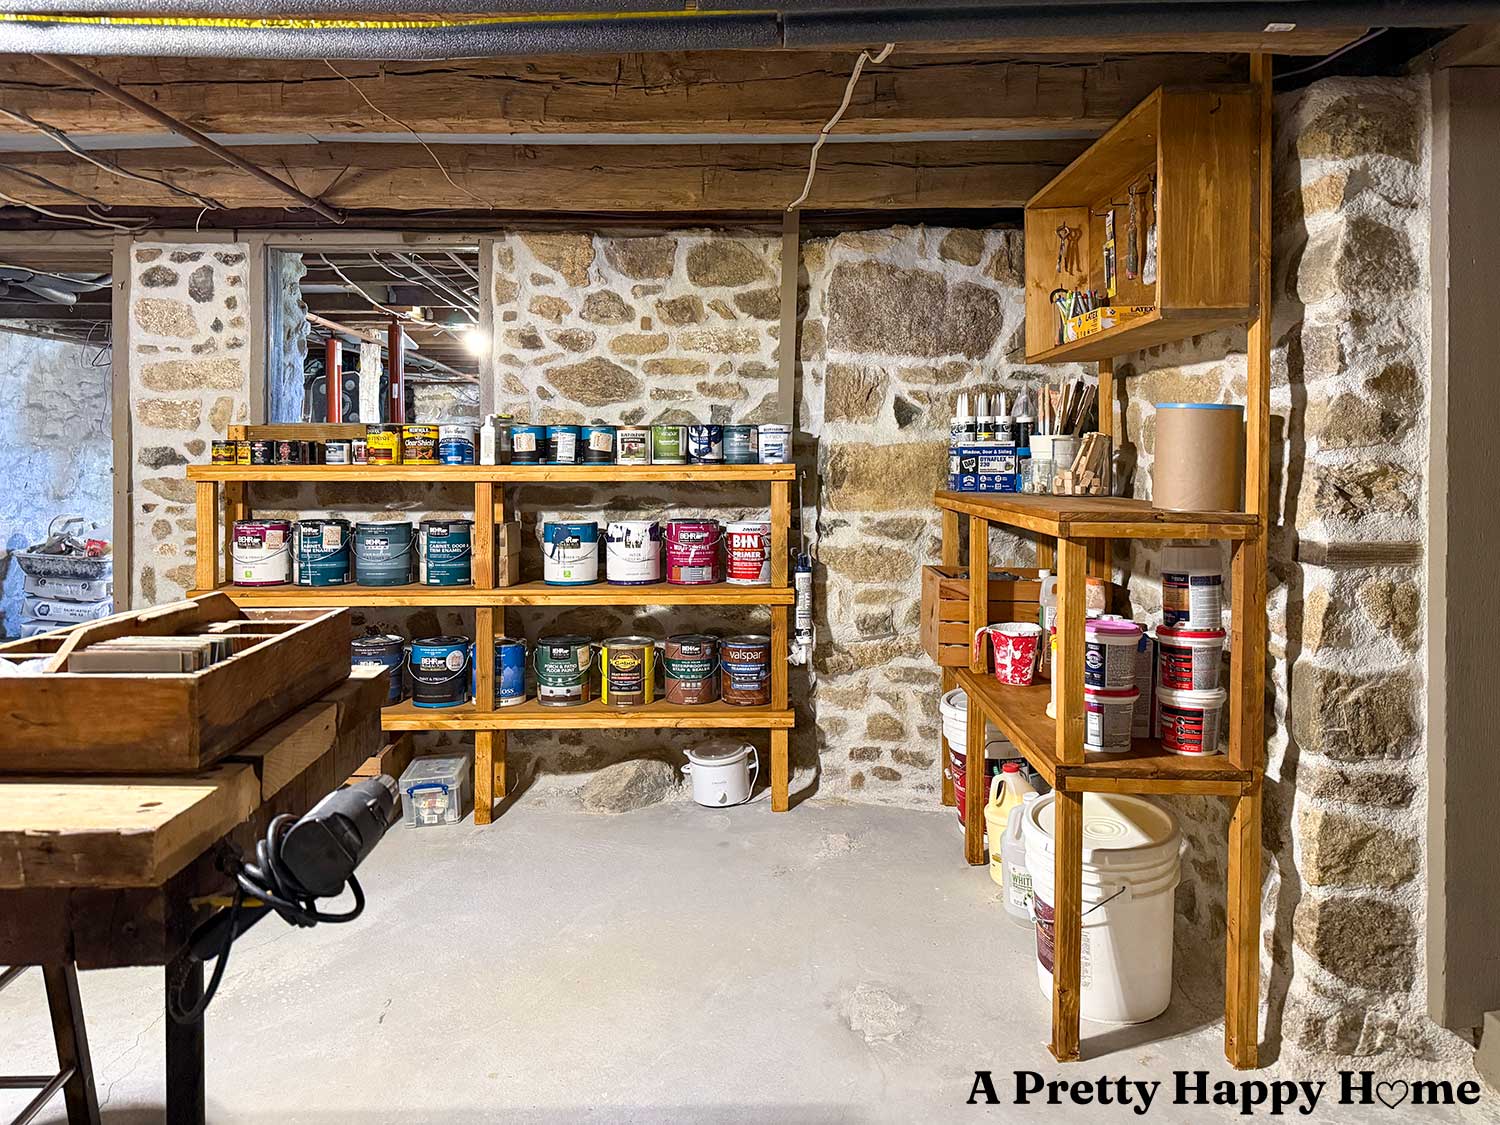
The other set of shelves was specifically designed to hold 5-gallon buckets.
If those buckets look a little wonky on the floor, it’s not bad Photoshop. The floor is comically crooked and lumpy. Nothing is a breeze to build in this house, even shelves. Every single leg under that bottom shelf is a different length.
Rest assured, one thing we’re not short on around here is old house quirks.
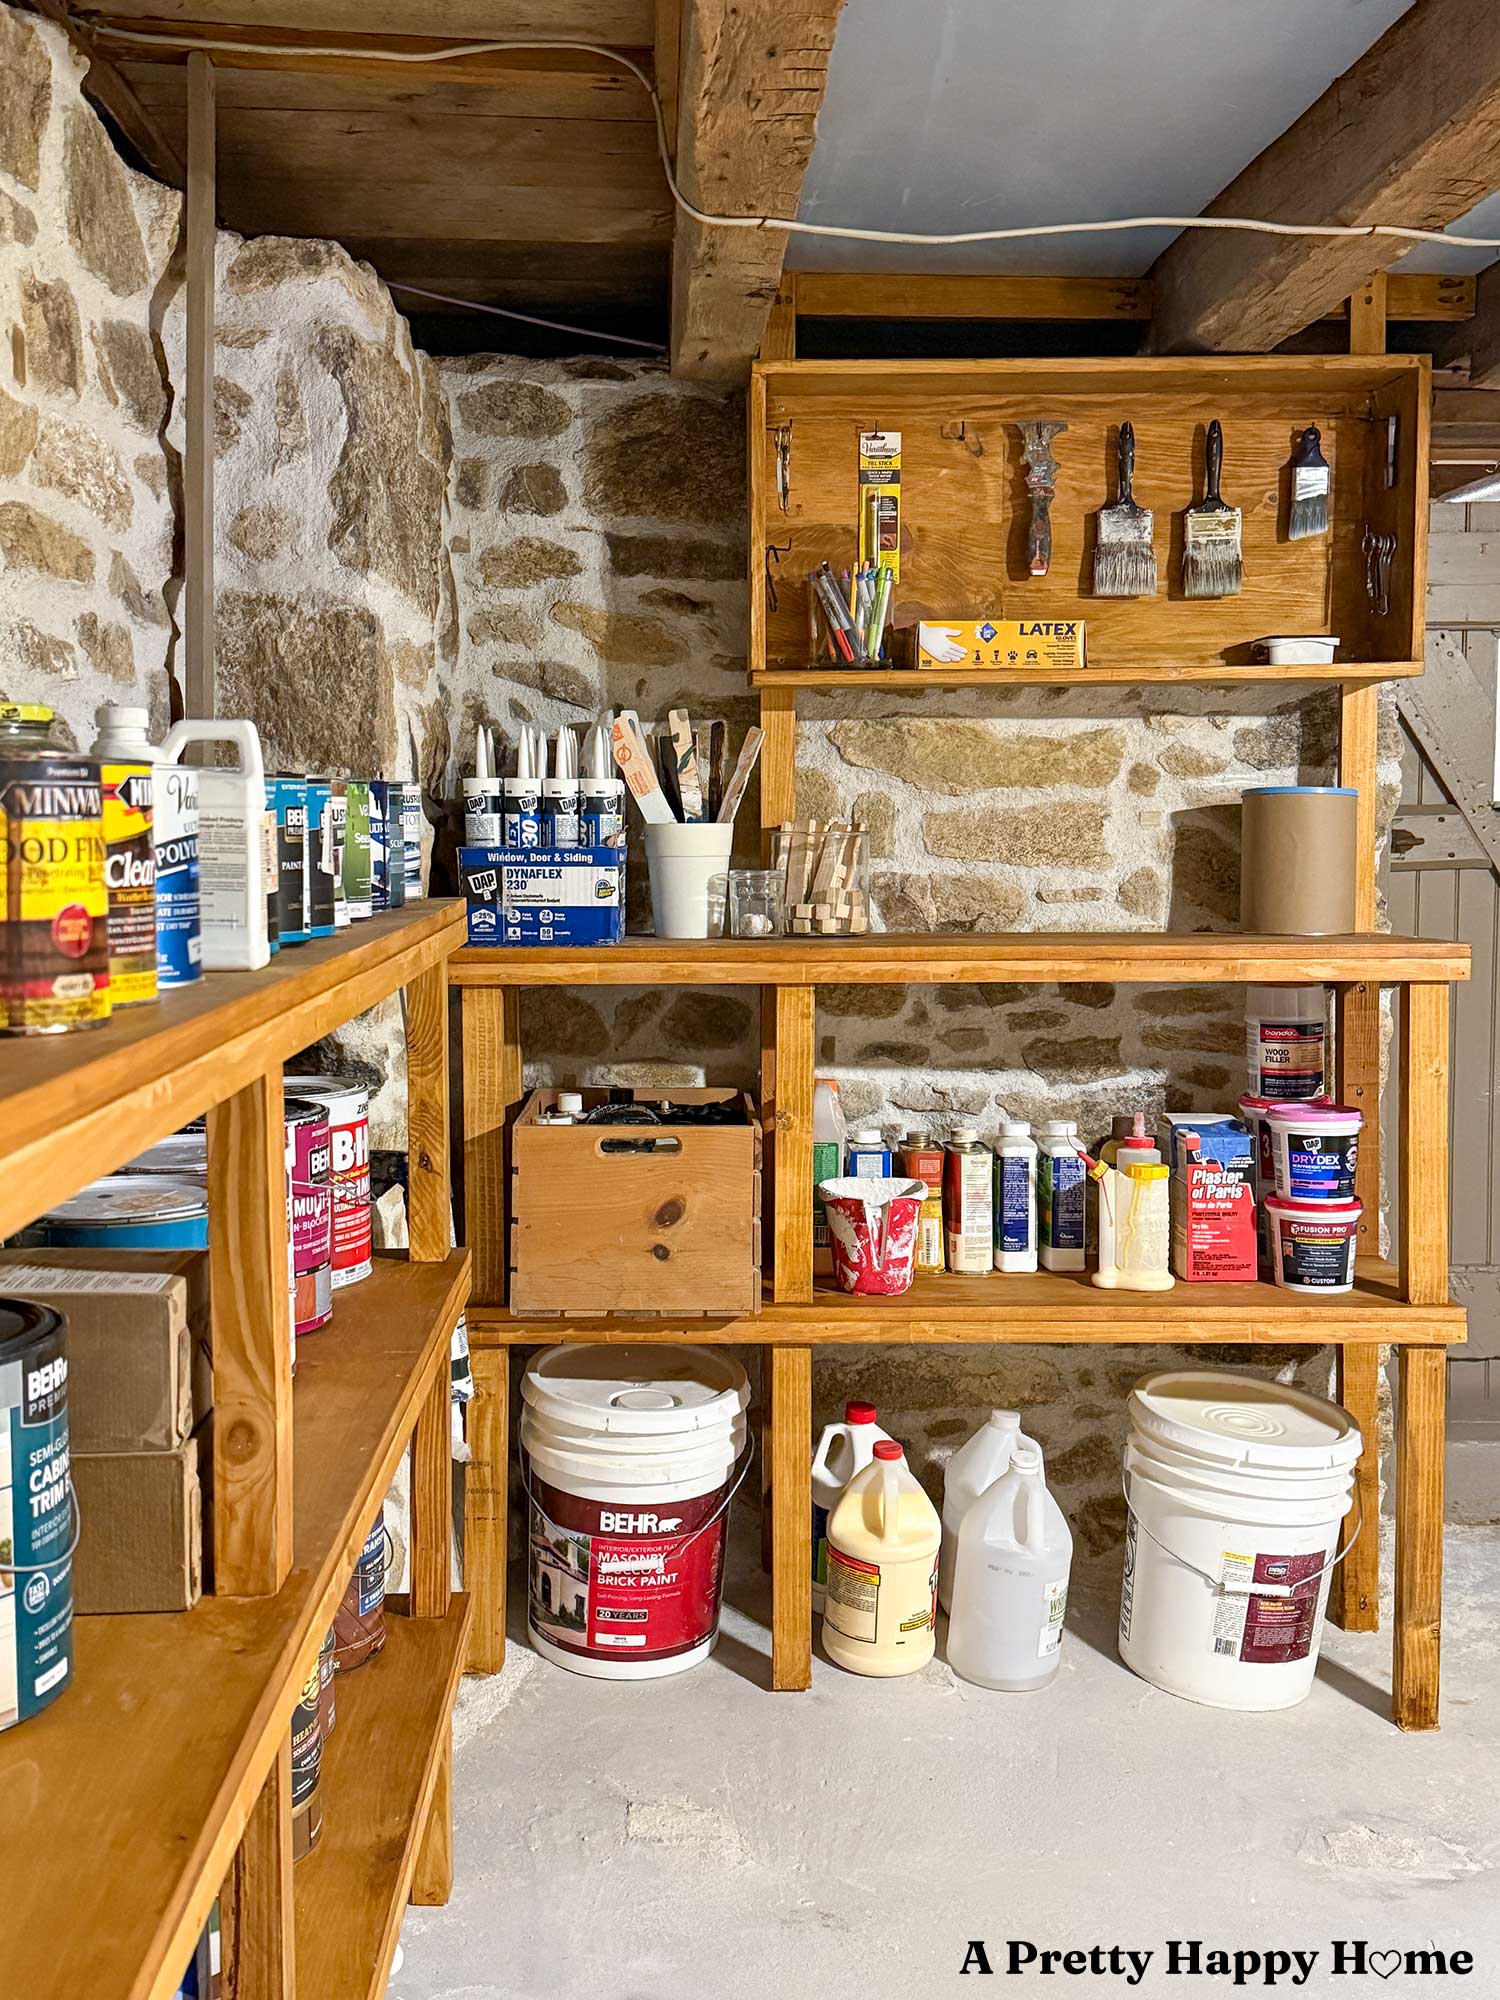
The box shelf holding my paintbrushes was a happy accident. The box was already built for another project, but we ended up never using it for the purpose for which we built it. It’s been sitting unused in the basement for two years.
That box just so happened to be the perfect width to attach to the wall supports, and it gave me a spot to hang hooks for brushes, paint keys, etc., so that I didn’t have to mess around with a pegboard.

Speaking of wall supports, if you want to attach shelves to stone foundation walls, it’s a bit tricky.
You need something in the wall, ceiling, and/or floor to attach the shelves to.
In our experience, Tapcon screws (masonry screws) and even plastic anchors are unreliable in lime mortar because the screws end up grinding away at the lime mortar if there’s any movement to the thing they are securing. (For example, a curtain sliding on a rod that’s secured into lime mortar.) Concrete and other mortar mixed with Portland cement is able to hold a Tapcon screw securely because the chemical composition of the mortar is different.
For historic lime mortar, it’s best to screw into wood that’s been mortared into the wall or to wood ceiling supports. For our shelves, we use vertical wood supports that are secured to the ceiling to secure our shelves.
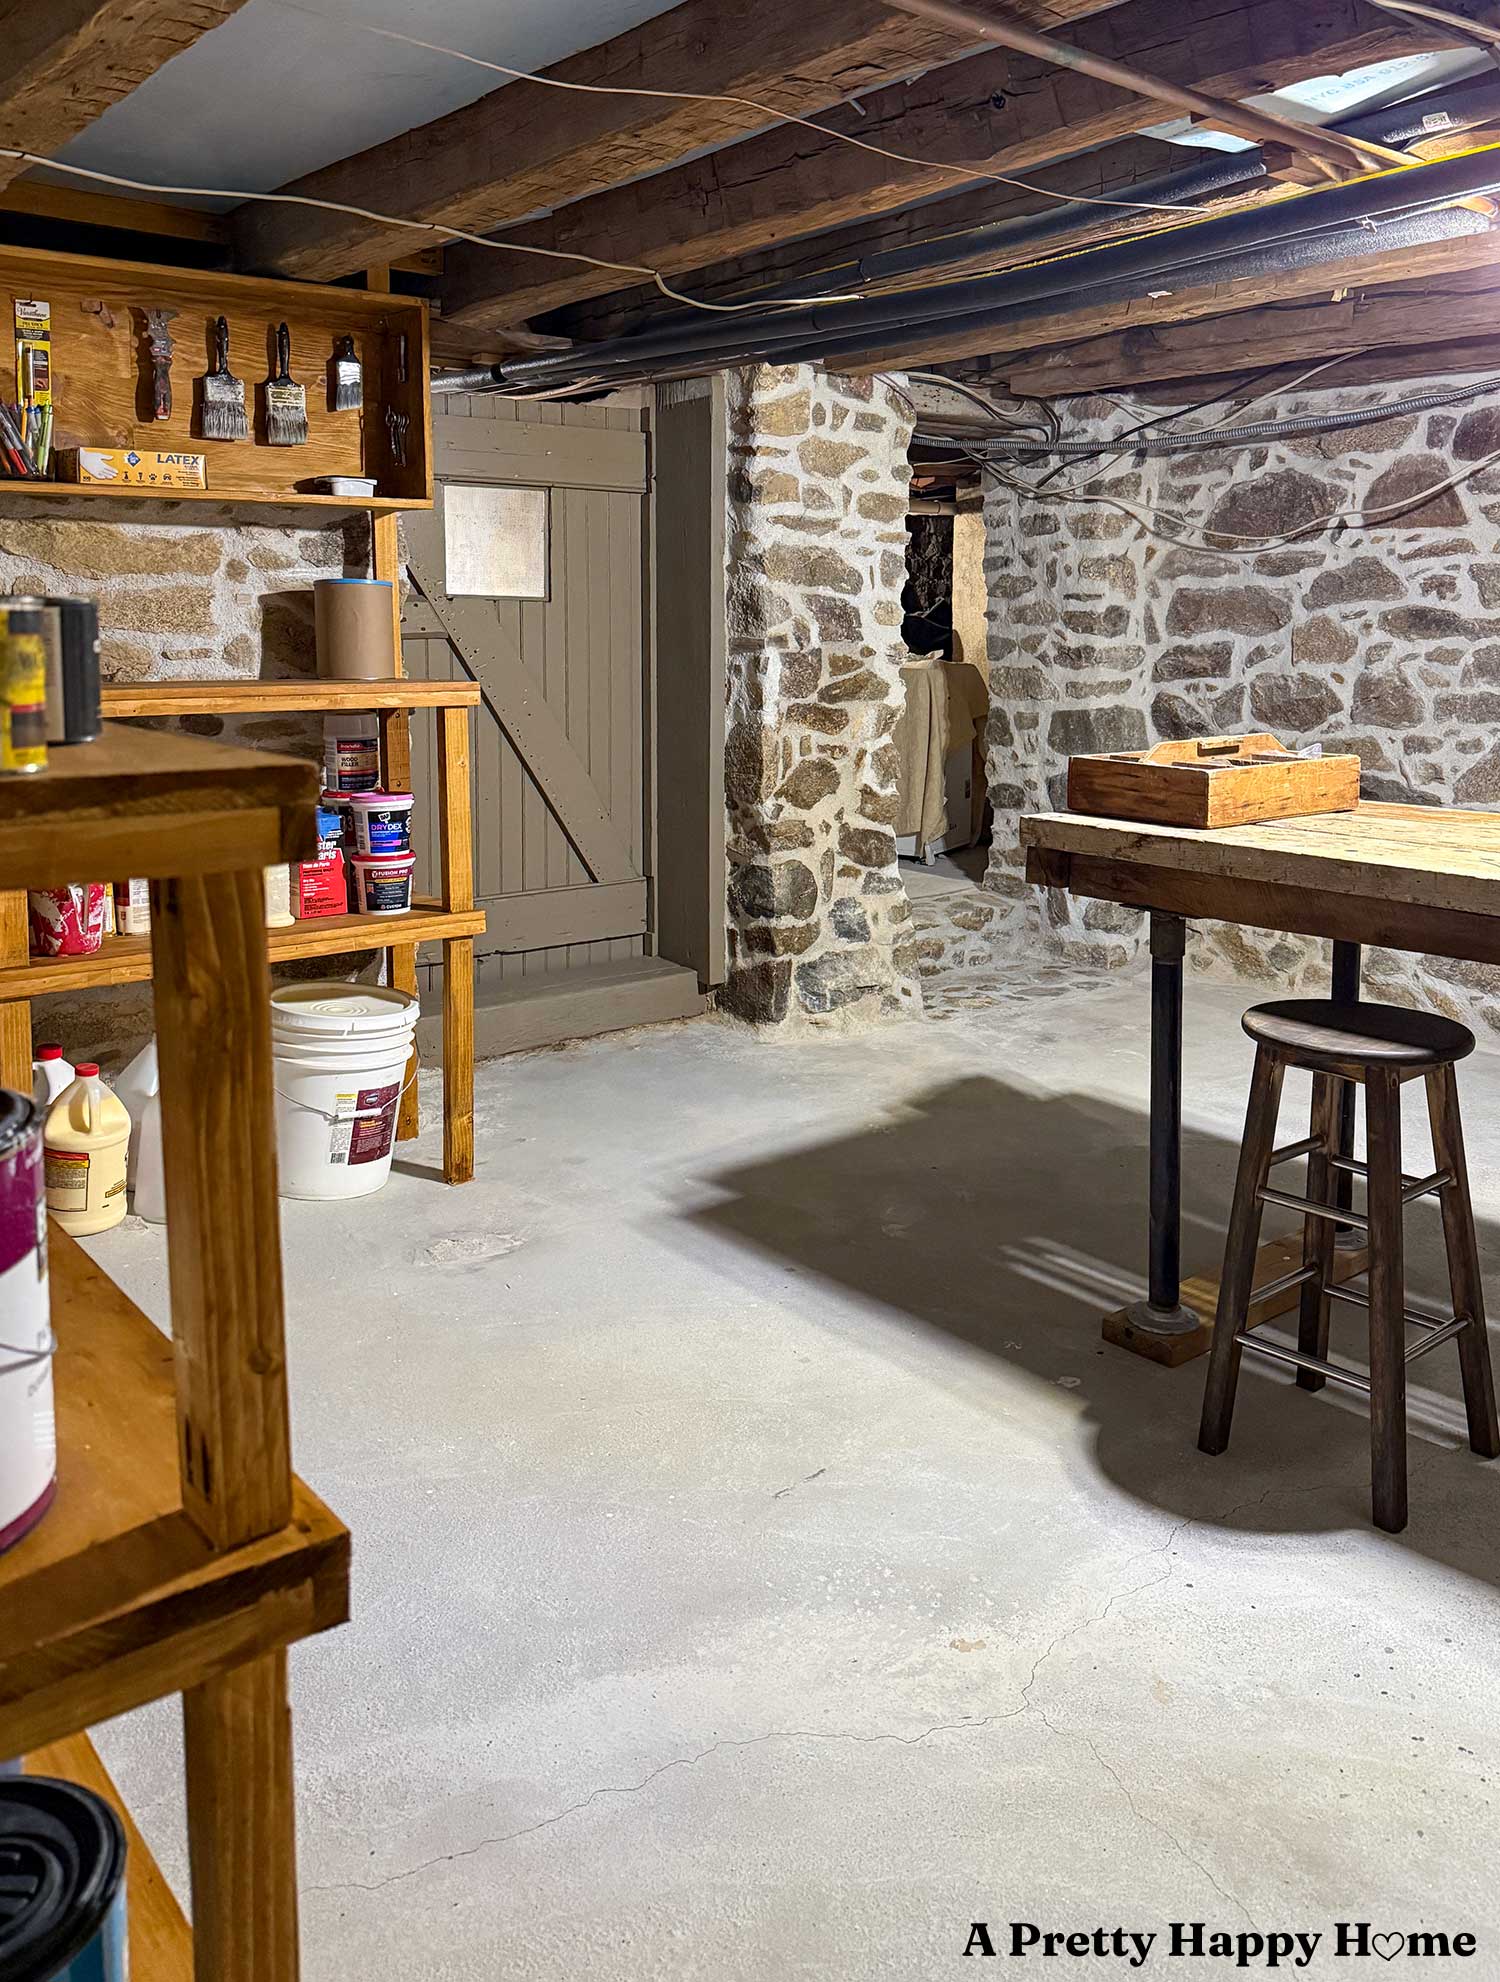
You may have noticed that I painted the door in our basement workshop and the existing woodwork a warm grey color.
The door was already painted badly, so it didn’t give me any heartburn to refresh it with new paint.
The rest of the woodwork, and there’s not much in this space, had been previously painted but it had definitely worn off or been removed in spots. For half a millisecond, I considered removing the rest of the paint, but then I remembered this is an old house, and messing around with lead paint is not worth it. It’s best to encapsulate it and move on.
I ended up using only one coat of paint on the door and window surrounds. It spruced things up, but let the wood grain still show through. In person, it complements the color of the stones so nicely, and gives a weathered wood vibe instead of a painted wood vibe.
There are actually two things left to do in this basement workshop.
The first is Handy Husband needs to re-secure some wires to the ceiling that we had to loosen to do the pointing. I feel the need to mention that before I get messages about it.
The second thing left to do is to actually use the space, but it feels too nice to mess up. Haha!
It still boggles my mind that this basement had not already been tricked out with built-in shelves everywhere. How did people store things down here? Did there used to be shelves, but they were removed? I have so many questions.
I probably won’t get answers to my questions, but one thing I can do is say thank you.
From the bottom of our hearts, thank you so much for your support, encouragement, and curiosity as we trudged our way through this repointing project. I’m not sure how we got so lucky, but we feel blessed to have somehow gathered the best cheerleaders a DIY duo could ask for to help keep us motivated.
How do you think our Basement Workshop turned out? I’d love to know. You can comment on this blog post, email me here, or reach out via direct message on Instagram or Facebook.
Happy DIYing!
For questions about where we buy our lime, what type of lime, etc., please reference our Lime Mortar FAQs.
If you need supplies for your repointing project and want to know what tools we use, please check out our Amazon Store.
Thank you for following along with our DIY adventures. If you’d like another blog post to read, try one of these.
Basement Workshop Stone Repointing: Part 1, Why Now
Basement Workshop Stone Repointing: Part 2, The Concrete Problem
Basement Workshop Stone Repointing: Part 3, Halfway Done
Basement Workshop Stone Repointing: Part 4, Floor Joists
Basement Workshop Stone Repointing: Part 5: Wall Tops
Basement Workshop Stone Repointing: Part 6: A New Wall
Basement Workshop Stone Repointing: Part 7: Stone Doorway
Basement Workshop Stone Repointing: Part 8: Walls Are Done
*affiliate links in this blog post*


4 Comments
Laura L
Congratulations!! This is a hard won victory in the books! And everything looks SO GOOD!
annisa
Thank you so much, Laura!! It does feel good to have this one “in the books” partly for us, but as a way to pay it forward to future homeowners, too.
Dawn Olsson
That was a huge project! You did it! You finished it and it looks great! Tell HH that one of the shelves is off by 1/16 of an inch.
Good work! Great job!
annisa
LOL! He will be like “inconceivable!”
Thank you so, so much!