
Carriage House Interior Before Photos
If you follow us on social media then you’ll know I speak about our Carriage House fairly frequently, but I’ve not mentioned the Carriage House interior on the blog yet.
We’ve owned this property for 3 years and this is the first time I’m addressing the Carriage House interior here. What have I been writing about?!?
Hmm. That’s a good question.
I have written about the new roof we put on the Carriage House and how snazzy that building is looking with its fresh exterior paint.
The inside…well, it’s never felt done enough to write about it. It’s still not done, frankly.
We put the slow in a slow renovation, folks.
However, we’ve made some progress on sprucing up the interior of the Carriage House recently, so I thought it was a good time to start documenting the process.
If you don’t document it, it didn’t happen. Isn’t that what the kids say nowadays?
Actually, my kids would say, “If you don’t document it, it didn’t happen, bruh.” You’ve got to have the “bruh” at the end.
Here’s the Carriage House exterior from when we bought this property in 2019.
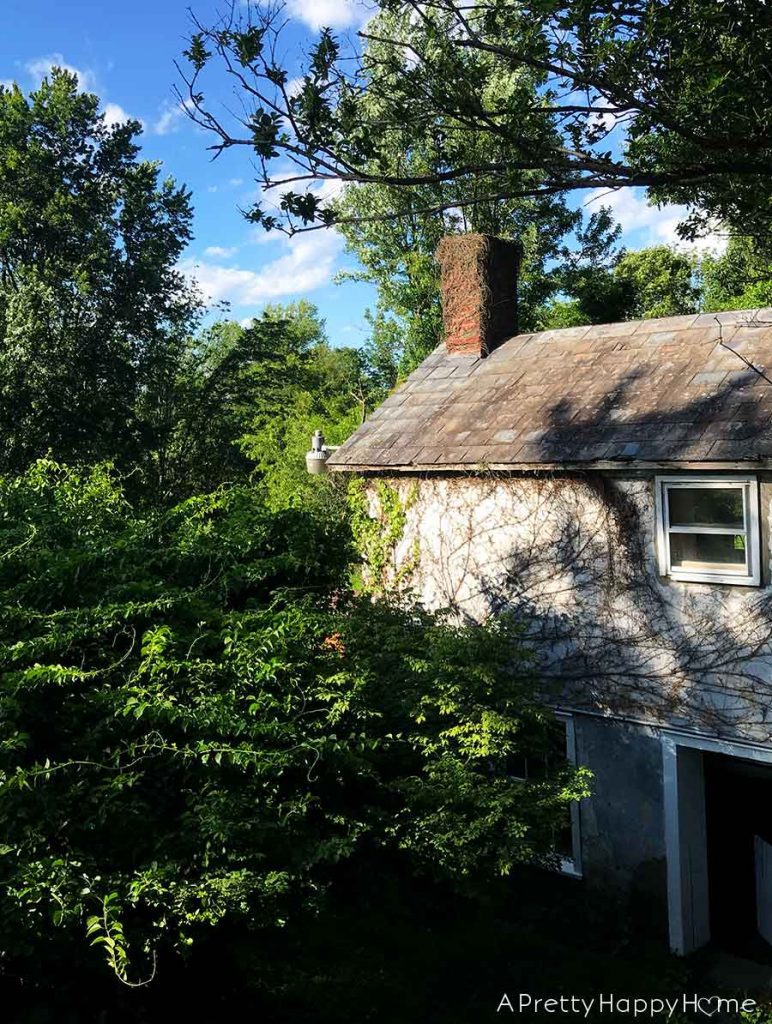
Here’s how the Carriage House exterior looks now.
Much better with the vines removed, a new roof, and new paint, right?

The Carriage House is a long, narrow building.
The internal dimensions are approximately 8 ft. wide by 20 ft. long. It has two floors.
The upstairs was converted into living space in the 1980s and that’s what we’ve been working on sprucing up. The downstairs is unfinished storage space and was used as a barn at various points in the last 100 years.
Here’s how the Carriage House interior looked after we cleaned out the items that had been left in it by the previous owner.

Every wall was wallpapered. There was smelly, brown wall-to-wall carpet, a couple of closets, old fluorescent lights, and original beams.
About the only positive thing was the original beams.
Facing the opposite direction was a kitchenette of sorts. No real space for a refrigerator or stove, but I suppose there are workarounds for that.

The bathroom is almost retro enough to be cool again.
It had and still has a blue tub, yellow tile, and a pink sink.
It’s a bathroom of many colors.
The pink sink minus the grime is kind of charming, actually.
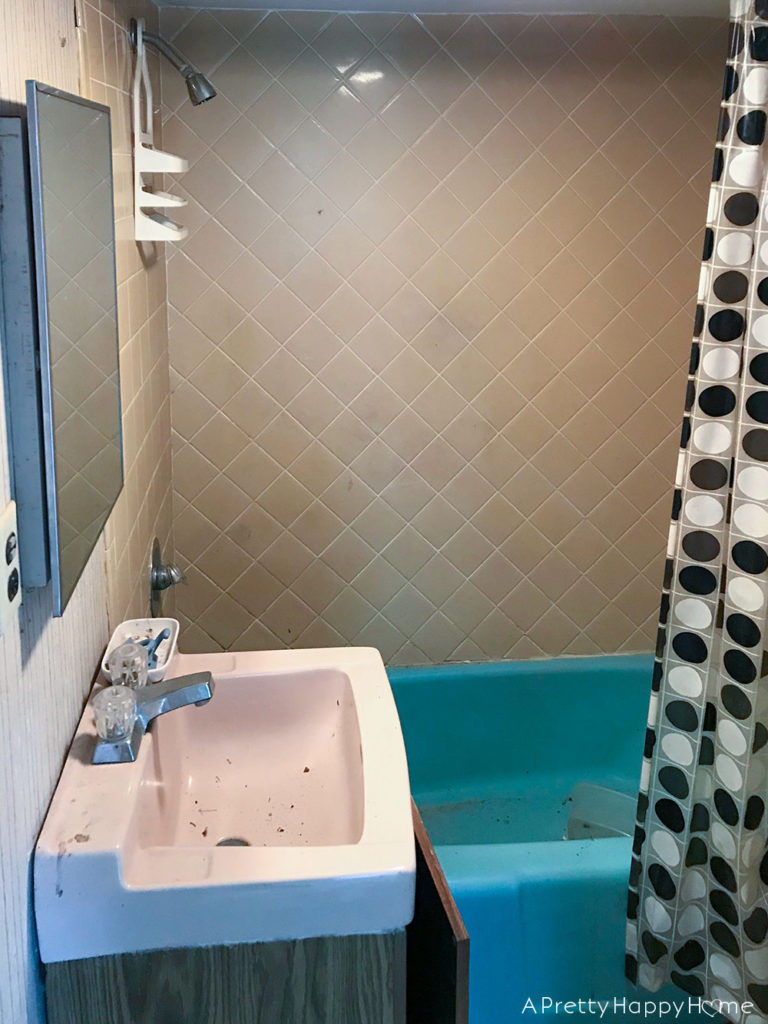
What shocked the life out of me was how well the tub and sink cleaned up when I finally got my hands on them.
I assumed the grout would be riddled with mold and mildew, but there was none.
Continuing the colorful theme, this bathroom also had a colorful toilet. A pink one.

We weren’t going to replace it because it was kind of cute and charming as far as toilets go.
However, there was one little problem.
The Carriage House had not been used for 20 or 30 years and the water had been disconnected at some point. When we reconnected the water and filled the toilet back up, we realized it had a fatal flaw.
Not so much of a flaw, actually, but a crack. A cracked toilet will not hold water.
Ask me how I know.
After the water was turned off and the floor was mopped, we shlepped that toilet out to the curb and waited for garbage day. Yes, we were those neighbors with a broken toilet sitting on the curb in front of our house. Classy.
Even toiletless, we knew this Carriage House interior had loads of potential. It’s one of the reasons we wanted to buy this property and were so happy when it became ours.
In the next post in this Carriage House interior series, I will share the things we did to breathe new life into this space.
Spoiler: It was messy and dirty, and more items ended up sitting on the curb waiting for garbage collection day.
Do you have any opinions on colorful sinks, showers, and toilets? I’d love to hear them. You can always comment on this blog post (I have to approve it first before it appears), email me here, or reach out via Instagram or Facebook.
Thanks for being here today! I enjoy sharing our home projects and life adventures with you. If you’d like another blog post to read, I’ve got plenty for your to choose from. You can start with one of these:
Insight on Repairing a Slate Roof


You May Also Like

Colonial Farmhouse Kitchen Mini Makeover One Year Later

How We Did Meeting Our 2022 House Goals
