How to Curl Fabric Ribbon – Corkscrew Ribbon
Am I the last one to know how to curl fabric ribbon? Have I been living under a rock?
All of those corkscrew ribbon hair thingies that little girls wear…I could have been making those instead of spending a fortune on them. Apparently, this ribbon can also be called corker ribbon. That just sounds odd to me, so I’ll just go with corkscrew.
The kicker is that it is super easy! Ridiculously easy.
All you need are:
1. ribbon (duh!)
2. wood skewers
3. tape, binder clips or anything else to secure the ribbon
4. cookie sheet to place your creation on
5. An oven
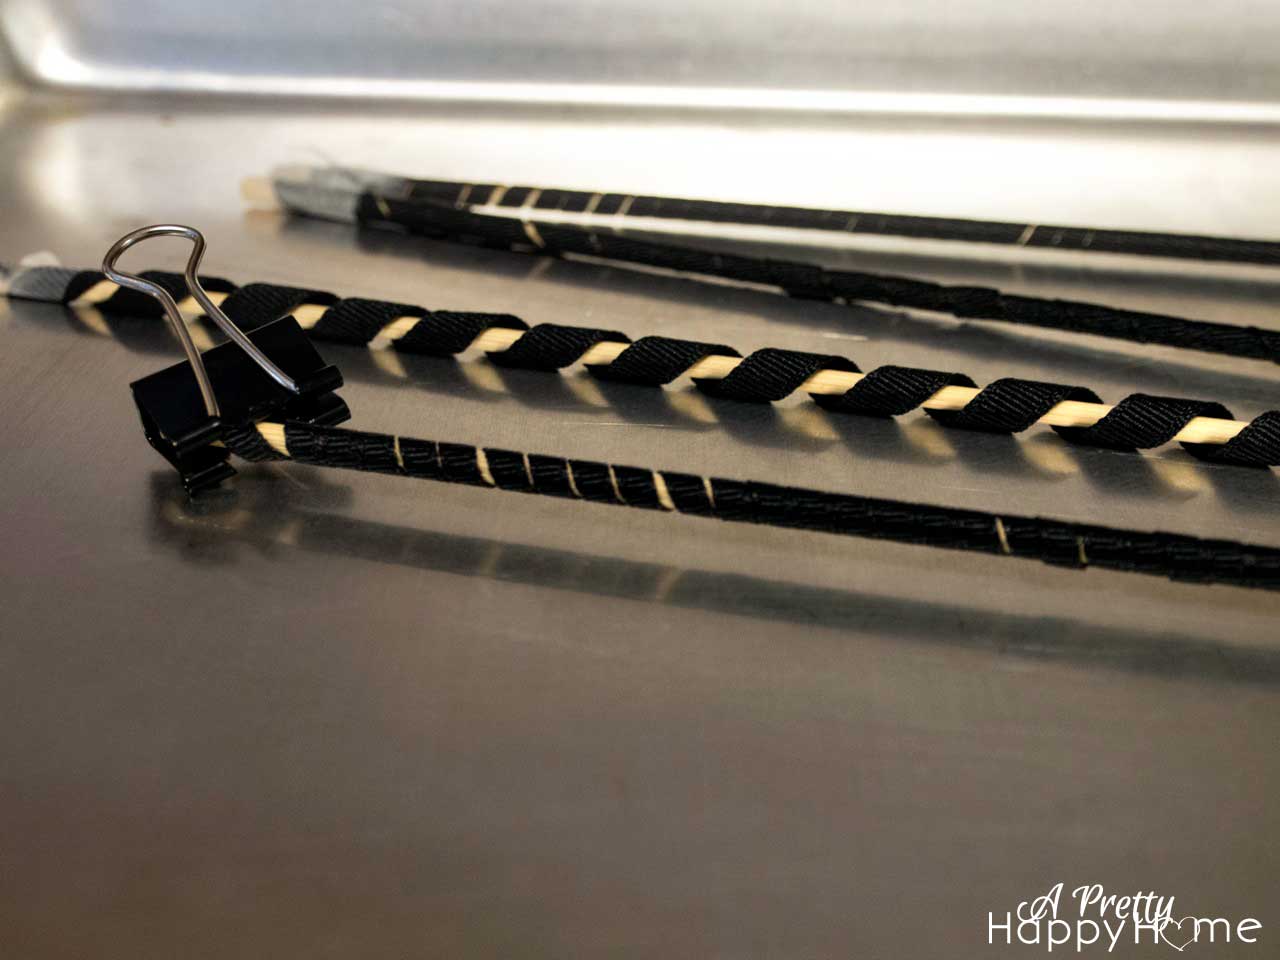
Secure one end of the ribbon to a skewer with a binder clip or tape. Then, start wrapping it around the skewer and secure on the opposite side with another piece of tape or a clip.
Place the ribbon-wrapped skewer on a cookie sheet and bake in the oven at 250 degrees for 20 minutes.
In the interest of research, I found a few things.
1. In lieu of binder clips, I’ve seen wood clothespins used. I couldn’t find one to try it myself.
2. I thought the tape might melt or be flammable. Nope (at least, not this time!). It was a little stickier to get undone, but it wasn’t bad.
3. If your ribbon becomes unsecured during the baking process, it’s going to make a bigger curl (last one on the right in the below picture).
4. The good news if this happens, you can re-bake it. I did it with this particular piece below and it turned out fine the second time.
While it seems incredibly strange to put something non-food related in the oven (and I don’t advocate that kids!), it worked like a charm! I would recommend checking on the ribbon during the process in case something is wonky with your oven. Please use the utmost of caution if you try this tutorial.
My only last remaining question: can you reuse the wood skewer for kabobs? I’m conflicted!
I saw a cool tutorial and I used this ribbon to make some happy hair clips for my daughter. I’ll show you soon!
Here are some other crafty posts you might enjoy!


