How to Fix a Sagging Wood Bench
So you have a sagging wood bench and want to know how to fix it?
You’ve come to the right place.
If there’s one thing we can help you avoid in life it’s the potential emotional and physical trauma that would come from sitting on a sagging wood bench and having it break.
No one wants that to happen to them.
But if it was caught on camera and you were okay…Alright, not even then.
Now on to the tutorial!
First of all, I’m going to assume that the wood that is sagging on your bench is not rotten. You need to double-check that.
If it is rotten and you need to replace it, that’s fine. You can still use this tutorial to prevent future sag.
Second, chances are your sagging wood bench is constructed differently than ours. While your fix might end up looking a little different than what is shown here, the concept of how to go about it will be the same.
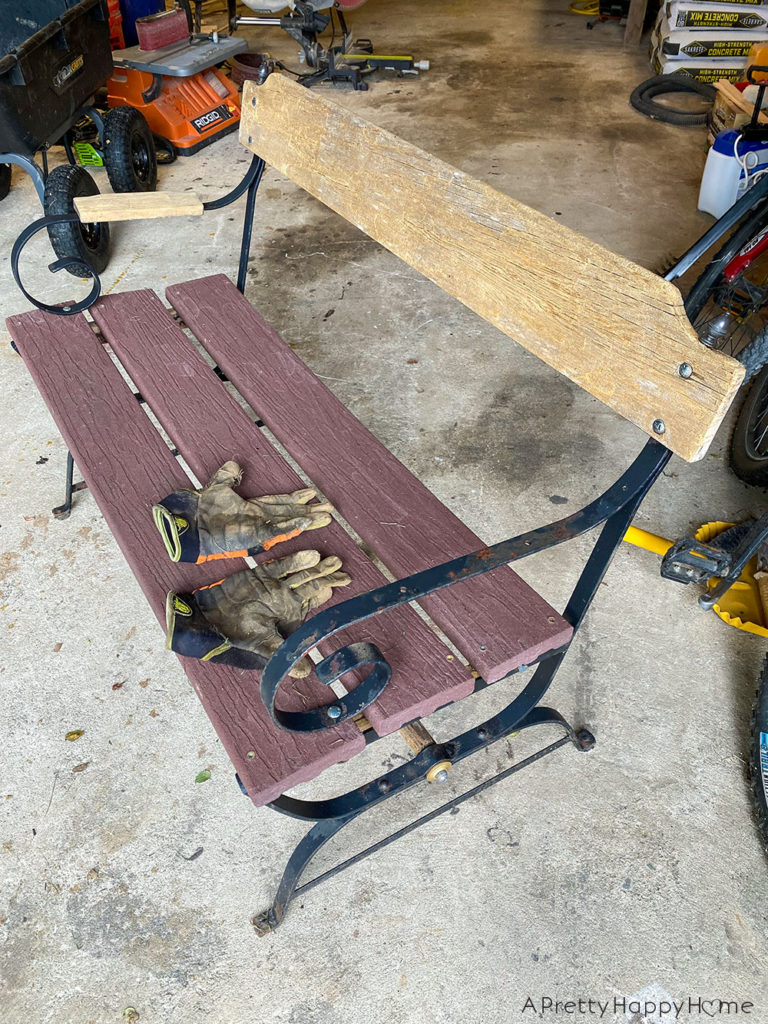
Here’s our sagging wood bench.
You might think it looks okay from this angle, but when you sat on it you were definitely aware of that hamburger you ate for lunch.
The seat part of our bench is actually made out of composite wood decking, not 100% real wood. The good news is that the composite decking is what saved this bench from absolute ruin because it is designed not to rot. It can sag though!
To prevent sag from occurring, the wood bench needs a support frame under the seat.
If we had more composite decking, we could have used that to make the support frame. We didn’t, so we ripped a 2×4 down to a 2×2 to use instead.
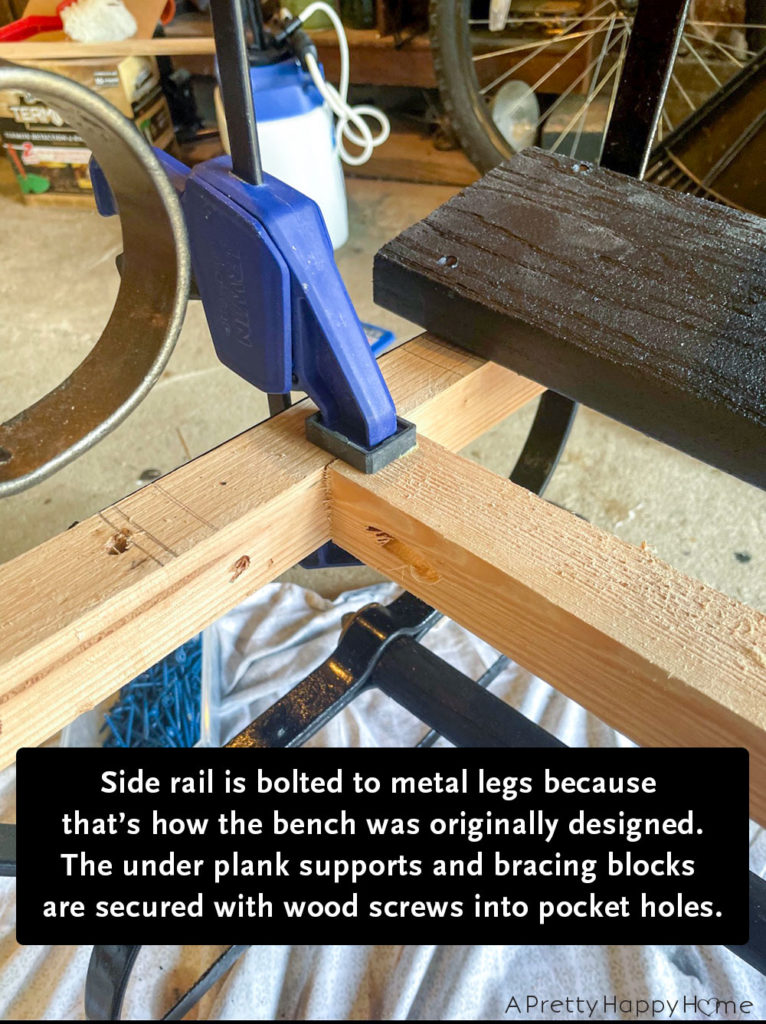
Your support frame is going to end up looking like a grid with three components: side rails, under plank support rails, and bracing blocks.
The side rails of the support frame need to rest on and be secured to the bench legs with bolts. Please note that our bench has metal legs and there is a designated spot for the side rails to sit and be secured.
The old side rails for our bench were rotting, but we were able to use those as a template for how to cut new side rails.
Our bench has 3 seat planks, so each seat plank received an under plank support rail secured underneath it. This support rail was in the form of a 2×2 cut to length and secured with pocket screws into the side rails.
The last step in building the support frame is to secure the under plank support rails to each other with stabilizing bracing blocks using pocket screws.
Last, you can reattach the bench planks that folks see and will sit on to the underlying support frame.
Tada!
You now have a wood bench that won’t sag for a very long time, especially if it is taken care of properly.
Please note that our no longer sagging wood bench received a cosmetic update as well as a structural update.
We stained the support frame, backrest, and seat planks with a solid waterproofing stain and sealer made by Behr.
Did you know you can stain composite decking?
It’s true! If you have non-capped composite decking, it can be stained.
Composite decking (like Trex brand) is a mix of plastic and wood fiber and it will take a solid stain. You can also paint it.
Our first instinct was to throw this wood bench away. It was covered in moss, the seat was sagging, and there was rust on the metal frame.
I’m so happy we took a second look at it and determined that it could and should be saved!
It looks like it will hold me and the hamburger I ate for lunch a million bucks now.
If you end up fixing a sagging wood bench or even building a completely new one, we’d love to see the pictures! Message us on the blog or tag us on social media. We can be found on Instagram or Facebook.
Project Resources:
Stain: Behr Solid Color Waterproofing Stain and Sealer in black
Spray Paint for the arms: Rustoleum Antique Brass
Thanks for being here today! Here are some other posts you might find helpful!
How to Turn a Tub/Shower Combo into a Closet Without Causing Damage
How to Remove a Dog Door from a Wood Door AND Repair the Damage
Quick Fix for the Rattling Windows in the Back Door
*affiliate links in this blog post*


