Curved Fieldstone Wall: Part 12, Reveal 2nd Wall Section
It’s Reveal Day! Welcome back to our Curved Fieldstone Wall series. I’m so glad you’re here.
In August, we decided to reconstruct the crumbling fieldstone walls in front of our house. We reused the original stone to build the new wall. We used lime mortar to keep it historically accurate. We added a little flair to the wall design to call it our own.
After 75 days of solid work, we can finally call this fieldstone wall complete. Thank. Goodness.
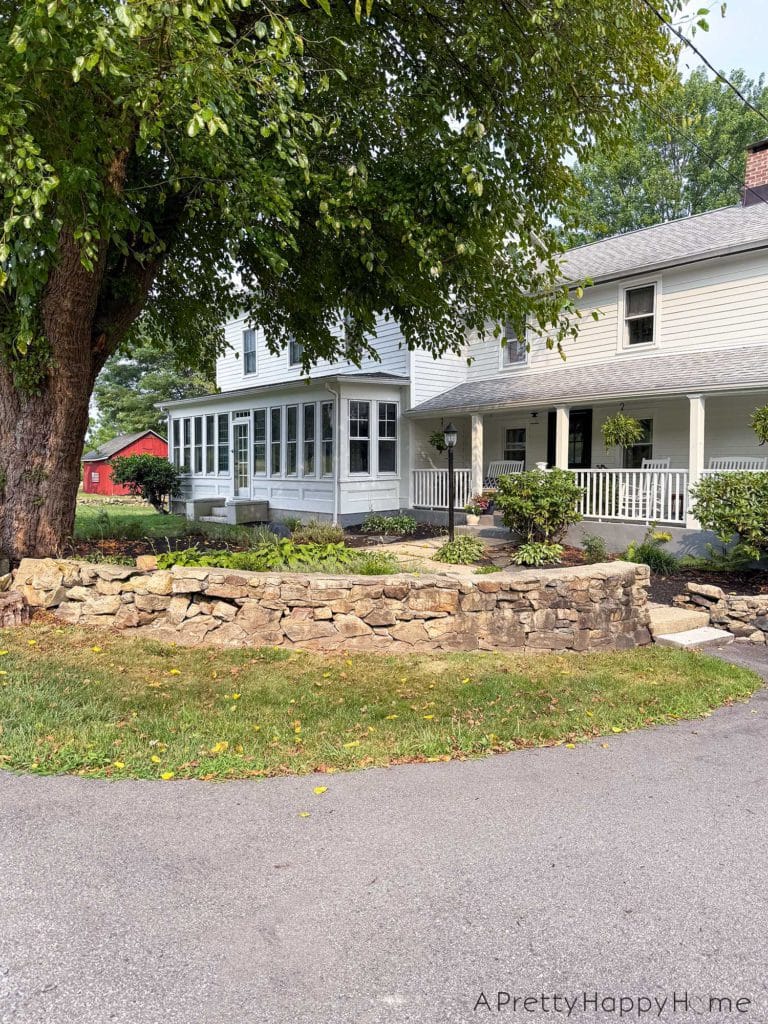
Here’s how it started. The wall definitely exuded a certain old house charm if you didn’t look too closely to see that it was barely hanging on. This wall was nothing if not highly relatable.
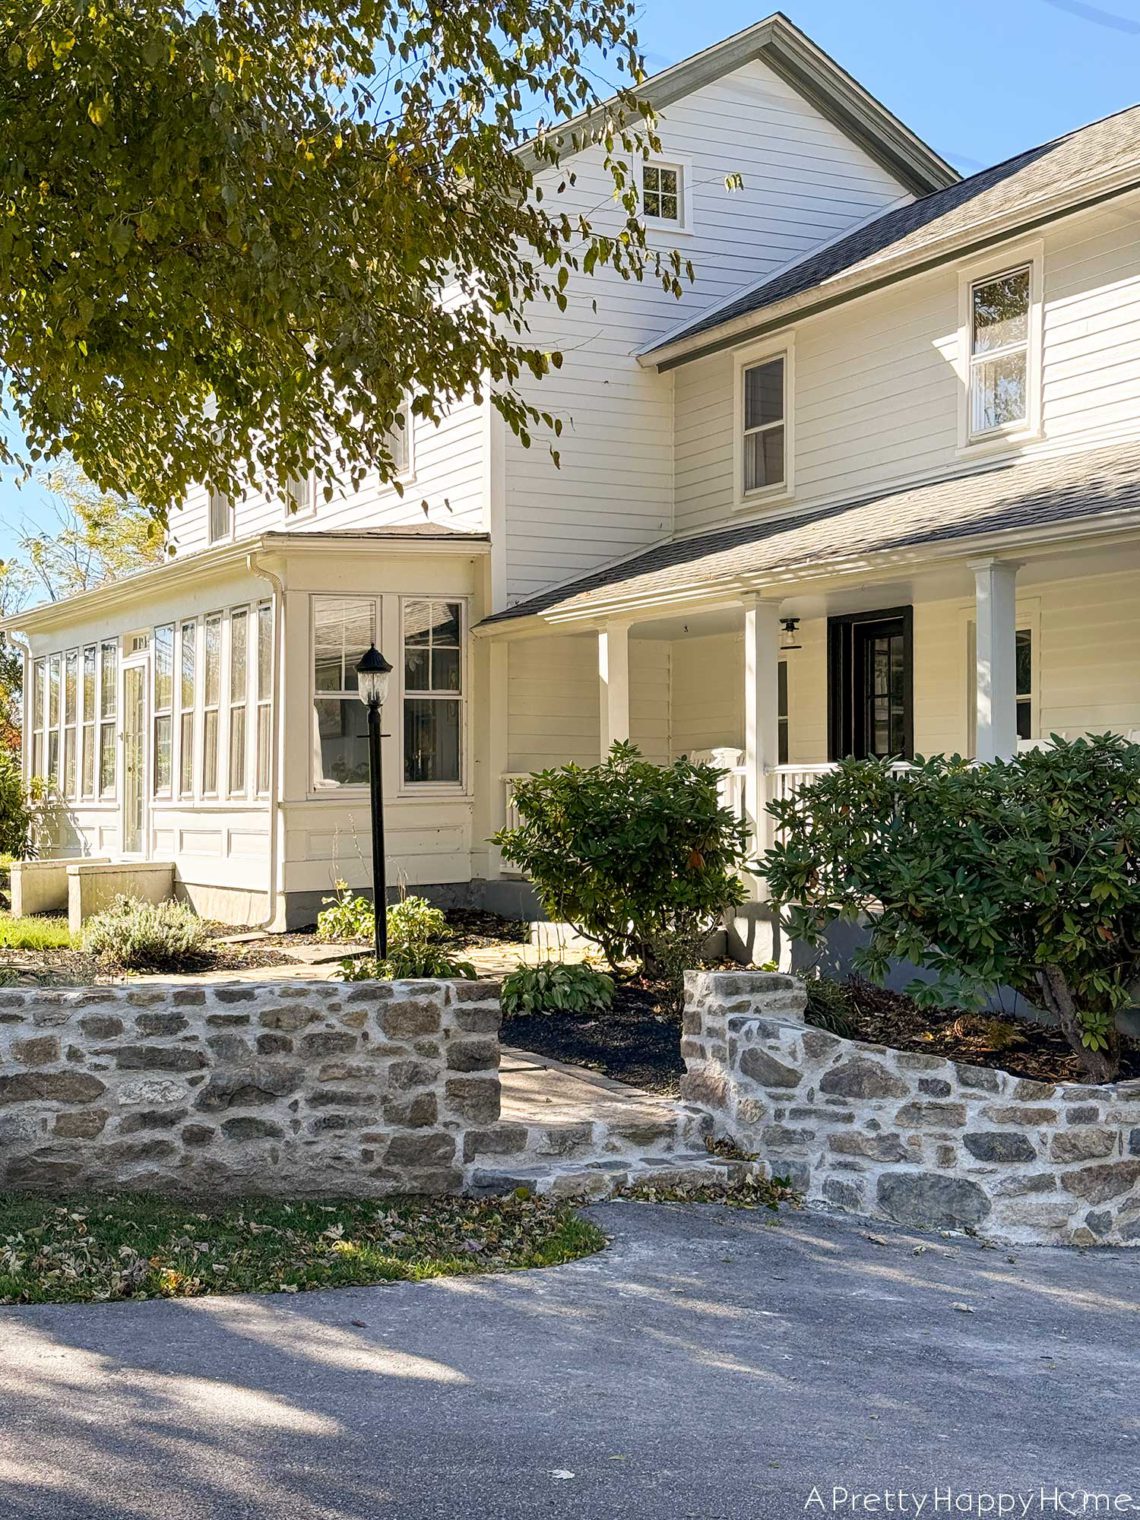
Now, give me a little, “Swoop! There it is!”
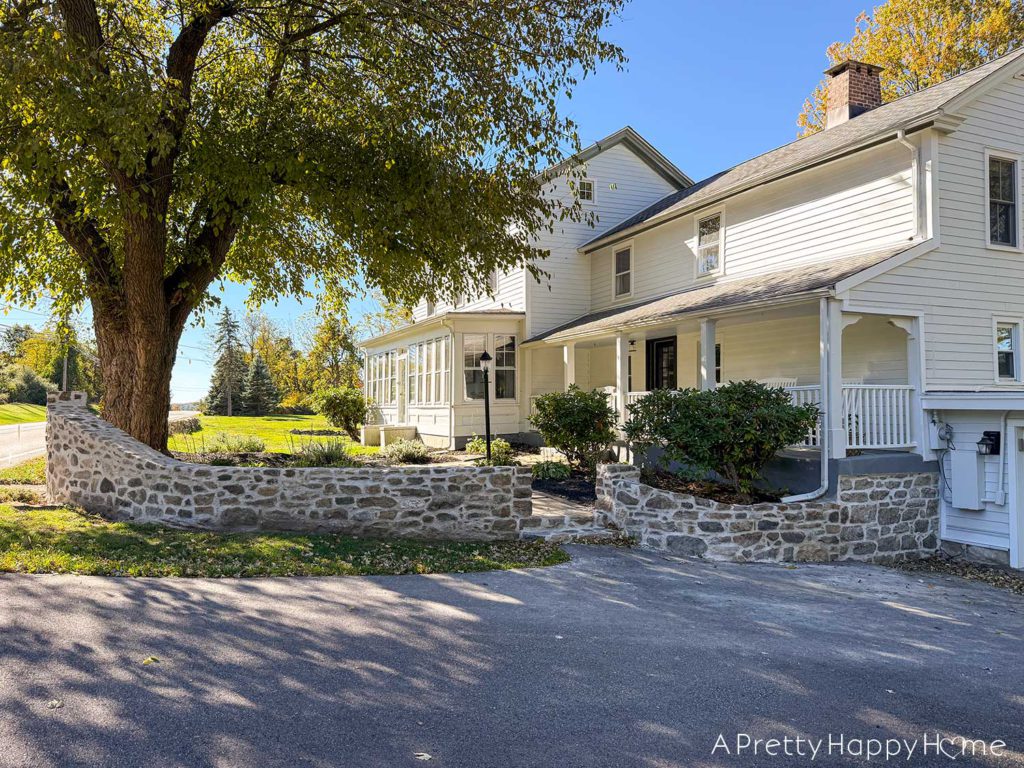
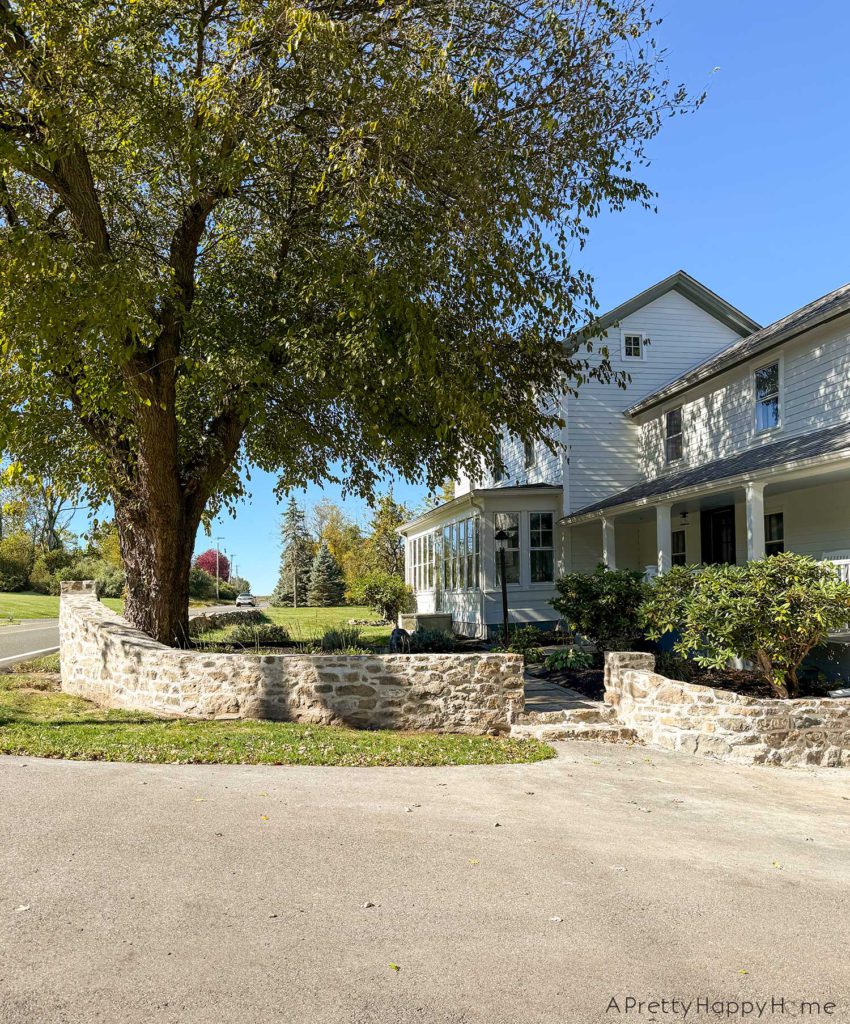
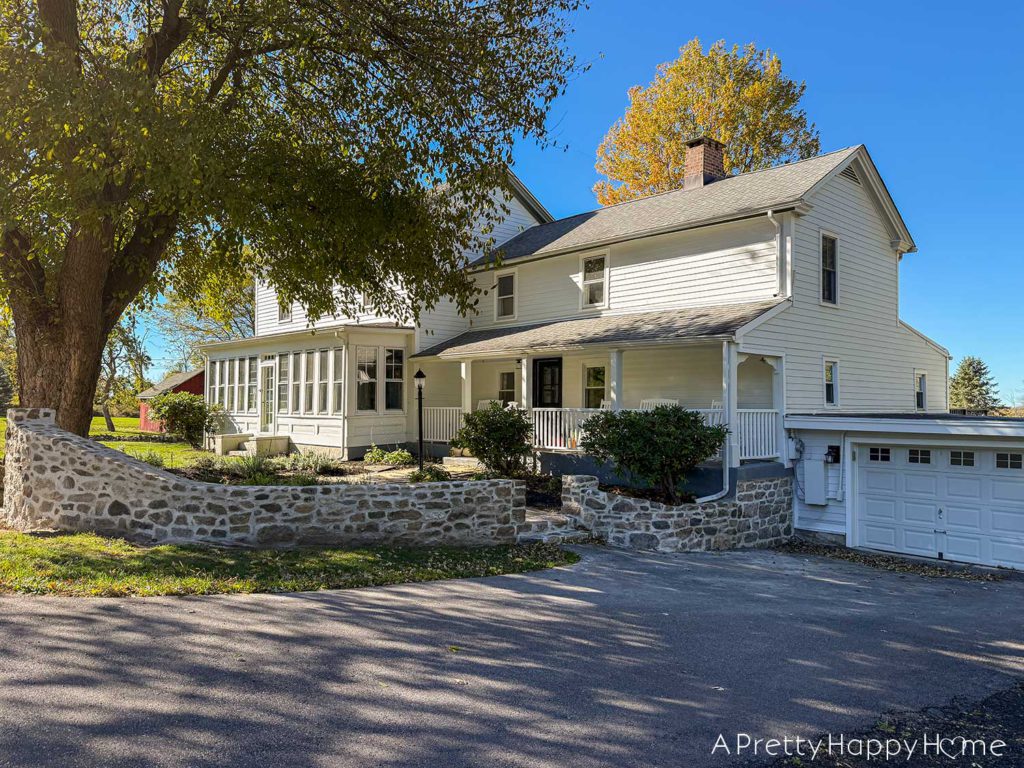
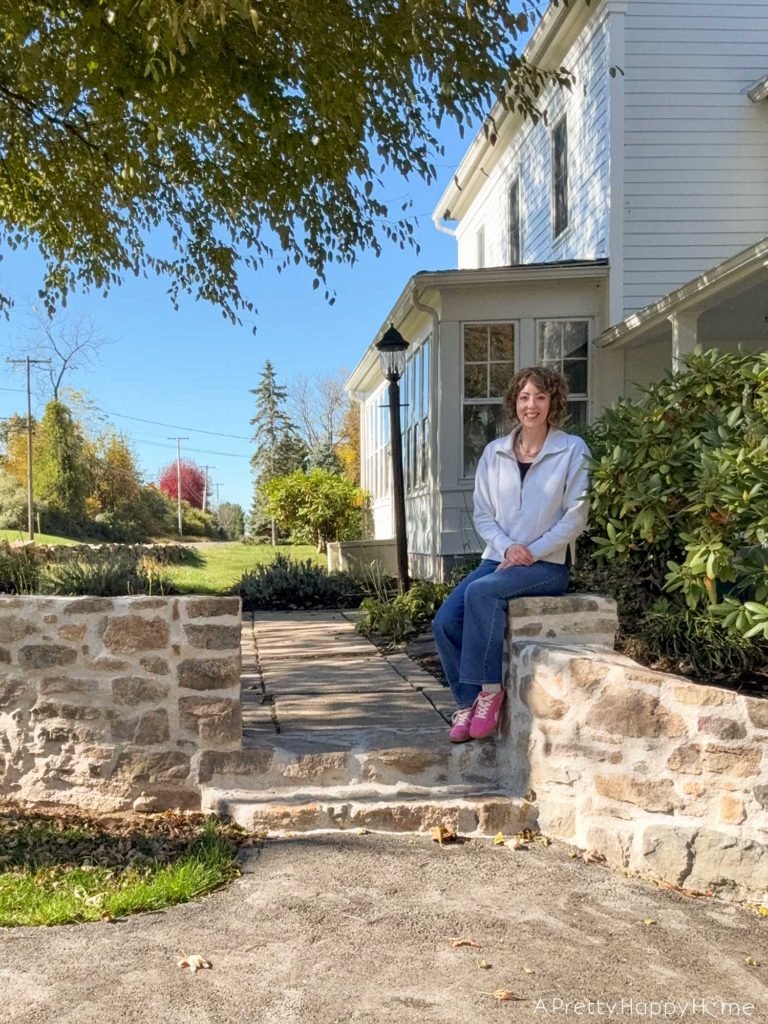
Because here’s the finished wall.
I can’t believe I built this!
Below is another before shot so that you can appreciate the transformation.
We don’t embark on major projects “just for funsies” around here. Who has time for that? We wouldn’t have dreamed of messing with these walls if they weren’t cracked and crumbling beyond reasonable repair.
The newly rebuilt curved fieldstone wall is, obviously, a huge change in our home’s curb appeal.
My goal was to reduce the curb appall around here, and make it look like we care while being true to the historic nature of our home.
One of my kids said the new wall looks “too fancy,” so I guess I overshot that a little.
If you ever forget that there’s no pleasing everyone, you don’t need to share your business on the internet. Just have kids. They’ll take care of that for you. Ha!
You might think that changing the wall shape by adding the swoops was what took the build to the next level. Personally, that was the part of the project that made me question all my life choices.
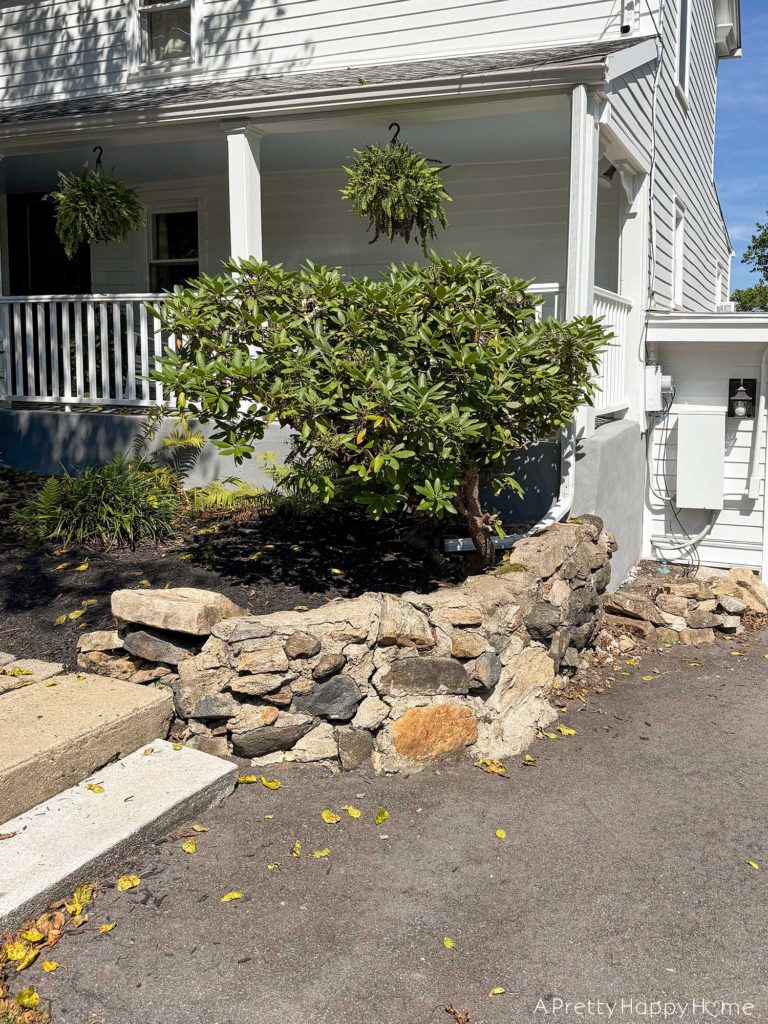
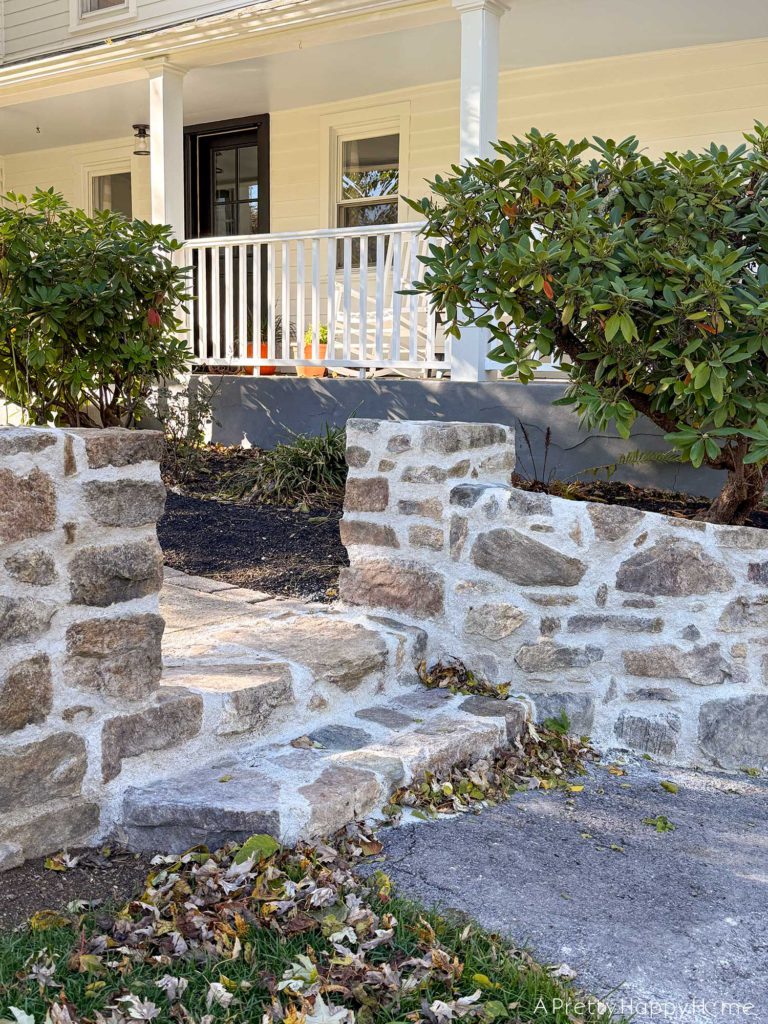
What I think took the project to the next level was adding the stone steps and revealing the stone on the side of the porch. In person, those details tied everything together and elevated this project in a way that we hadn’t anticipated. In fact, those two things weren’t even in the original project scope. They were “last-minute, what the heck, you only live once” additions.
Now, we want to expose more of the stone foundation around the porch, so maybe we WILL do a major project just for funsies. Never say never!
When you think of a “major” project, cost always comes to mind.
How many arms and legs do you think it would have cost us to hire this project out?
If you guessed all of them and a kidney, too, I think that would be in the ballpark.
I didn’t have this curved fieldstone wall quoted. Most masons would not build a wall using historic techniques, so I didn’t even bother, but I can tell you all the cost would be in the labor. It takes a tremendous amount of time to piece together a puzzle with irregularly shaped rocks.
We have easily spent 300 hours on this project. That’s probably a gross underestimate.
If only one mason was working on it and they only charged $50 per hour, which is low, that’s $15,000 for labor.
In terms of hard costs, we spent about $1,500 TOTAL for sand and lime. And now you know why we DIY.
The rocks were free because we reused the rocks from the original wall and other walls on our property. One thing we don’t have a shortage of around here is rock.
Earlier today, before I started writing this post, a mail lady – not our mail lady – but one I see in the area, stopped her mail truck while I was on my walk to tell me she loved how the wall turned out, and she was so happy for us.
Her encouragement came at just the right time. I’m still in the nit-picky phase of the project. Perhaps you can relate.
I do it every time before I decide what I want to learn to apply for next time, treat myself with a little more grace, and move on to the next thing.
Because, holy cow! I built a freaking wall! Not my husband. Me! This feels like a huge accomplishment, and I’m pretty proud of that.
(To be fair, he’s no slacker. He did all of the demolition and moved some heavy rocks. We often divide and conquer to get things done.)
If you’re sad that this project is complete, dry your eyes and prep your popcorn. This is just phase one of this fieldstone wall project. The weather is too unpredictable for us to start phase two, but come spring, all bets are off.
We have to rebuild another section of the fieldstone wall so that the gate has a place to latch. And, yes. It’s not lost on me that it’s going to be a lot of work to simply be able to latch a gate.
I’ve said it before, and it bears repeating. We don’t do things just for the sake of having something to write about. We would do what we do even if no one was watching or reading about it, but it is more fun to share the process with friends. Thank you for being a part of our world and for cheering us on from afar throughout this entire project. The echoes of your kindness cannot be contained.
If you’d like to send us a note, you can comment on this blog post, email us here, or reach out via direct message on Instagram or Facebook.
Happy DIYing.
P.S.We prefer to keep photos true to life. For privacy reasons, select identifying features have been removed from the photos of the surrounding area.
P.P.S. I took these photos before we did any major cleanup of the area. Hopefully, once we pressure wash the driveway, it will look clean again. We also need to plant grass seed in front of the wall.
Thank you for following along with our DIY adventures. I appreciate you! If you missed any of the posts in this series, you can catch up here:
Curved Fieldstone Wall: Part 1, The Plan
Curved Fieldstone Wall: Part 2, Demo Section 1
Curved Fieldstone Wall: Part 3: Progress Section 1
Curved Fieldstone Wall: Part 4: Reveal Section 1
Curved Fieldstone Wall: Part 5: Porch Wall
Curved Fieldstone Wall: Part 6, Demo Section 2
Curved Fieldstone Wall: Part 7, The Stairs
Curved Fieldstone Wall: Part 8, Progress Section 2
Curved Fieldstone Wall: Part 9, The Salt Problem


12 Comments
Pamela
Well it’s gorgeous…AND fancy but not too. You have every right to be proud of your work and the result. It makes a very big difference’s in your curb appall, very funny BTW…I’m borrowing that.
annisa
Thank you, Pamela!! I appreciate it SO much. P.S. Borrow away!
Laura L
Annisa!!!! It looks SO good! One thing I think of everytime I see the picture though is that you need a line of sugar pumpkins adorning the walls. Hahaha I cannot wait to see the other side and the new gate get added. But, I guess I will have to since we are heading into the colder months. So proud of you!
annisa
Thank you, Laura!! Your message made me feel so good! I’ll have to remember do the pumpkin thing next year. Someone else suggested it too, and I’ve not seen anyone do that around here. On fence posts, yes, but not on a stone wall.
Teri
This is nothing short of amazing. You should be so proud of yourself. Not only are you an entertaining writer but you build historic stone walls as well! Can’t wait for the next project!
annisa
Aw, Teri, THANK YOU! I promise you won’t have to wait very long for a mini stone project. Just a little one. But don’t tell anyone. It’s a surprise. LOL.
Aggie Ansell
In Australia when someone does something impressive we say
You little rippa
What a rippa wall
You did a rippa job
Well done!
annisa
Australians and Australian lingo are so cool. Thank you, Aggie!!!
Nancy B
I expected this would be worth waiting for, but oh, my gosh!! It’s beyond gorgeous, and, not to be disagreeable with your offspring…just right for The House! You deserve all the applause your audience is sending your way!
annisa
Thanks, Nancy! I appreciate you SO much. Thank you for all of the love and encouragement. Don’t worry about being disagreeable with my offspring. Pretty sure kids can be contrary just for the sake of being contrary from time to time. LOL!
Carla Erickson
Annisa, your rock wall is beautiful and amazing! It was definitely a labor of love! Well done!
annisa
Oh, Carla! Thank you so much for taking the time to tell me that. I appreciate it so much! And, yes. It was a labor of love.