DIY Polymer Clay Leaf Dish with Heart Detail
Looking to make a handmade gift for Valentine’s Day or Mother’s Day? How about making a DIY Polymer Clay Leaf Dish? Oh, but this is not just any leaf dish. No, no. We’re upping the ante with a sentimental twist – a heart detail right in the center of the leaf.
Be. Still. My. Heart.
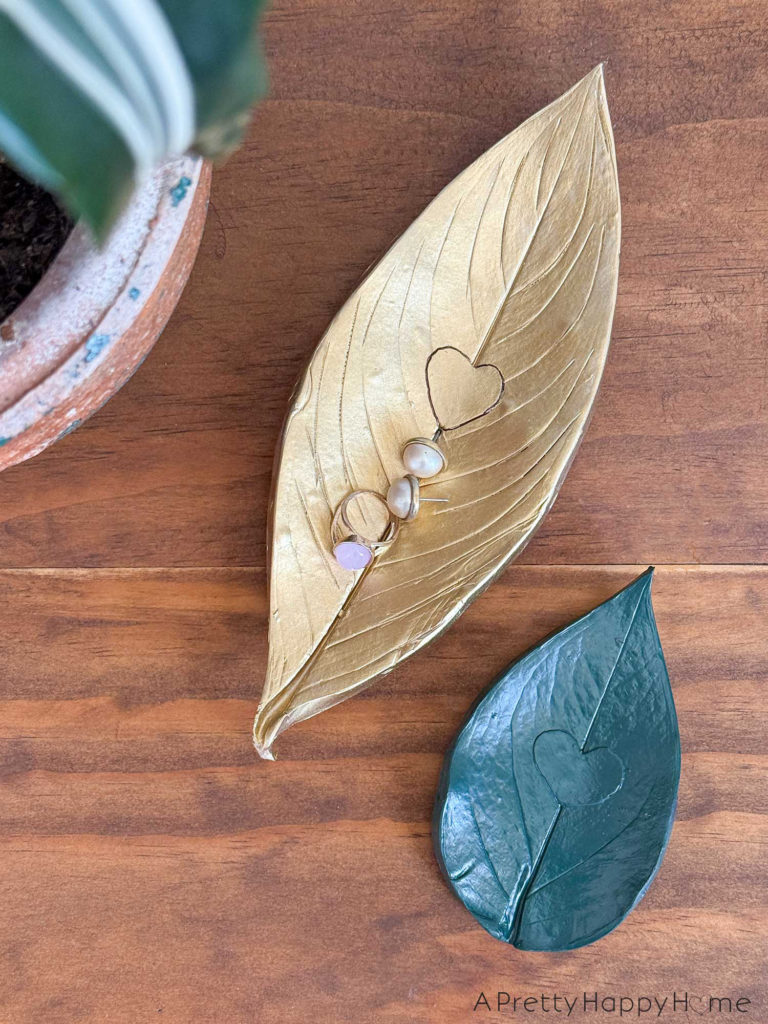
The secret to this heart detail: I cut a heart shape out of the leaf right before pressing it into the clay. The clay pushes through that empty heart-shaped space, creating a smooth, raised heart surrounded by the textured veins of the leaf.
If this leaf trinket dish, made with love, doesn’t make the recipient of this handmade gift’s heart melt, you can keep it for yourself.
Kidding! They are going to love it, and so are you.
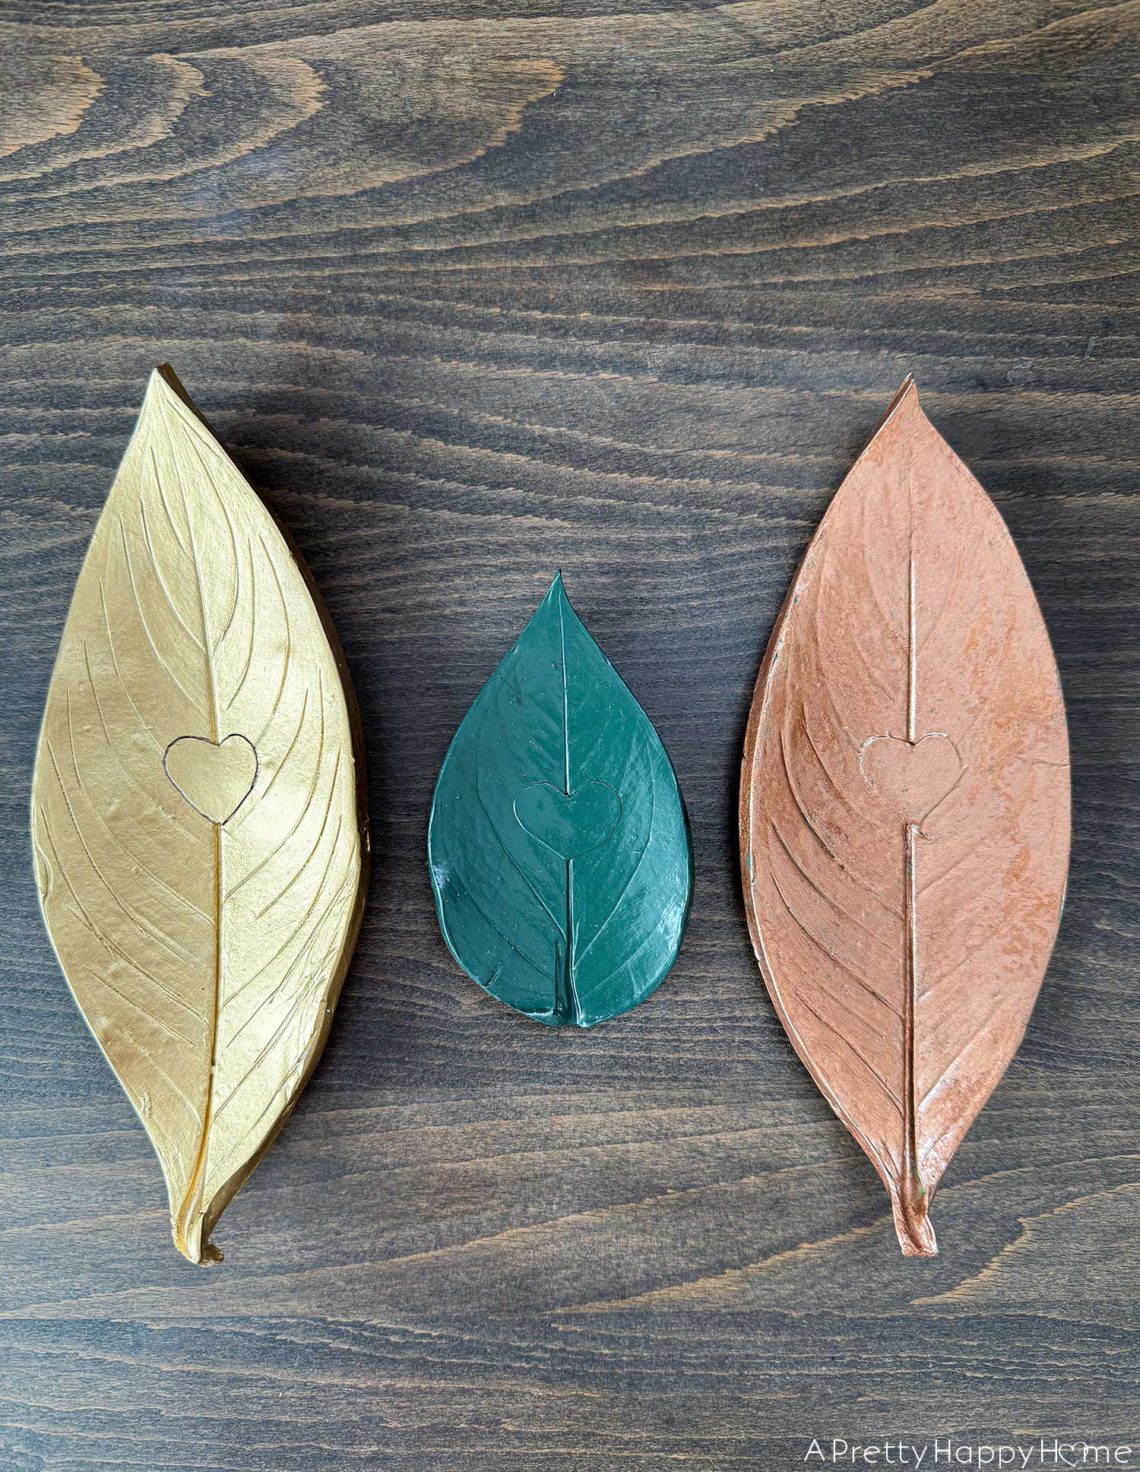
In fact, I’d make more than one.
Since I occasionally take my own advice, I made three.
Supplies Needed to Make a DIY Polymer Clay Leaf Dish with Heart Detail:
Sculpey Polymer Oven Bake Clay
freshly picked leaf
rolling pin
silicon mat or something else to roll the clay out on
oven-safe dish or aluminum foil
an oven (Obvious, just checking who is paying attention!)
craft knife
felt-tipped marker
small paintbrush
acrylic or other clay-safe paint
clear clay-safe sealant like Sculpey Glaze
Directions for Making a DIY Polymer Clay Leaf Dish with Heart Detail:
Step 1: Select a Leaf
Pick a leaf with textured veins. I used a leaf from one of my houseplants.
Step 2: Draw a Shape to Cut Out
Draw a heart (or any shape) on the back of the leaf with a marker.
Step 3: Cut Out Shape
Use a craft knife to carefully cut out the heart from the leaf. Set aside.
Step 4: Prep Your Oven Bake Clay
Roll out your Sculpey clay to a 1/4-inch depth using a rolling pin.
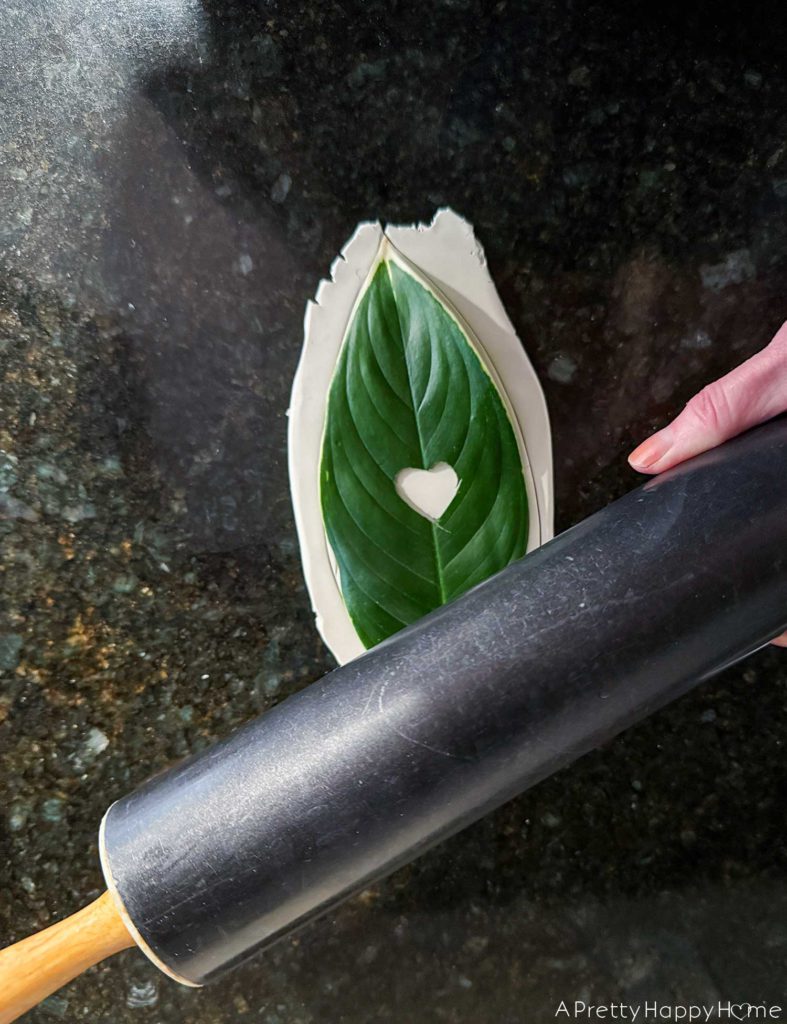
Step 5: Make Your Leaf Impression
Position your leaf (vein side down) on the clay. Use the rolling pin to press the leaf into the clay. Carefully pull the leaf off the clay. Then, use your craft knife to cut around the leaf shape, removing the excess clay.
If you REALLY want to up the sentimental ante, you could also use your craft knife to carve the initials of you and your beloved inside the heart. I didn’t think of that until after I was done making mine.
Step 6: Prep for Baking
Prep the clay leaf for baking by positioning it in a curved, oven-safe bowl. Most trinket dishes have a slight upward curve to help them hold your…trinkets. Hence, the curved oven-safe bowl.
If that doesn’t give you the dish shape you want, you can make an aluminum foil form to gently lift the sides of the leaf up to make it curved. I put my leaf in an oven-safe glass pan (it didn’t stick), and propped the sides up with an aluminum foil “wedge.” It wasn’t exactly perfect, but neither are leaves, and no one’s critical of that, so I let it go.
Step 7: Bake
Bake according to the manufacturer’s directions. My trinket dish was a little thicker than it should have been, so it took longer for it to harden.
Step 8: Finish and Celebrate!
Once cool, you can sand any rough edges and paint the dish if you want. You can also outline the heart to make it stand out more. The clay itself doesn’t need sealing, but you may want to protect your paint finish with something like Sculpey Glaze or another polymer clay-compatible sealant. Not Mod Podge.
Now it’s time to celebrate making the loveliest leaf trinket dish! You do fantastic work!
Well, be-leaf it or not, I’ve typed the word leaf so many times in one blog post that it now looks all wrong to me. That must mean it’s time to wrap this up.
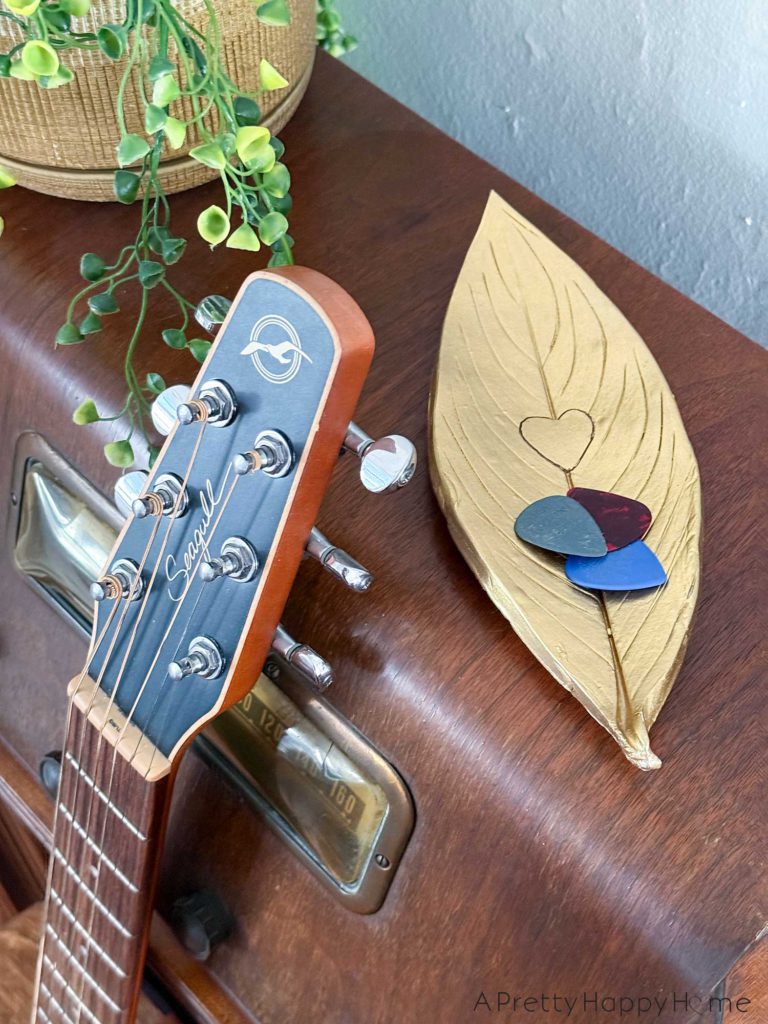
Whether or not you make a leaf trinket dish just like this one, I hope it inspires you to make something else that you or someone else will love, use, and enjoy.
How do you think my leaf dish turned out? Have you made anything with polymer clay lately? Let me know. Comments are like little treats for my brain. So, help a lady out! You can comment on this blog post, email me here, or reach out via direct message on Instagram or Facebook.
Happy Crafting!
As always, thanks for hanging out with me today. Here are some other blog posts you might love.
How to Make a Wood Heart Bracelet
DIY Embroidered Heart Sweatshirt for Valentine’s Day
*affiliate links in this blog post*


2 Comments
Pamela
How sweet ❤️
annisa
Thank you, Pamela!