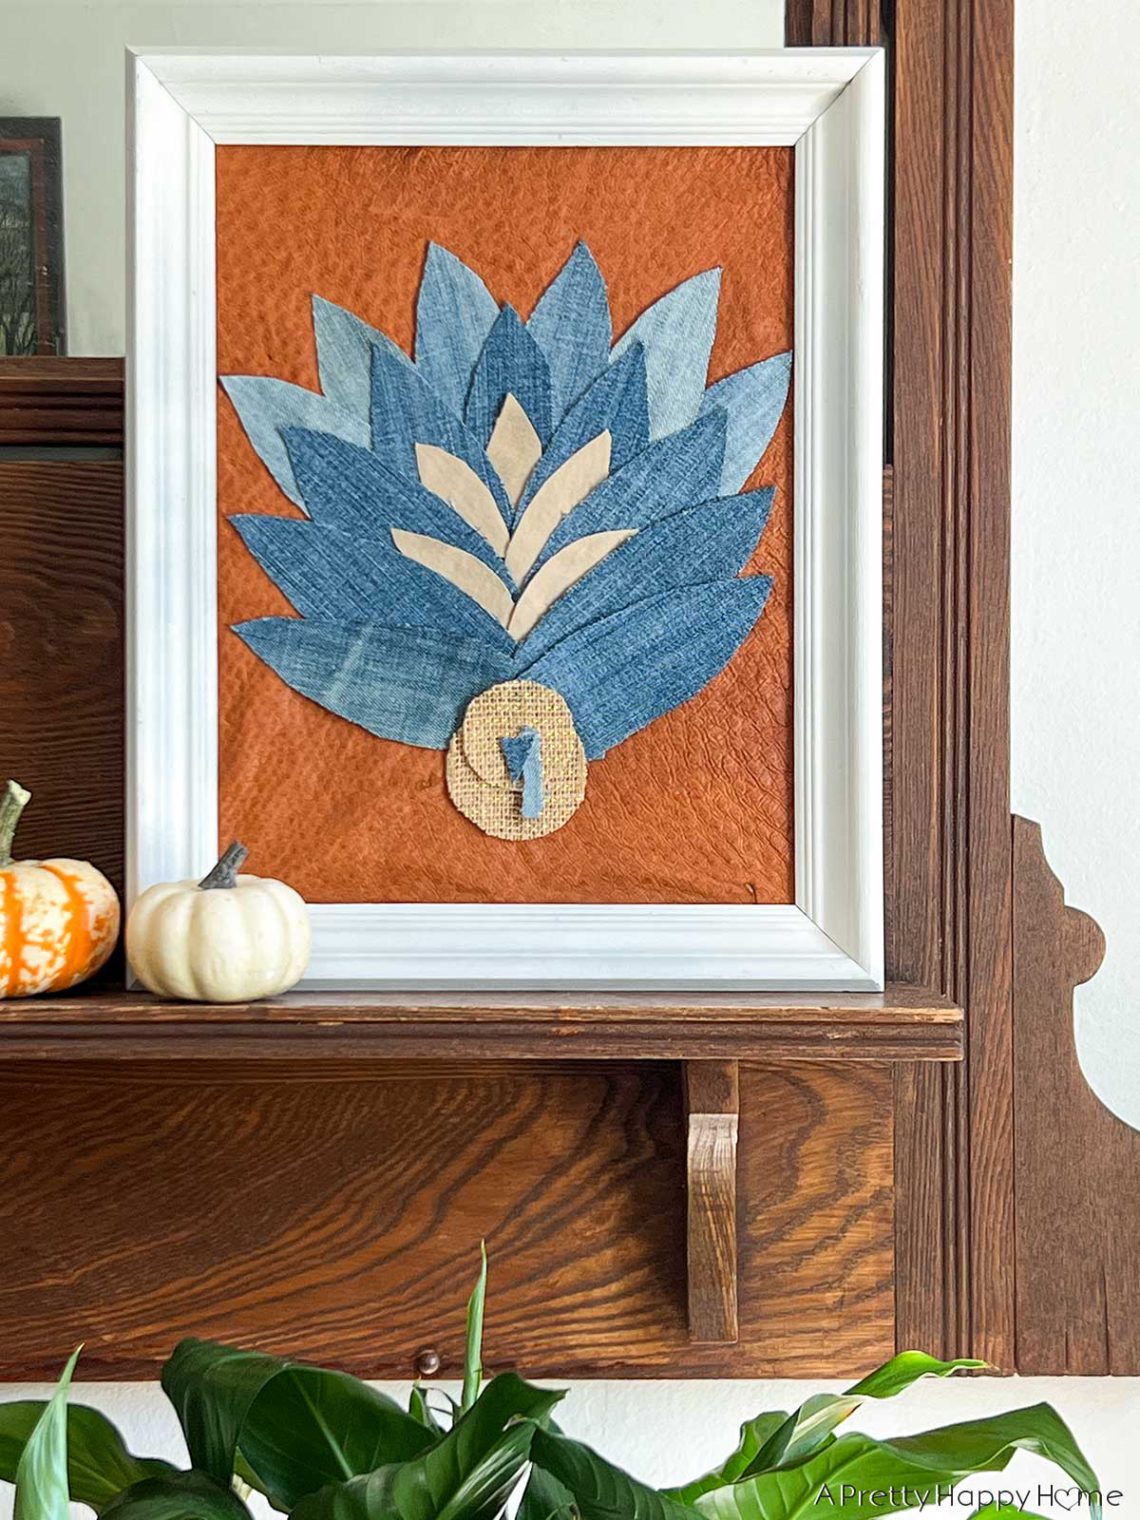
Denim Turkey Craft – Upcycle Denim Jeans
Gobble, gobble! It’s time for a denim turkey craft using upcycled denim jeans.
This is the craft you never knew you wanted.
Until now.
We often slide right from Halloween into Christmas in the U.S., but this denim turkey craft will give Thanksgiving its due.
Let’s get started.
Materials Needed For This Denim Turkey Craft
- old denim jeans and khaki pants cut into shapes for turkey tail feathers, beak, and wattle
- scrap of contrasting fabric, felt, or ribbon for the turkey body and head
- contrasting fabric or paper for the turkey background
- scissors
- picture frame of any size (I used a 10×14 frame)
- marker
- optional: hot glue

Denim Turkey Craft Instructions:
Step 1: Pick a frame to hold your denim turkey.
It’s important to know the size of your frame so that you know what size to make your turkey.
I’m using a 10×14 frame.
Step 2: Cut out and place a background for your denim turkey art.
If you don’t want to use the cardboard backing of your frame for the background that your denim turkey is going to sit on, you’ll need to pick a contrasting fabric or piece of paper.
I’m using a leather scrap. You could also use wrapping paper or construction paper. It just needs to be a color that will contrast with your denim turkey.
Cut the background fabric or paper to size (mine was 10×14 inches) and lay it on top of the frame’s cardboard backing. You can secure it if you want with hot glue. I didn’t secure mine because it would be held in place by the frame’s glass.
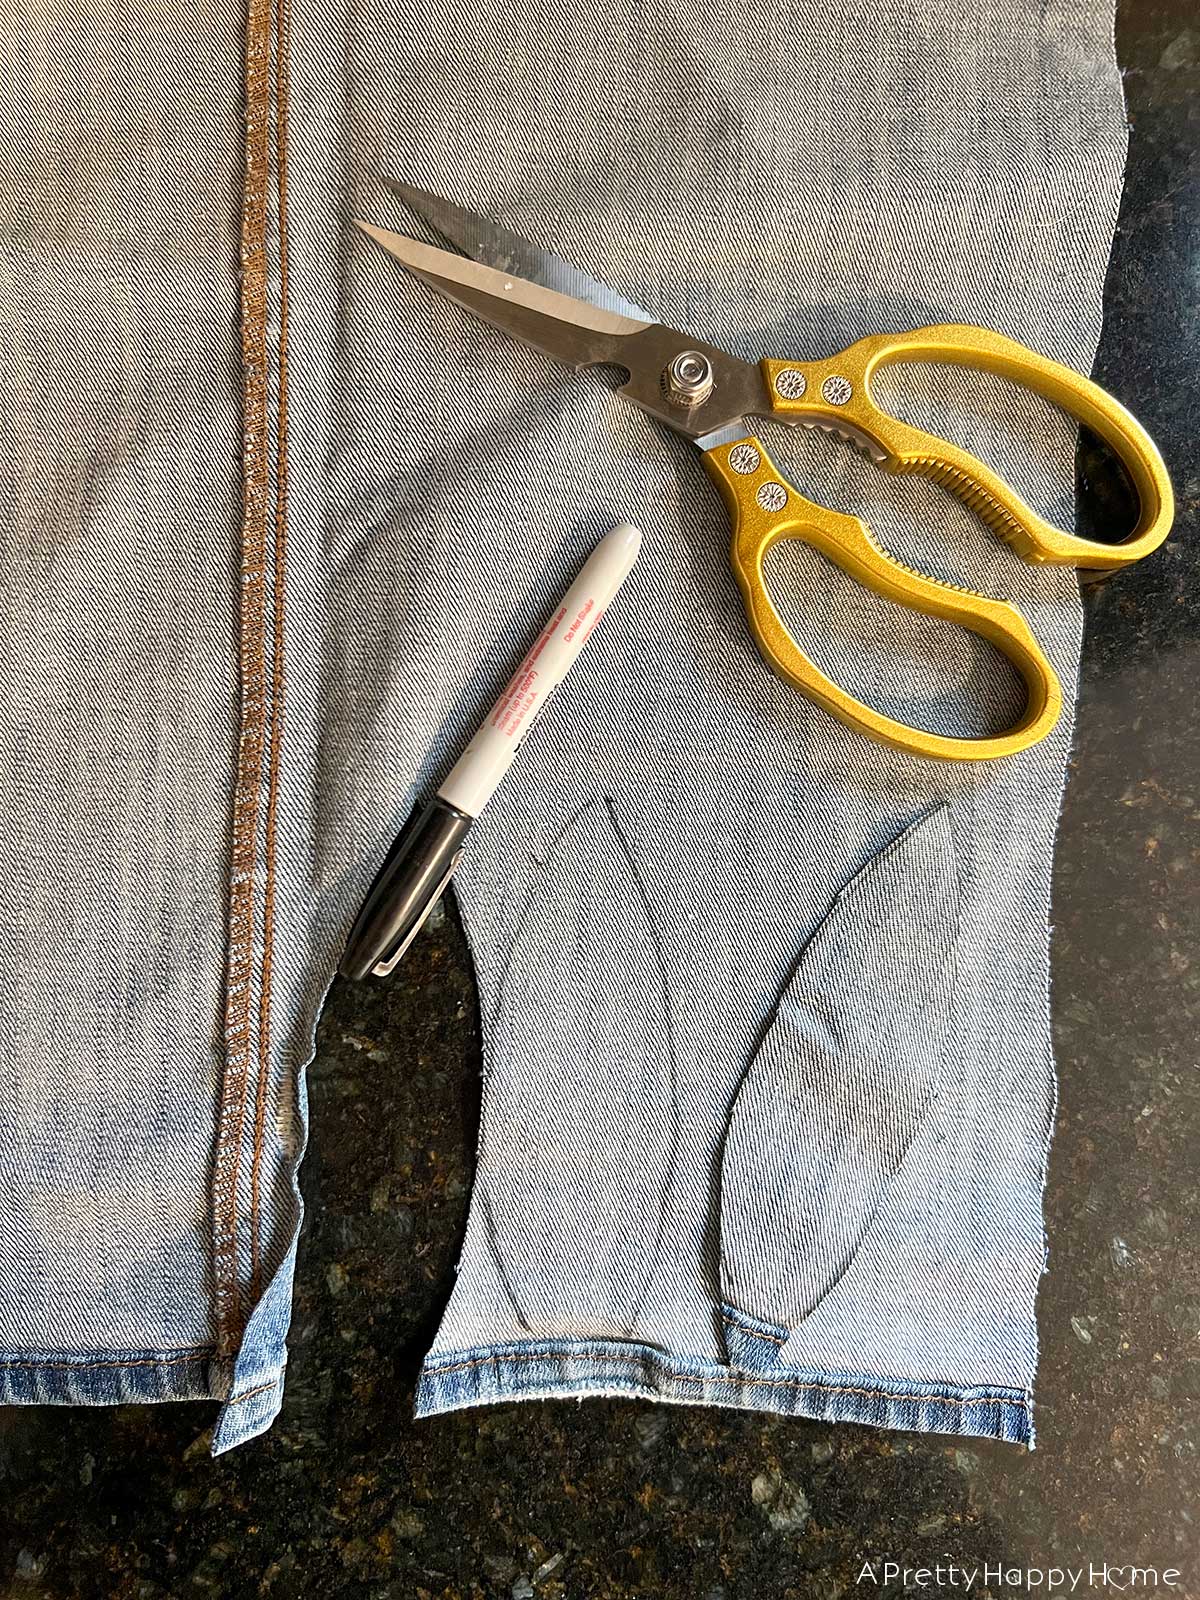
Step 3: Cut out your denim tail feathers and position them in place.
Using a marker, I freehanded a “leaf” shape on the inside of the denim to use for my feather. I cut one out and used that as my template to trace and cut out the remaining denim feathers. I specifically cut feathers out from different parts of the denim jeans so that I would get some color variation.
If you want to use contrasting colored tail feathers like I did, you can cut those out now too. My tan-colored tail feathers came from a pair of khaki pants and are shorter than the denim tail feathers.
My denim feathers are approximately 5.5 inches long and I used 15.
I also added 5 tan-colored feathers that are approximately 3.5 inches long.
When you have enough tail feathers, position them on your background in an overlapping pattern. You can glue them down if you want. I did not because they would be held in place by the glass of my picture frame.
Step 4: Cut out the head, body, beak, and wattle of your denim turkey.
Cut out two circles for the head and body of your denim turkey using a fabric that contrasts with the denim tail feathers. Make one of the circles slightly smaller than the other. I used a burlap Christmas ribbon to make my circles.
For reference, here are the dimensions I used. Yours will likely be different.
circle for turkey head: 1 3/4 inch diameter
circle for turkey body: 2 1/2 inch diameter
triangle for nose: 3/4 inch long
wattle: approx 1 1/2 inches long
eyes: I didn’t end up using the eyes but the ones in the photo have about a 1/4 inch diameter

Position the larger circle at the base of the denim tail feathers. This is the body of the turkey.
Position the smaller circle on top of the larger circle. This is the head. The head should be positioned slightly above the body.
Cut out a small triangle from the denim for the beak.
Cut out a curved worm shape for the wattle out of denim. This one is tricky to cut out. It’s easier to just accept that it’s supposed to look funny.
If you want eyes, you can cut those out of denim too. I decided they looked too silly for the subtle look I was going for and opted not to use them. Do what makes you happy though. It’s a turkey craft. It’s going to be a little silly. There’s no need to overthink it.
Step 5: If you want, glue everything down.
If you want to secure the denim turkey parts in place, now is the time to do it. I’d use hot glue for this part.
You’ll have to do this step if you are using a frame without glass.
After I made my turkey, I ended up making it a second time because I realized I couldn’t take good pictures with glass in the frame. I removed the glass and then had to glue enough of my denim turkey in place so that it wouldn’t fall over for pictures. *sigh*
Step 6: Add the frame and hang.
After every single part of your denim turkey is positioned just where you want it, glued or not, put your frame on top of the turkey. Make sure it still looks good. Then carefully flip the frame over to secure it in place.
Now you’re ready to hang your denim turkey. Good job!

What I love the most about this denim turkey craft is that it has ‘choose your own adventure’ vibes to it depending on the type and style of material you use to construct the turkey.
Every single one of you could make this denim turkey craft and it would look a little bit different, but equally fabulous each time.
What do you think of my denim turkey? Did it turn out better than you expected? I’d love to know. Unless you hate it, then you don’t worry about. Ha! You can always comment on this blog post, email us here, or reach out via Instagram or Facebook.
Happy (early) Thanksgiving to those in the U.S.
Thanks for being here. You made my day. Here are some other blog posts you might enjoy.
Mountain-Themed Pool Ball Rack Art
3 Creative Uses For A Wood Sewing Machine Cover
*affiliate links in this blog post*


2 Comments
Donna via Funky Junk Interiors
SO clever! I loved watching you make your turkey art on Instagram in real time, and it’s even cuter on the blog! Glad it made its way over here so it can be shared so much further!
annisa
Thanks, Donna! You made my day!