How to Make Beautiful Pebble Flower Art (Easy DIY Pebble Art Flower Tutorial)
Empty those pebbles from your pockets! Today, I’m going to show you how to DIY Pebble Flower Art. This is so easy to make, and no two will look the same. That’s the beauty of this craft.
Someone has to state the obvious, so it might as well be me…
Pebbles can be used to make various shapes.
In the case of this art, the shape is a flower, but you can make animals, people, words, etc.
The only limit is your patience and imagination. You’re seeing the limit of both of mine in this craft! That’s okay, though, because I’m smitten with how it turned out.
What you need to make pebble flower art:
- bag of pebbles (mine are polished like these, these, or these)
- sticks
- glue (I used hot glue, but you could use a more permanent glue like Gorilla Clear Grip.)
- A “canvas” for your art (board, sturdy cardboard in a frame, canvas, etc.)
- rimmed tray or pan for sorting pebbles
How to make pebble flower art using a unique surface for the art:
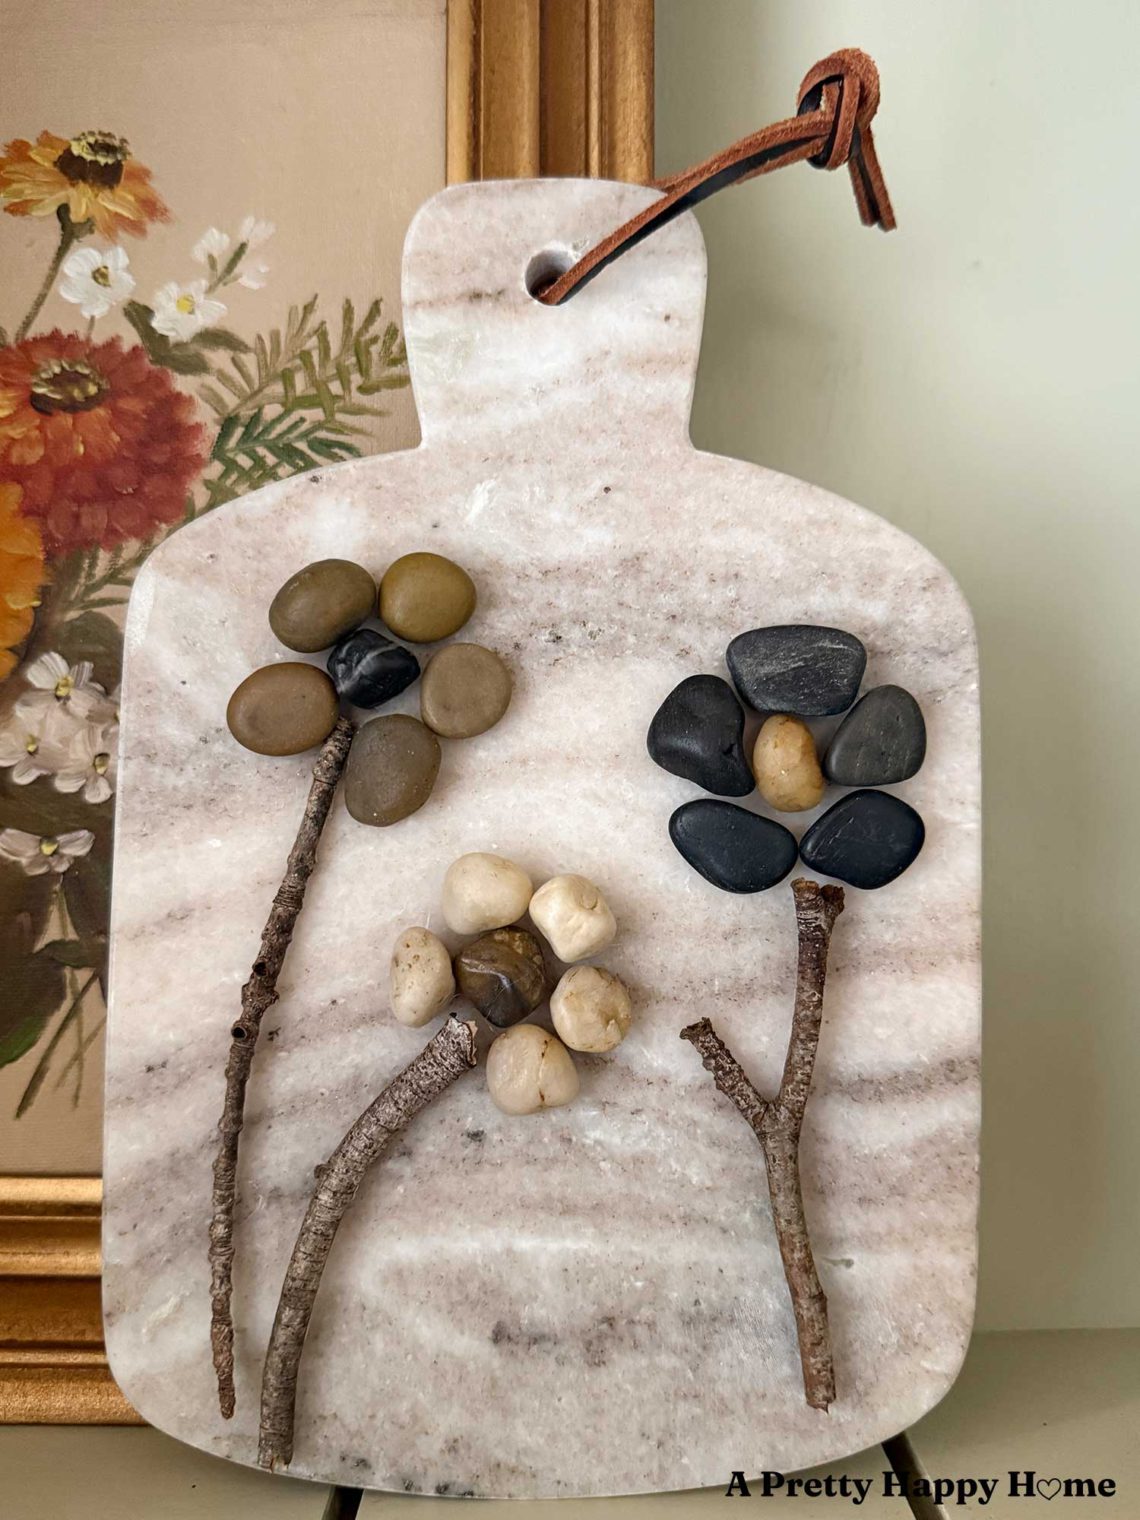
First, it’s helpful to start by selecting the background or canvas for your art, so that you know the size you have to work with and the background color. Be sure to pick something that can support the weight of the pebbles when they are glued on. I went for a unique “canvas” for my pebble art and used a small marble cutting board because when I commit to a theme (like stone), I double down. Plus, this art was going in my kitchen.
Second, I’m going to assume your pebbles are clean, but if they aren’t, go ahead and clean them now. Sort the pebbles by color unless you prefer pure chaos with your crafting. However you get your thrills is cool with me.
I did sort mine by color and kept them corralled in a tray, but a rimmed baking sheet would work, too. Taking the time to do this was a little therapeutic, and it made it easier to decide on a color palette for my flowers and then find pebbles of a similar size to make the petals.
Third, select the pebbles you want to use to make your pebble flower art. Arrange them without gluing them down on your canvas to get your placement just right.
Fourth, find some sticks from your yard to make the flower stems. Alternatively, you could make the stems out of other rocks, leather cording, ribbon, or something else that floats your creative boat. I didn’t worry about leaves, but you may want to add leaves of some sort to your art. You could even use faux leaves for this.
Last, carefully glue your flower pebbles and the stems to your canvas. I used hot glue in case I ever tire of this art and want to use my cutting board again. You can use any glue (e6000, Gorilla Clear Grip) that is strong enough to hold the pebbles to your particular canvas.
One of the best parts of crafting is celebrating the finished result.
Stepping back and saying, “I made that. Go me!” is a really good feeling. Sometimes, I even say it out loud…when I’m the only one in the room.
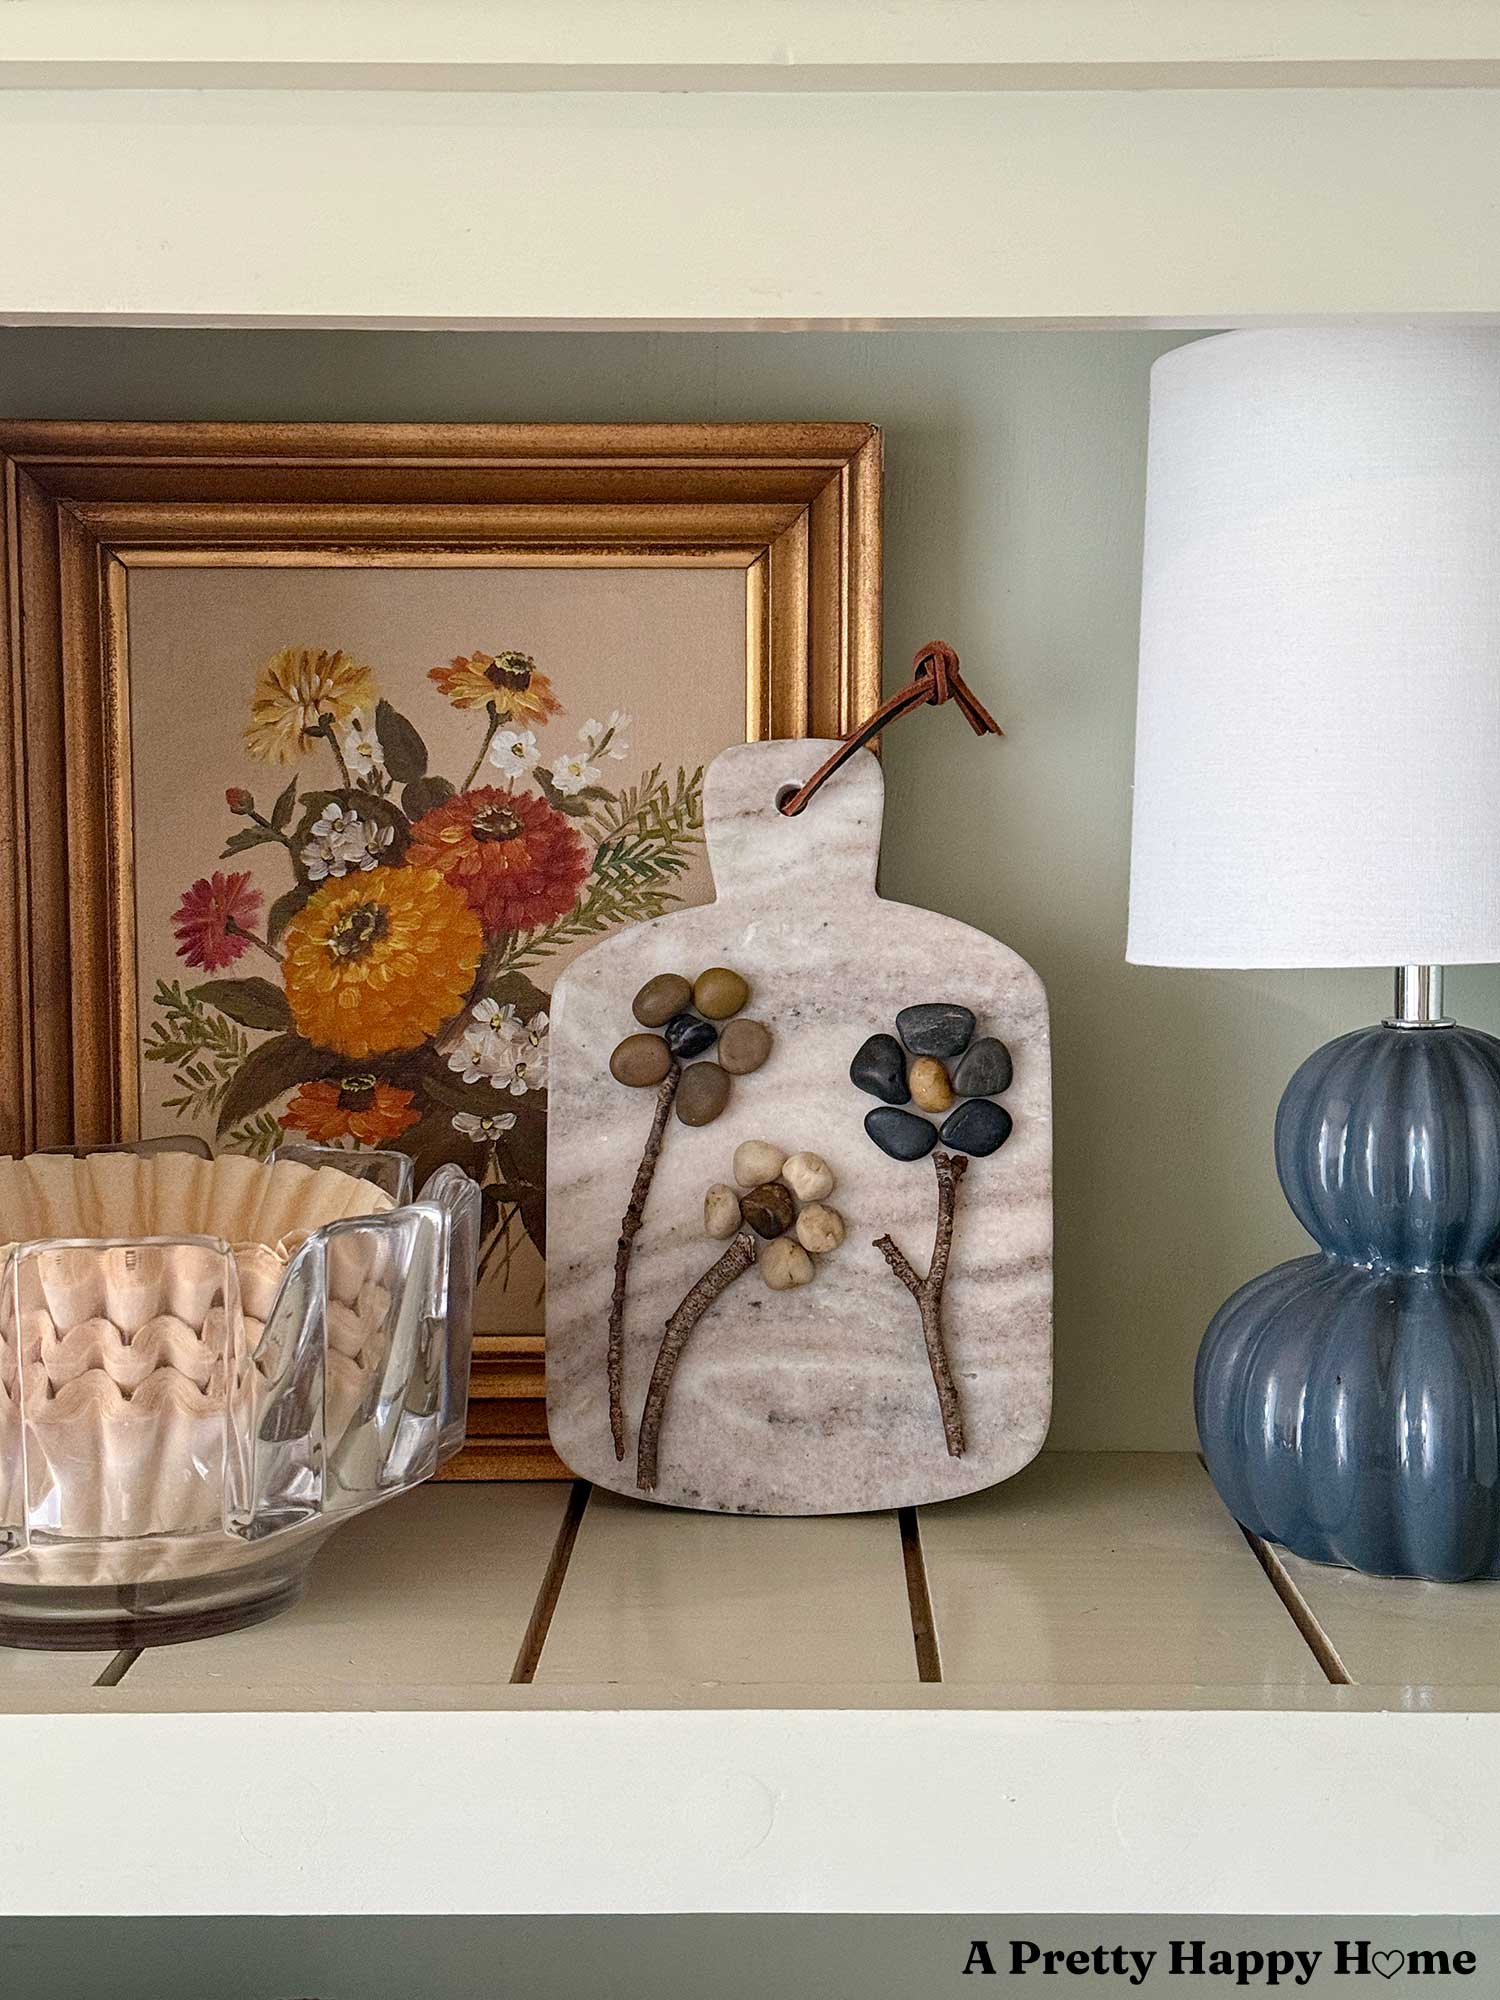
For the flower pebble art that I made, I am over the rocky surface of the moon with how well it coordinates with the wallpaper in this room. You’d think I planned it that way.
Subconsciously, maybe I did.
However, it took me years to get to this point with this room. I’m definitely on the path of slow decorating, and you won’t hear me complaining about that.

This craft doesn’t take that long to do, so it could be a fun activity to do with a group of friends. Plus, kids would rock at making pebble flower art, so don’t forget about inviting them to join in the fun. They could even make word art with the pebbles.
Have you ever used pebbles to make art? How’d it go? You can comment here on this blog post, email me here, or reach out via direct message on Instagram or Facebook.
Happy Crafting!
Thank you for spending a few minutes of your day here. I appreciate you! If you’d like another blog post to read, I’ve got you covered.
Memory Rocks – A fun, free souvenir
Stone Basement Workshop Repointing Part 9: The Reveal
*affiliate links in this blog post*


You May Also Like

Using Contact Paper to Make a Deer Silhouette

My Christmas Decor Hacks
