DIY Custom Visors: 4 Ways to Decorate a Plain Visor
Got a plain visor or hat? Not for long, you won’t. Today, we’re going to discuss 4 ways to customize a visor or a hat.
In a land of hats and visors, I’m a visor-wearing gal. If we’re talking fun things to do, I love to customize a visor to give it a little pizazz. It’s pretty much the greatest compliment to have someone ask, “Where did you get that visor?” and I can say, “I made it!”
These decorating and customizing ideas are visor-centric, but can easily be transferred to hats as well, especially if you have a sewing machine.
Please note: I did not use a sewing machine to decorate these visors, but that might have made my life easier.
Here are 4 ways to customize a visor:
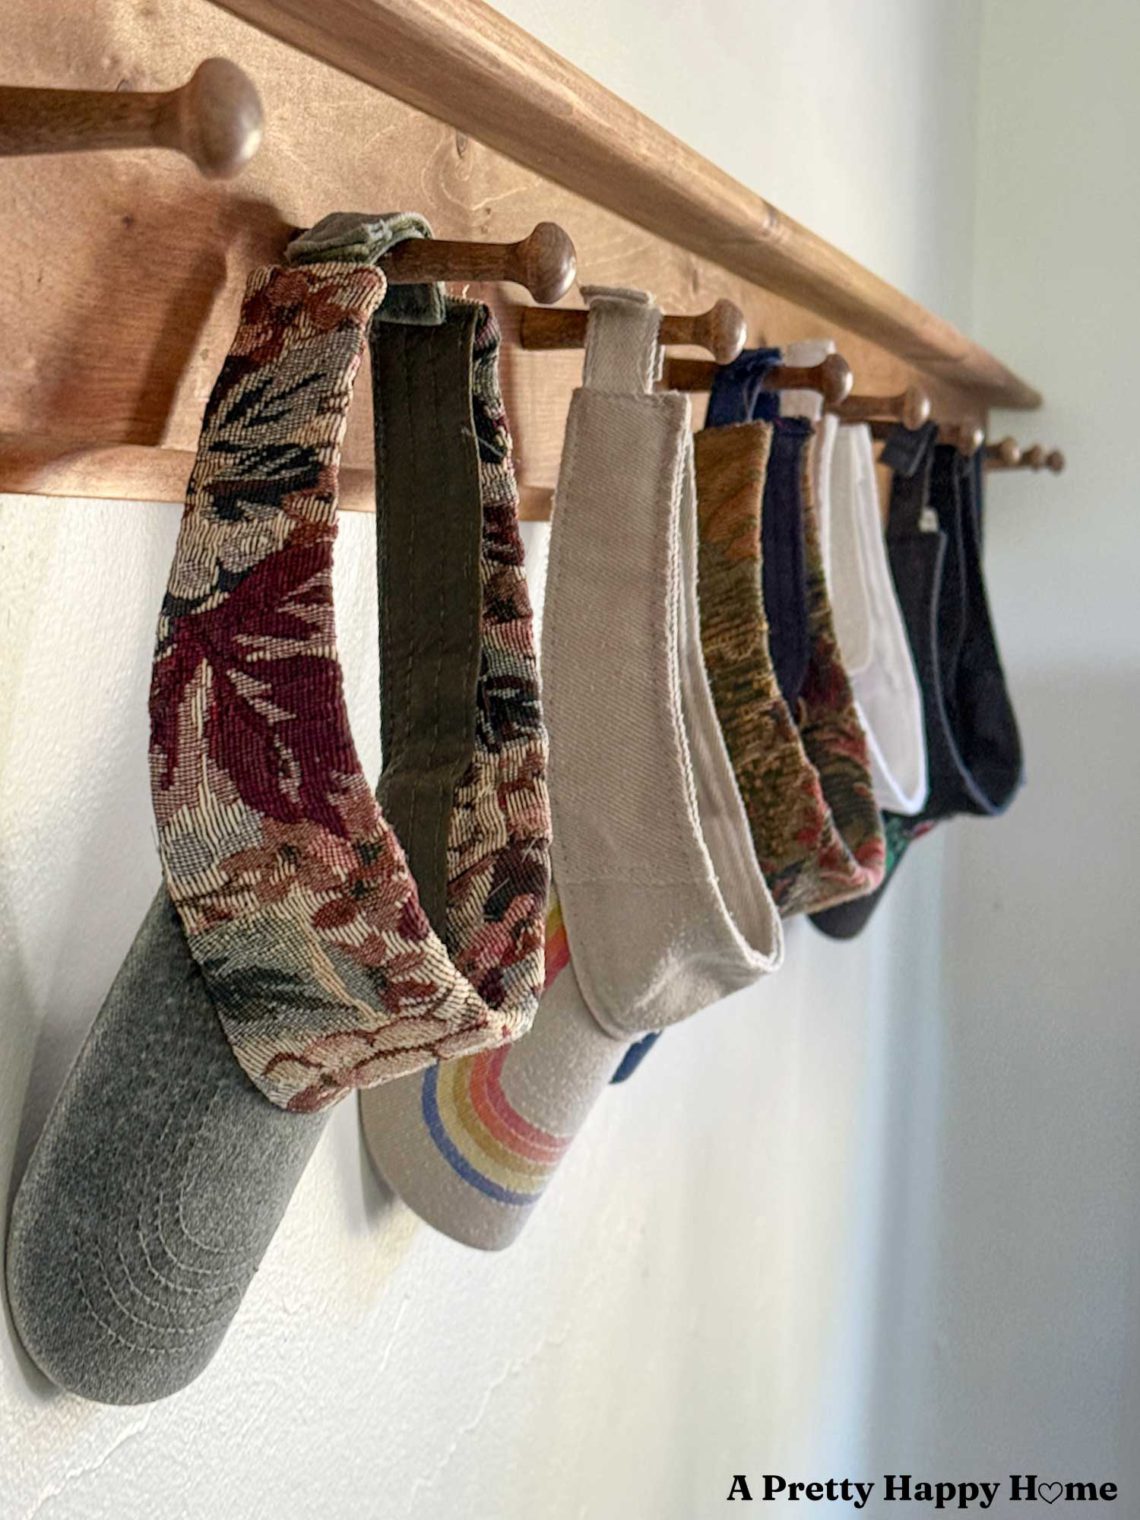
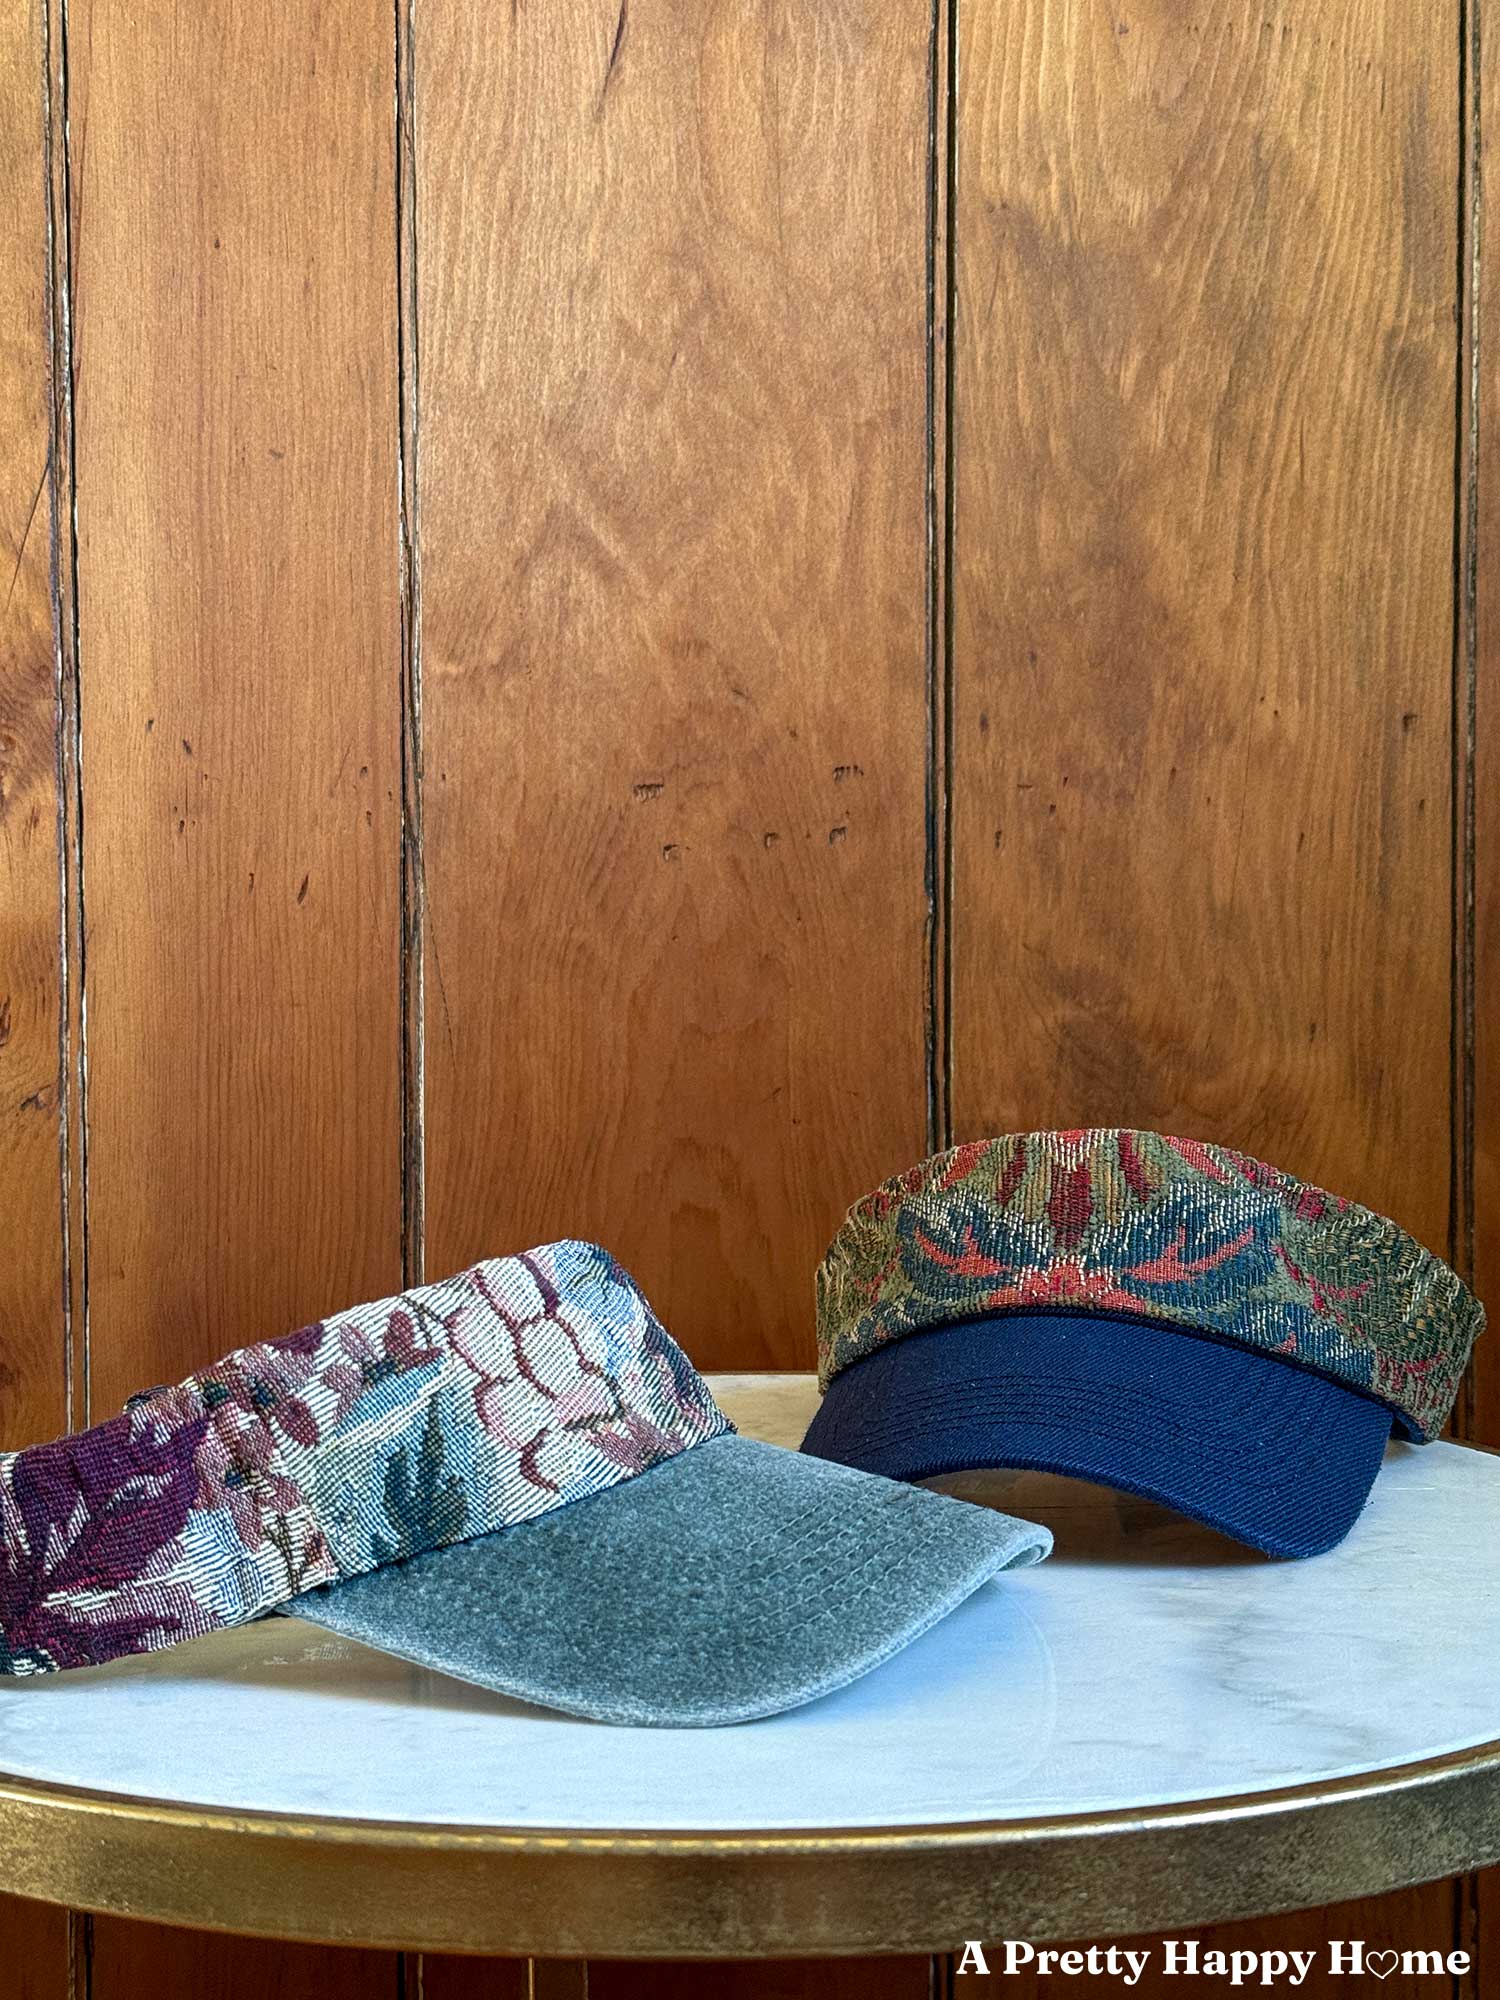
Add Fabric.
Visors are especially fun for customizing with fabric because their design is relatively simple and easy to access whether you are hand stitching or using a sewing machine.
For these visors, the fabric I added was to cover the entire headband, minus the closure.
I cut enough fabric to cover both sides of the headband, including a hem allowance. The visible edges were then hemmed, which you can do with fabric glue or a sewing machine. I used fabric glue to secure the fabric to the front and back of the headband. Once that was dry, I hid stitches along the outer and inner bottom edges of the fabric to make sure it stayed intact. And it has!
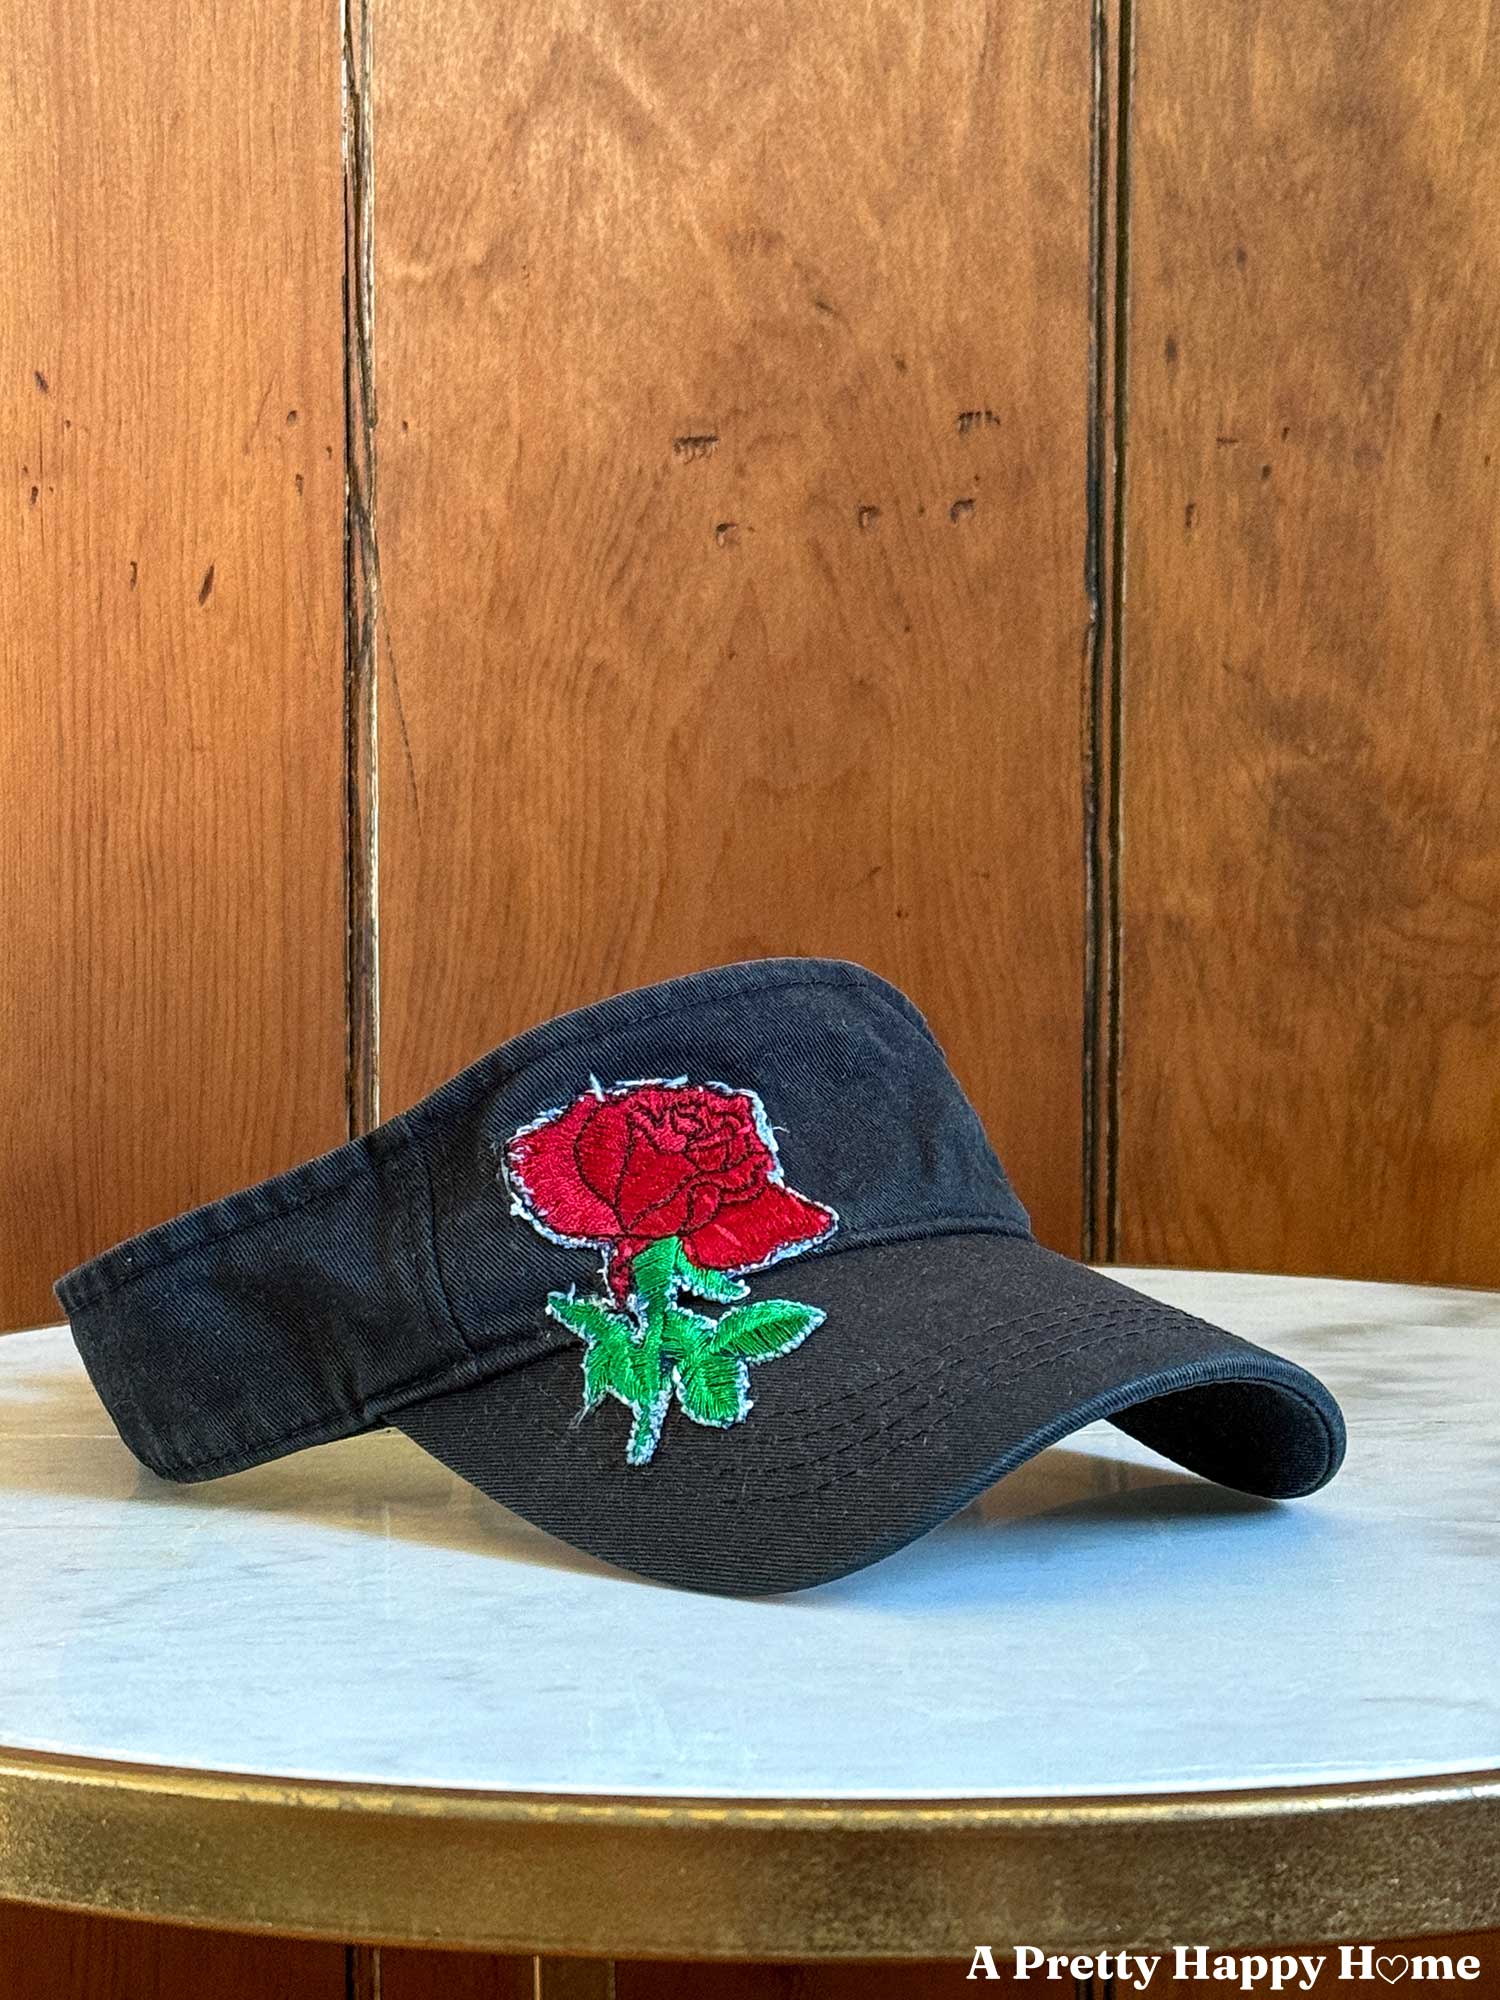
Add a Patch.
You can buy new patches online, and it is also great fun to rummage through bins of retro patches at thrift stores.
Add one to a visor or hat, and you’ll have created something unique. Just make sure to double check the size of your patch if ordering online to make sure it will fit on your headband.
I think it is best to stitch the patch to the visor or hat, but some of them are iron-on, and you can also try using fabric glue. I had to do that for this visor with the rose patch, as I extended the patch onto the bill, and my needle was not going through whatever material they use to make the bill.
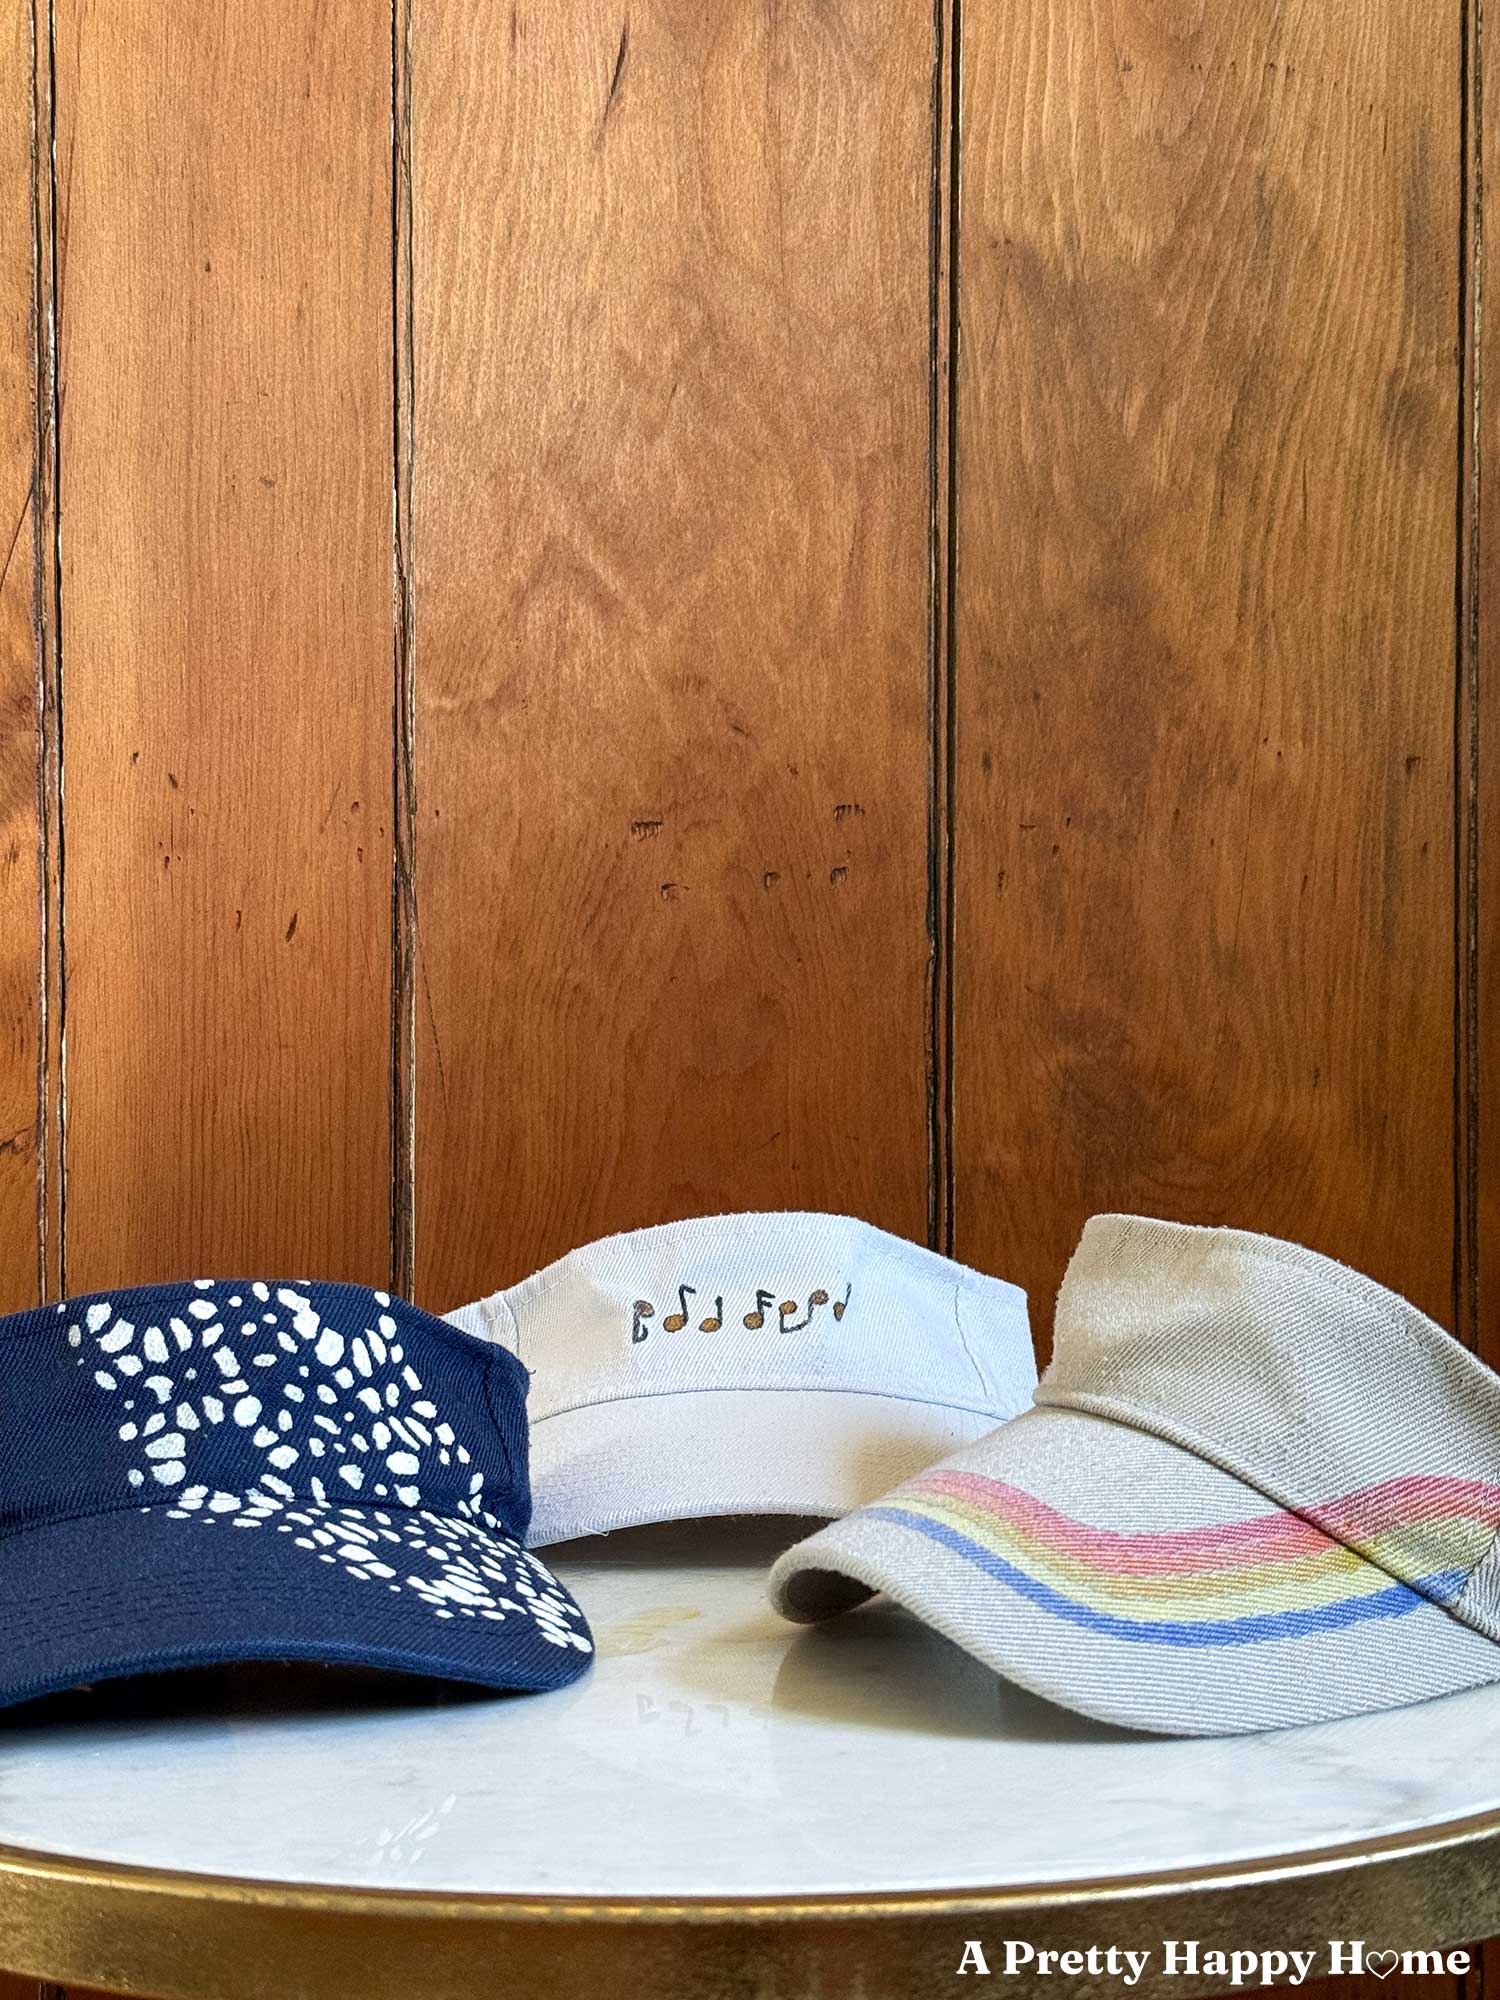
Use Fabric Paint.
If you haven’t used fabric paint yet, you’re in for a treat! It is permanent, flexible, and opens up a world of creative possibilities for customizing a visor or hat.
- Use a stencil to paint a pattern on your visor. Even a paper doily can be used a stencil for this craft, and I used that technique on the blue hat shown below.
- Stripes are always in style. While I mainly freehanded (no tape) the stripes on the grey visor below, I did use the stitched lines as a guide, and also used a pencil to mark guide lines where stitches were not available.
- Go for graphics or word art. Music is a big part of my life, and I could handle painting the basic shape of a music note on the white visor shown below. I haven’t done any word art yet, but only because I can’t decide on a word or short phrase to use.
Keep in mind that you may have to do more than one coat of the fabric paint to achieve the coverage you’re looking for, and it’s easier to use the fabric paint on lighter colors.
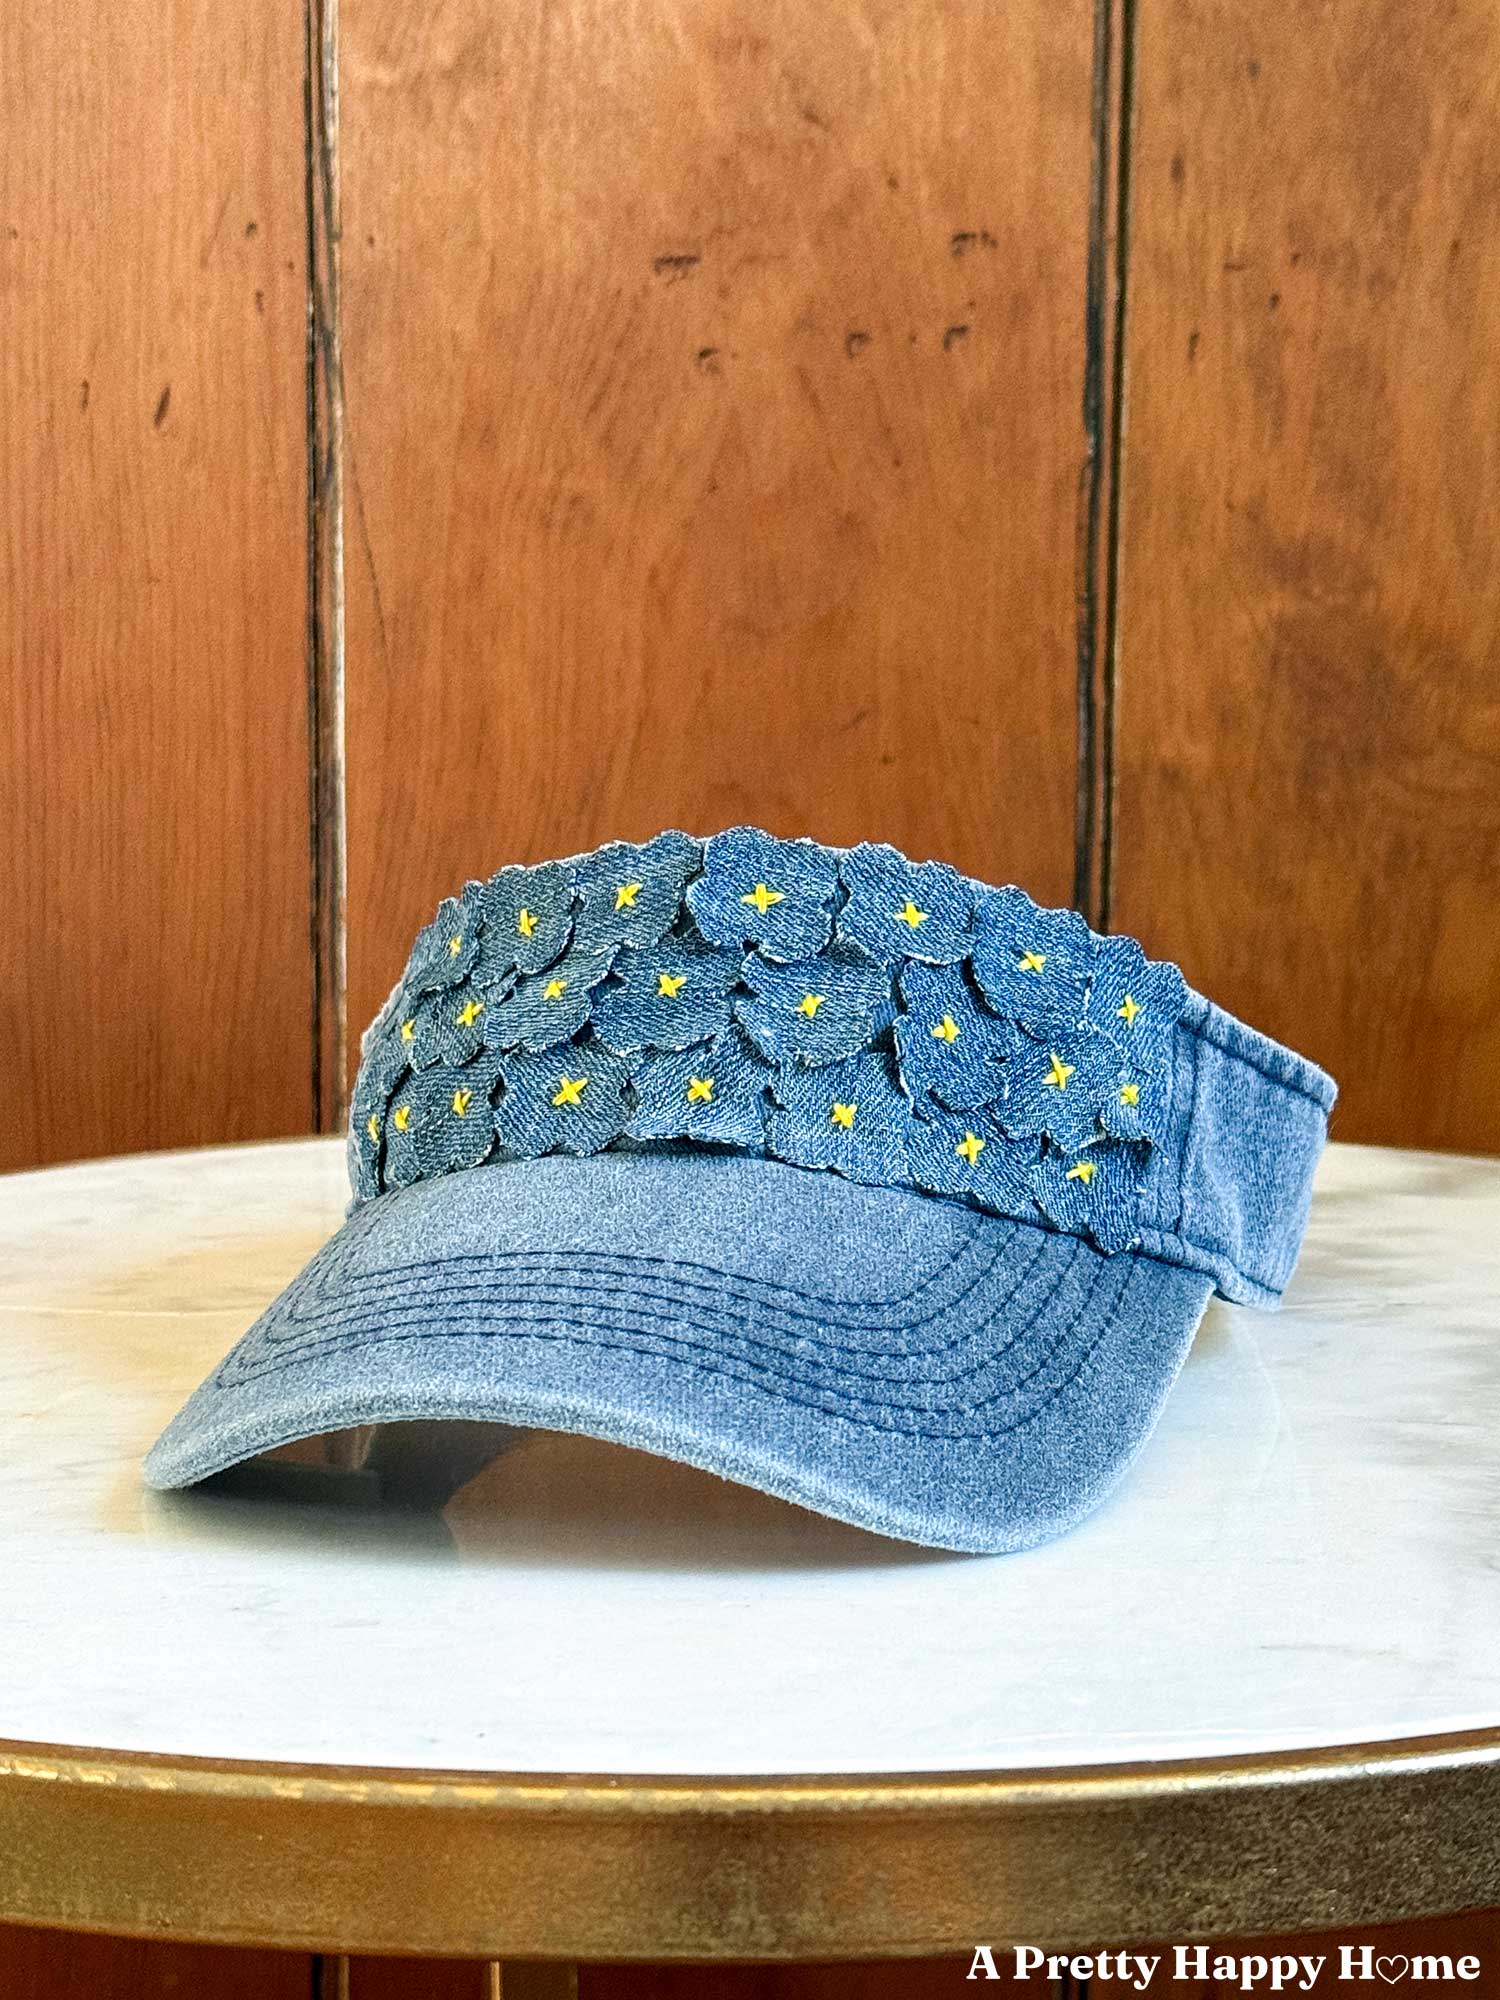
Use Designer Inspiration.
Most of us can’t afford haute couture, but we can use the inspiration from designer clothing to customize our own.
I was inspired by a Dior jean jacket with a denim flower collar to make a similar embellishment for a denim-colored visor. I used an old pair of jeans to cut out flower petals and stitched them on with embroidery thread. If you do something similar, make sure to use Fray Check or another product on the edges of the denim petals so that they don’t fray.
Supplies Needed for Visor or Hat Customization:
While I have found likely-new, plain visors while thrifting, I find that buying new, plain visors is the way to go. They are relatively inexpensive at $3 – $5 apiece if you buy them in a multipack. You definitely want a multipack because once you customize one, you’re going to want to keep going!
- Plain visors like these: solid color visors or muted color visors
- Fabric Paint
- Fabric Scraps
- Decals: thrifted or this variety pack is fun
- Liquid Stitch (fabric glue)
- Fray Check
- needle and thread/embroidery thread
- scissors
- small paintbrushes
How I Care For My Customized Visors:
When needed, I throw them in the washing machine with a load of like colors on either warm or cold water, depending on what I’m washing that day. Then, I air dry the visor. This is key! Don’t throw them in the dryer. You want to reshape the visor so that it doesn’t dry with wrinkles, and then leave it alone until it is fully dry.
You could also hand wash your visor and then let it air dry.
Some of the visors in these photos are several years old and have been washed countless times. The thing that will wear out before the fabric paint or any other customized part is the velcro.
Adapt These Customization Ideas to Other Hats.
Don’t wear visors? No problem. These ideas are adaptable to other types of hats like ball caps or sun hats.
In fact, with ball caps in particular, you have even more surface area to get creative. I’m a little jealous of those who can pull off the ball cap look. I think I’d need longer hair for that.
I do love this straw sun hat for almost 360-degree sun protection. Plus, it rolls up so nicely for storage. It’s only a matter of time before I customize it. Ha!
Are you into customizing your clothing, hats, and visors, too?
I’d love to know, and see what you’ve created. Comments are hat-tastic! You can comment here on this blog post, email me here, or reach out via direct message on Instagram or Facebook.
Happy Crafting!
Thanks for hanging your hat here for a few minutes today. If you’d like another blog post to read before you leave, try one of these.
6 Flower Monogram Embroidery Ideas
Nature Art Gallery Wall – Oh, It’s Expanded
*affiliate links in this blog post*


You May Also Like
Perler Bead Pokemon Coasters

DIY Stained Wooden Easter Eggs
