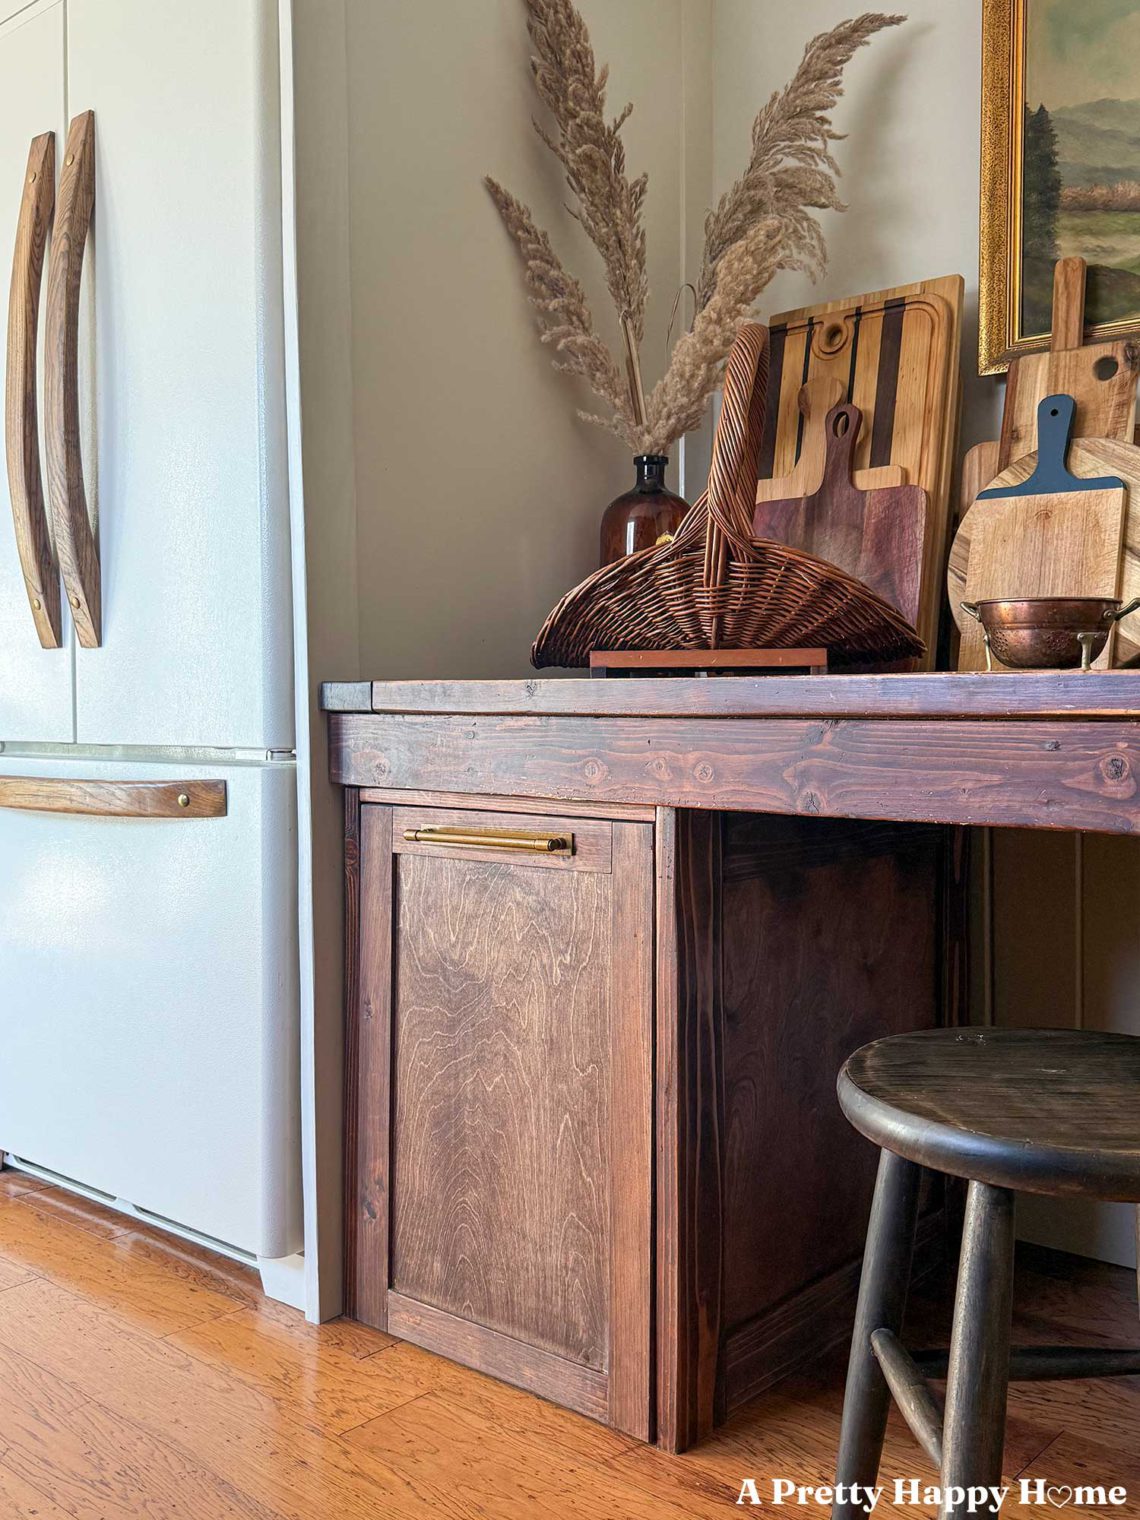
Under-A-Table Trash Cabinet – One Year Later
I love pretty pictures as much as the next person, but one of my favorite things about DIY and makeovers is learning how they hold up over time. A little more than a year ago, we built an under-a-table trash cabinet. Today, I’m updating you on how this area of our home has held up to heavy, daily use.
Would that be considered literal trash talk?
We needed a place to hide our trash and recycling.
That’s how this project started. We have a galley-style kitchen and, storage-wise, it’s small. Only one wall has any cabinets or countertops, and that’s where the sink, dishwasher, and range are located. The opposite wall has a beefy 25-year-old refrigerator. It’s probably not as big as any other refrigerator, but when it’s sitting alone on a wall, it feels like a beast. However, it runs like a dream, as the old ones do.
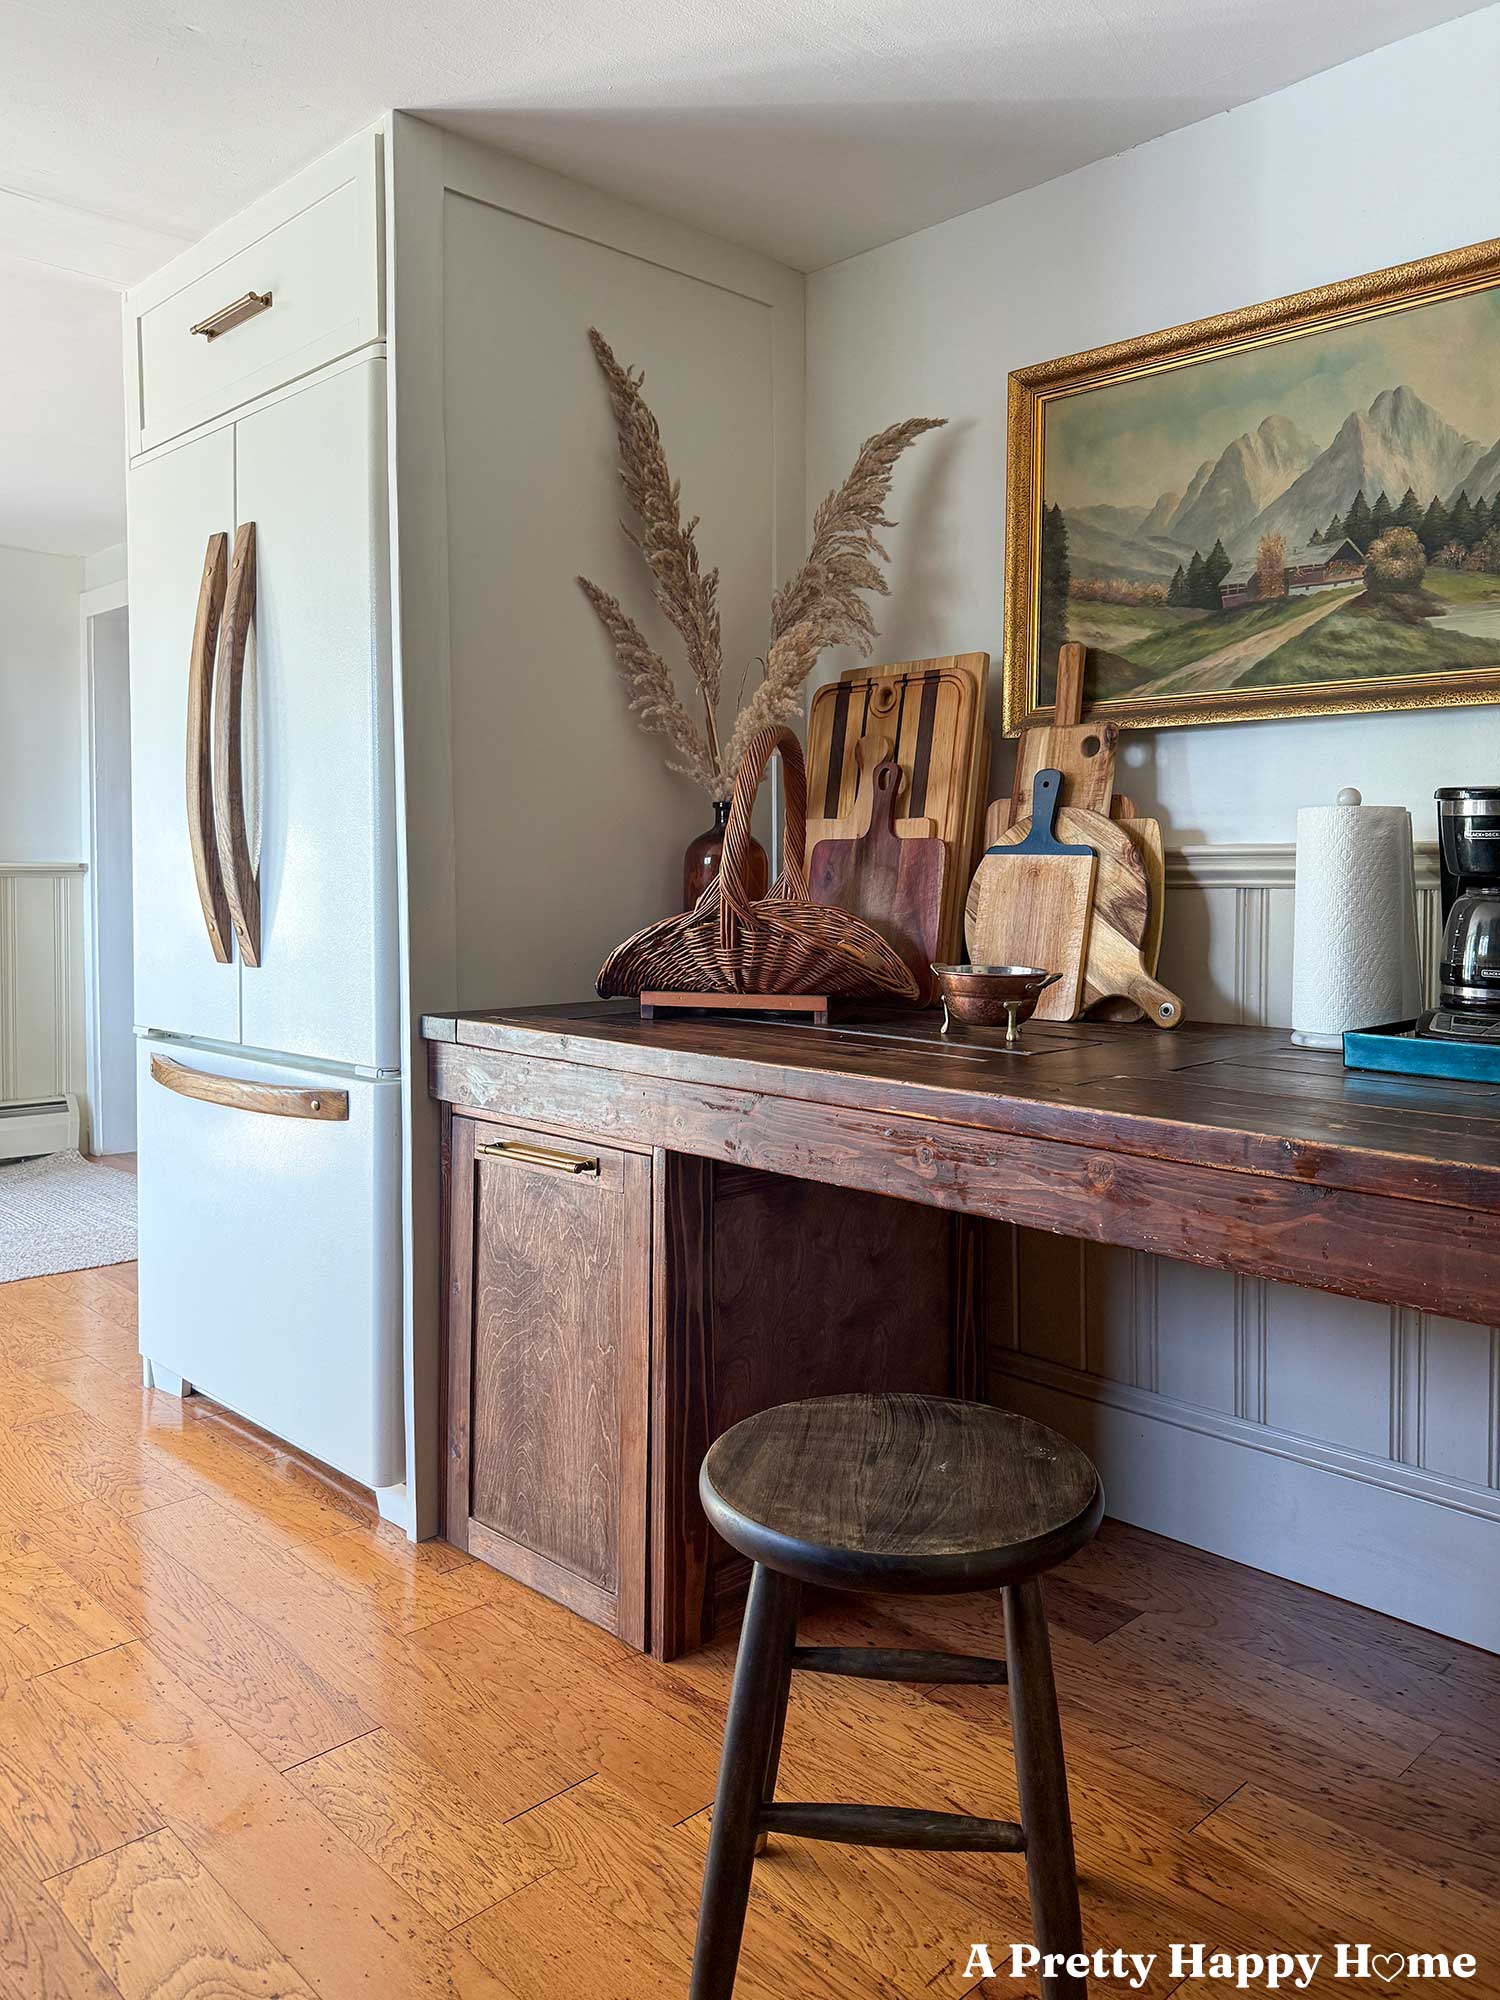
We gave it custom wood handles and built cabinetry around the fridge to make it look more intentional, and placed a rustic table next to it to act as another counter and a place to sit. It gives off the unfitted vibe of kitchens of yesteryear, and I love that look.
However, there was no spot in this kitchen to conceal our trash and recycling bins. Under the sink did not work. There was no cabinet for the bins unless I wanted to give up all of our pots and pans. Full disclosure: I did think about that.
It defeated the purpose of going to the trouble of making this side of the kitchen look so pretty if the view was marred by the sight of our overflowing trash and recycling cans, as the photo below demonstrates.
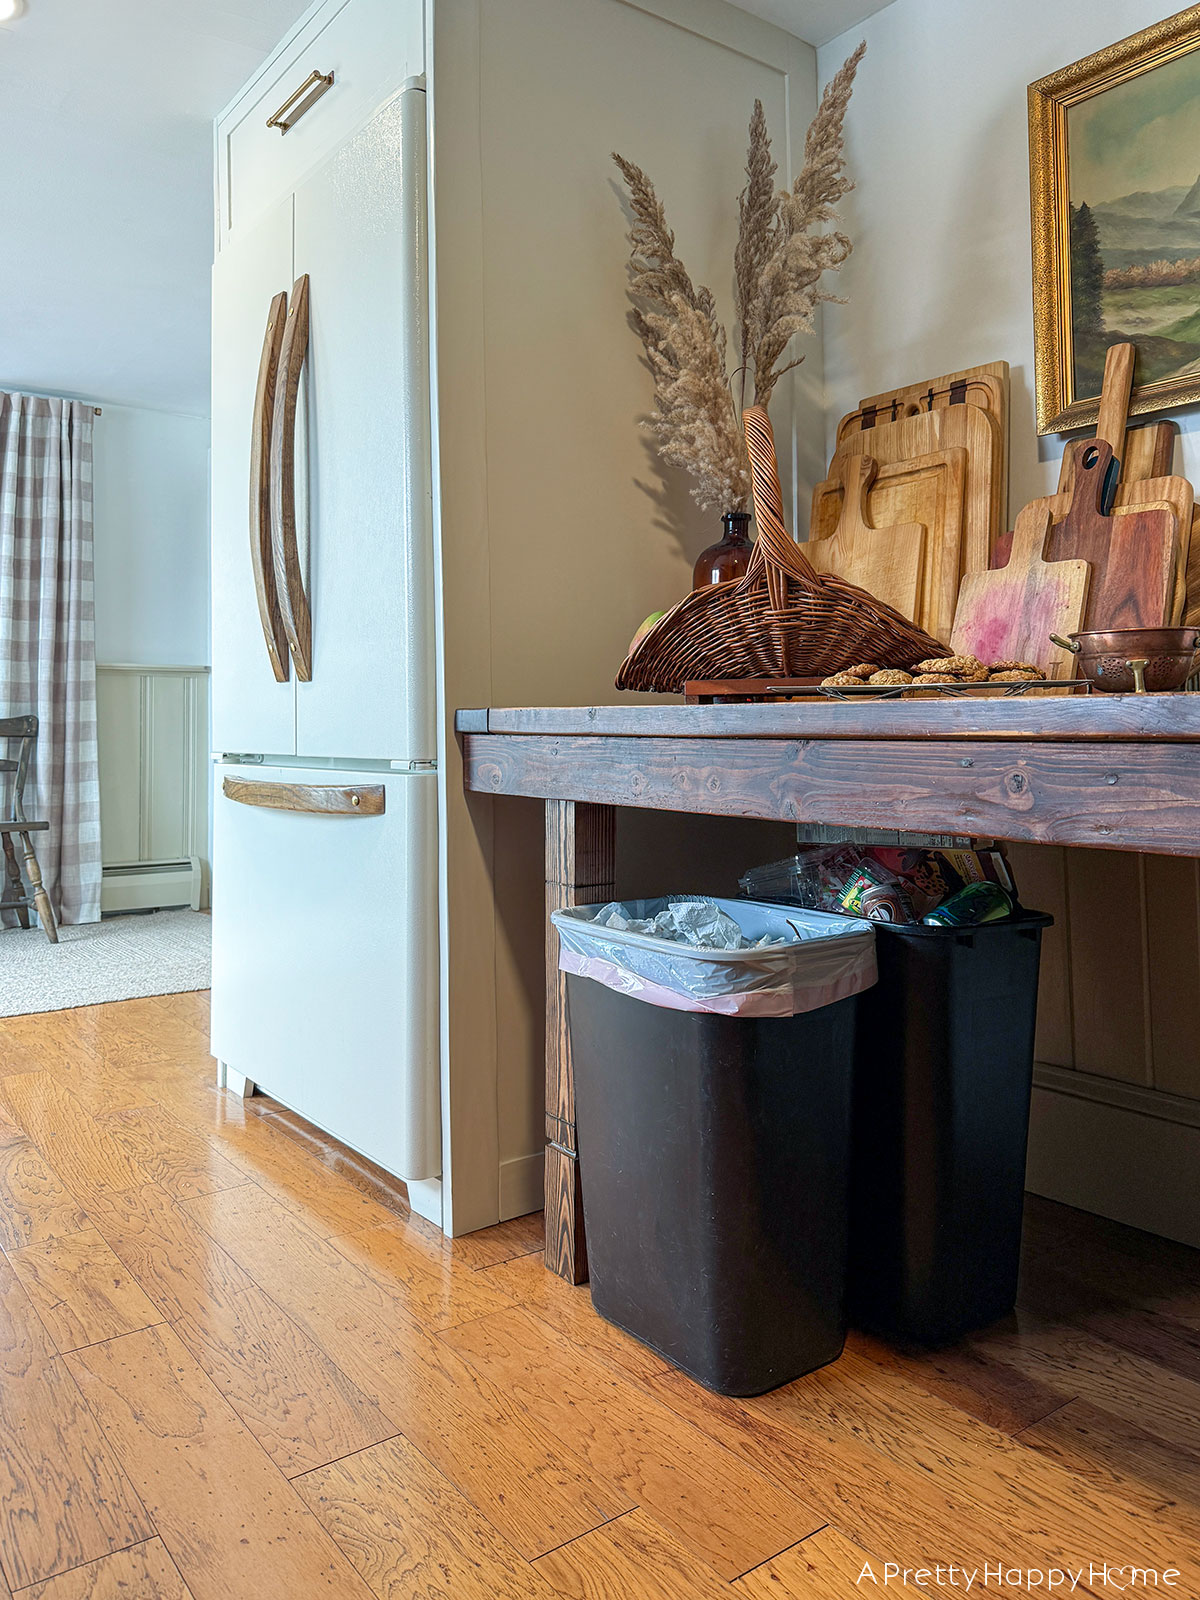
Ultimately, we decided to build a pull-out trash cabinet under the table to conceal the bins. This cabinet would replace two of the table legs to support one side of the table.
Best. Decision. Ever.
Here’s how we built the under-a-table, pull-out trash cabinet.
That was a mouthful, but I wanted to emphasize that this is not a tip-out trash cabinet. You can buy those, though.
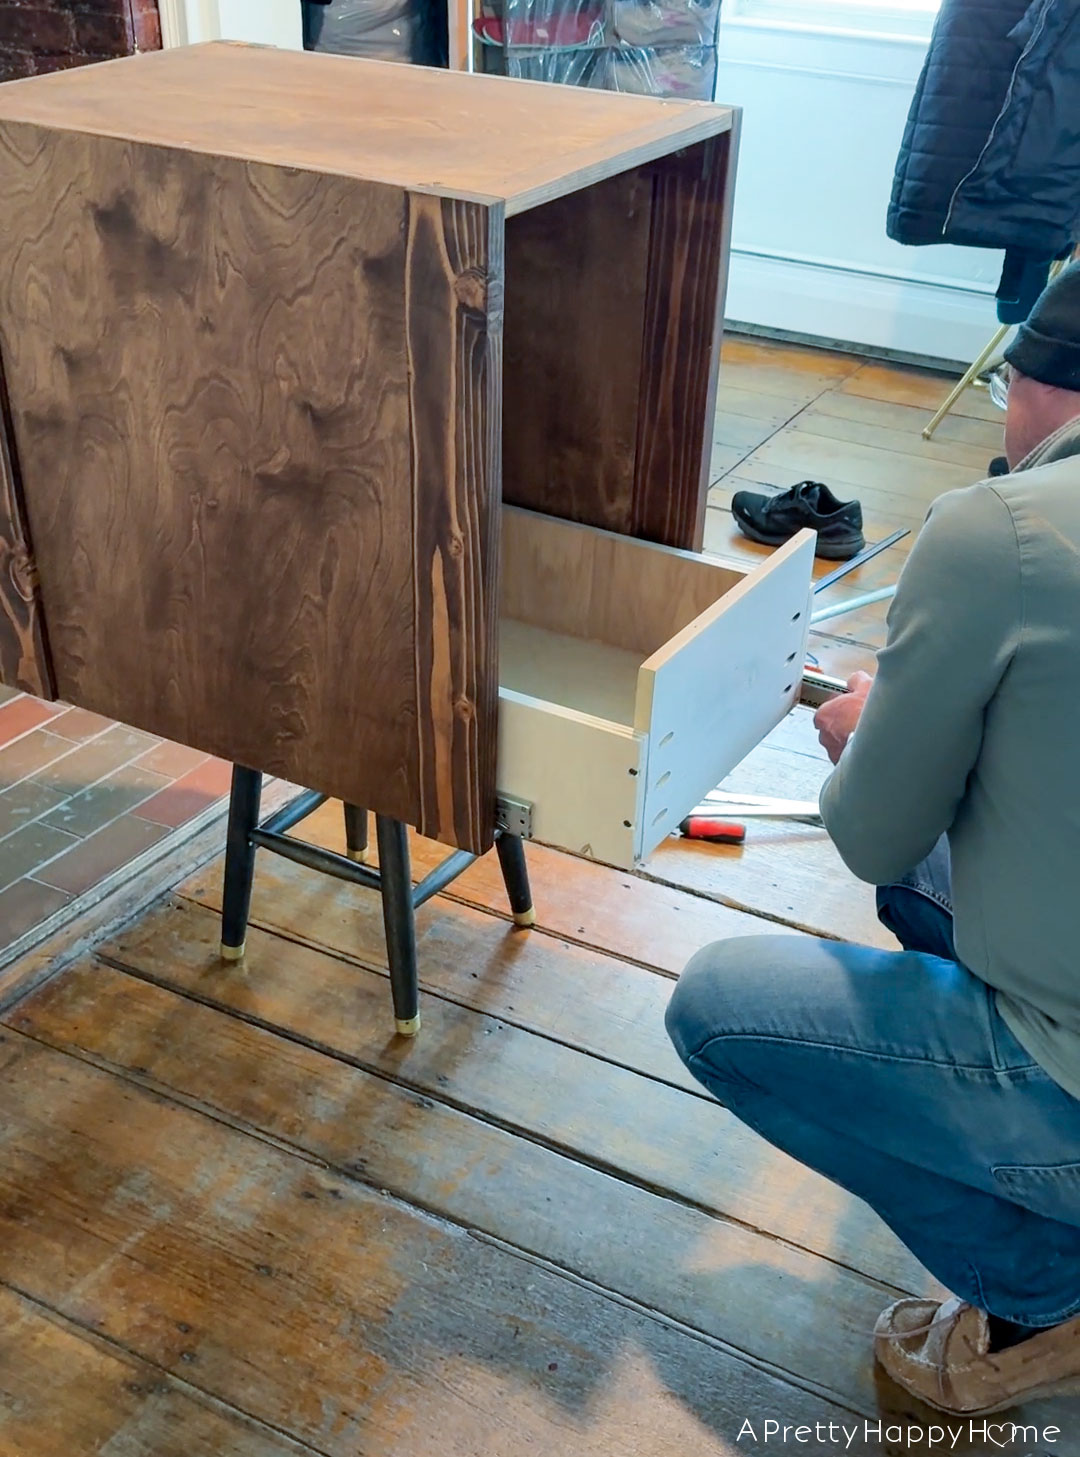
We basically built a rectangular-shaped box that fits two trash cans, one behind the other.
The cabinet face is shaker-style because, eventually, all of our kitchen cabinet doors will be this style. It is stained to match the table and is sealed with Waterlox to protect it.
The cabinet face is connected to a shallow drawer on slides. The trash and recycling bins sit inside this shallow drawer or tray. It keeps them contained and easy to remove for cleaning and emptying the trash.
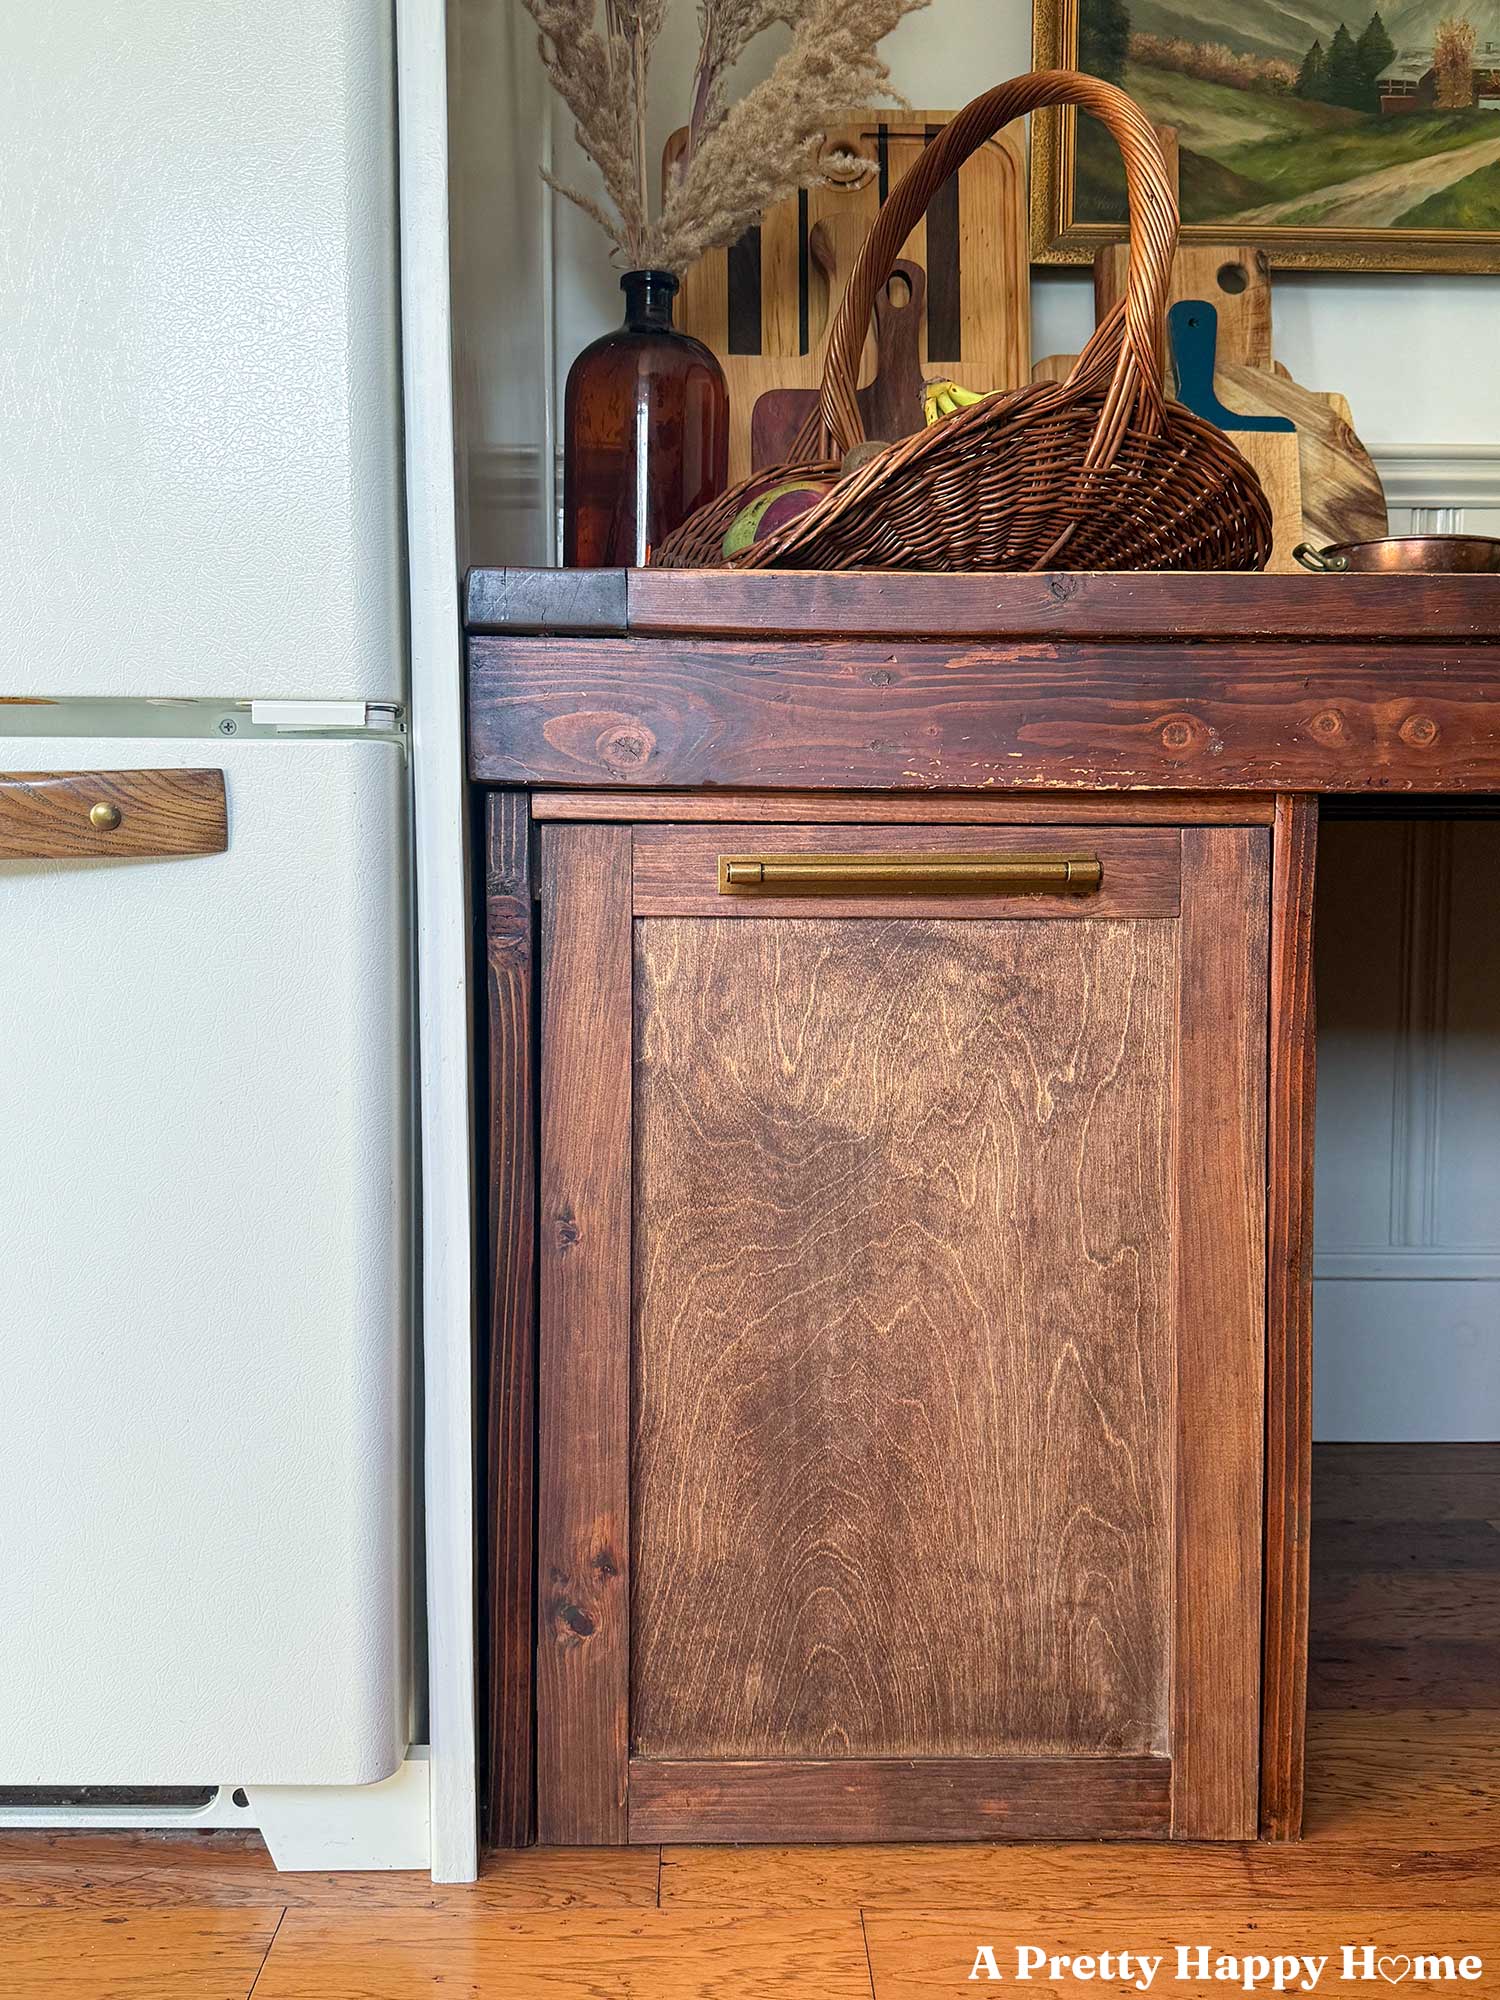
How the under-a-table, pull-out trash cabinet held up the first year.
It’s technically been 16 months, but who’s counting?
Bottom line, Handy Husband nailed it! If something we built is going to fall apart or show signs of inexcusable wear and tear, it would have happened by now.
The cabinet itself is still the best one we have in the house, probably because it’s solid wood and has those soft-close drawer slides.
It conceals the garbage, as intended, and also any smell.
The only wear to the area is not to the cabinet itself, but to the table above it. You can see where fingernails have nicked the table’s apron (the frame supporting the tabletop). Since the table itself, which is also a DIY, is quite rustic and we have allowed it to show signs of wear from daily use, this is not concerning to me. Our house dates back to the 1780s. A rustic table fits right in.
I attribute part of the lack of wear on the new cabinet to the Waterlox, but also because I chose a large handle (similar) for the cabinet that has a backplate. Moving forward, backplates on all cabinet hardware seems like a smart move for our family.
What’s next for our kitchen?
Nothing immediate is on the horizon. Ultimately, we’d like to take off the back wall of this kitchen and push it out six feet. That would solve a lot of layout issues and allow us to redo the floor, including the joists, to make the flooring height match that in our dining room. However, unless someone plants a money tree, that’s not happening.
The range or the countertop may force our hand to make some less drastic changes to the side of the kitchen they sit on, though. The range is from the 1990s, I’d guess, and has some quirks. Consistent oven temperature? Who even knows? The granite countertop, also from the same time period, has a really, really bad crack around the sink. No exaggeration – an 8-inch-long chunk around the faucet fell off, and we have now glued it back on twice in seven years with construction adhesive.
We’ve been living with the crack because it doesn’t seem like the highest priority, and once we replace the counter, then the backsplash has to be redone. While we’re at it, maybe we should move the range over a little, and that affects the cabinet layout. And do you know how expensive a pretty range is these days? My first two cars combined cost less money.
Long story short, that cracked counter is one of those cans of worms that could get out of hand very quickly.
That said, since our kitchen looked like this when we moved in, I’m pretty happy with how much we’ve transformed the space on a tight budget.
Most importantly, it functions pretty well for our family.

Do you have your trash and recycling hidden away, too? Do you like to know how makeovers hold up as much as I do?
Tell me everything! You can comment here on this blog post, email me here, or reach out via direct message on Instagram or Facebook.
Happy DIYing.
Thanks for being here today! Whether you were here when I originally shared this makeover, just joined today, or something in between, I appreciate you. If you’d like another blog post to read, I’ve got you covered.
Wallpapered Kitchen Alcove – a Multipurpose Spot
Gross to Gorgeous Pantry Transformation
*affiliate links in this blog post*


You May Also Like

How to Reshape a Flexible Woven Plastic Basket

Navy Blue Sunporch Reveal
