3 Mirror Makeovers to Try
Mirror, mirror on the wall, which of these three mirror makeovers is the fairest of them all?
That’s right! I have 3 mirror makeovers to fuel your creative juices today. All my hopes and dreams would be fulfilled if you take one of my ideas and make it your own!
Here are 3 mirror makeovers to get your ideas flowing:
MIRROR MAKEOVER #1: DIY ROPE MIRROR
If you can use hot glue, you can make a rope mirror.
All you need is a round mirror, rope, and hot glue.
I’m using 3/8-inch sisal rope for this project and 100-feet of it should cost less than $12. That’s WAY more rope than you’ll need.

Glue, wrap, glue, wrap, and then you are done!
You can always trim the very end of your rope strand at an angle to help the very last piece of rope blend in when you glue it off. You can also put a bit of liquid glue on the ends of the rope to seal them together so they don’t fray.
I tucked my rope mirror inside an old metal sifter, but even on its own it will look gorgeous.

The rope mirror is a potentially renter-friendly project. I used the rope trick on a round, plastic mirror in a rental we lived in in Ireland. The hot glue popped right off that plastic when it was time to move. Landlord was none the wiser.
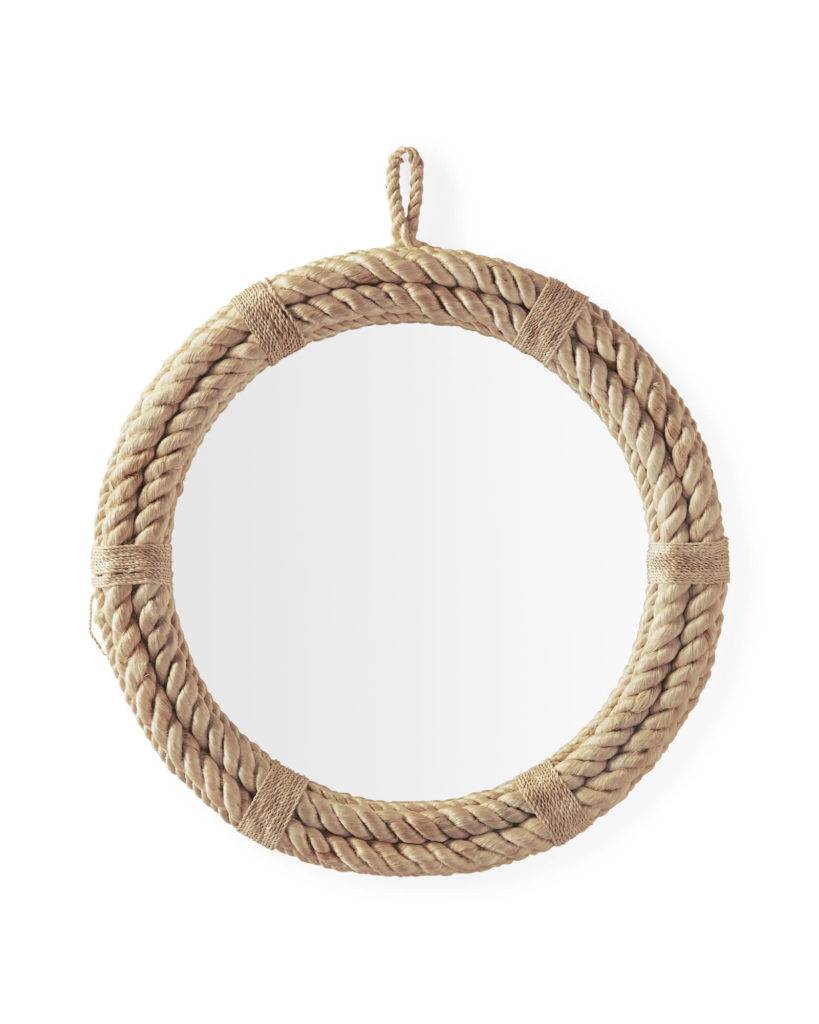
The fun thing about rope mirrors is they can trend rustic and farmhouse in style or nautical, like this one below from Serena and Lily.
(image: Serena and Lily)
P.S. That Serena and Lily mirror is $398, so you could save a bunch of money DIY-ing something similar.
MIRROR MAKEOVERS #2: GEOMETRIC MIRROR
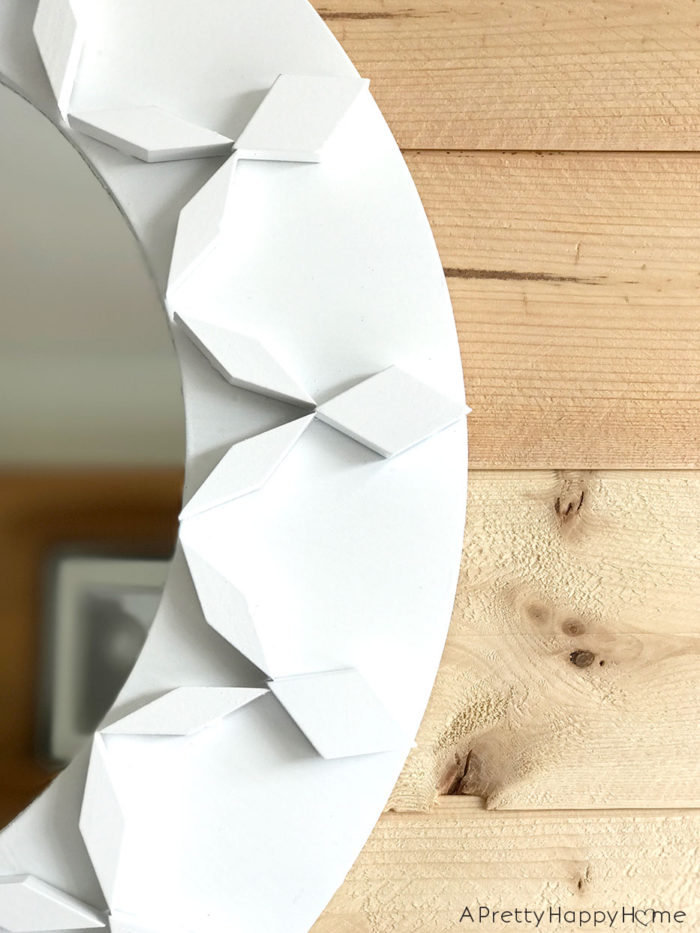
This geometric mirror is one of my favorite reuse or up-cycle projects using children’s blocks.
The mirror shape doesn’t matter so much for this project, just that the mirror frame has a flat surface large enough to add a geometric detail.

I used a paper template of the blocks to decide what pattern I wanted to create and to make sure that it would fit on my mirror frame.
Then it was a matter of glueing the blocks on in the desired pattern.
The final touch was to spray paint the whole thing to make it look uniform.
Fun, right? I don’t think you’d guess that I started this project out by raiding my kids’ toy box!

Geometric patterns on mirror frames don’t have to be completely in your face.
(Ha! See what I did there?)
This 26-inch round mirror from Bed, Bath, and Beyond is more subtle, but still pretty and textural.

(image: Bed, Bath and Beyond)
MIRROR MAKEOVERS #3: STRIP THE PAINT
Thrift stores usually have at least one rack of old mirrors.
If you find a mirror made from real wood that has been painted, there’s a chance that stripping the paint off that mirror will result in a gorgeous finish.
Here’s what I started with – a $5 painted mirror. I stripped the paint off of it using CitriStrip.

Here’s what I ended up with: an expensive-looking wood mirror.
Not too shabby, right?

It did take me time and elbow grease to remove all of the paint from this mirror.
I could have just bought a similar one from Target for $60, but then what would I do with all of my time and elbow grease?

(image: Target)
Did these 3 mirror makeovers get your creative juices flowing yet?
Will you look at the mirrors around your home or in a thrift store differently now?
I hope so!
Want to know a secret? I do not need another mirror around here, but I did come up with a couple of ideas in the course of writing this post that I’d love to try.
Hmmm….What to do? What to do?
If you do attempt a mirror makeover of any kind, it would make me so happy if you shared your results! Tag me on Instagram or Facebook.
Thanks for being here today! Here are some other posts you might enjoy.
Wood Tray Lined with Leather Belts
*affiliate links in this blog post*


You May Also Like

Well Bucket Book Holder

5 Easy, (mostly) Recyclable Halloween Decorating Ideas
