How To Make a DIY Push Pin Travel Globe
Don’t spend money on a cork travel globe to document your travels. Let me show you how to make a DIY Push Pin Travel Globe by upcycling a thrift store globe.
It’s one of the easiest crafts I’ve ever done, and such a fun way to document your travel adventures!
Items Needed To Make a DIY Push Pin Travel Globe
Globe made of cardboard or paper mâché. It cannot be plastic or metal.
Map pins (multi-colored pack | wood pins)
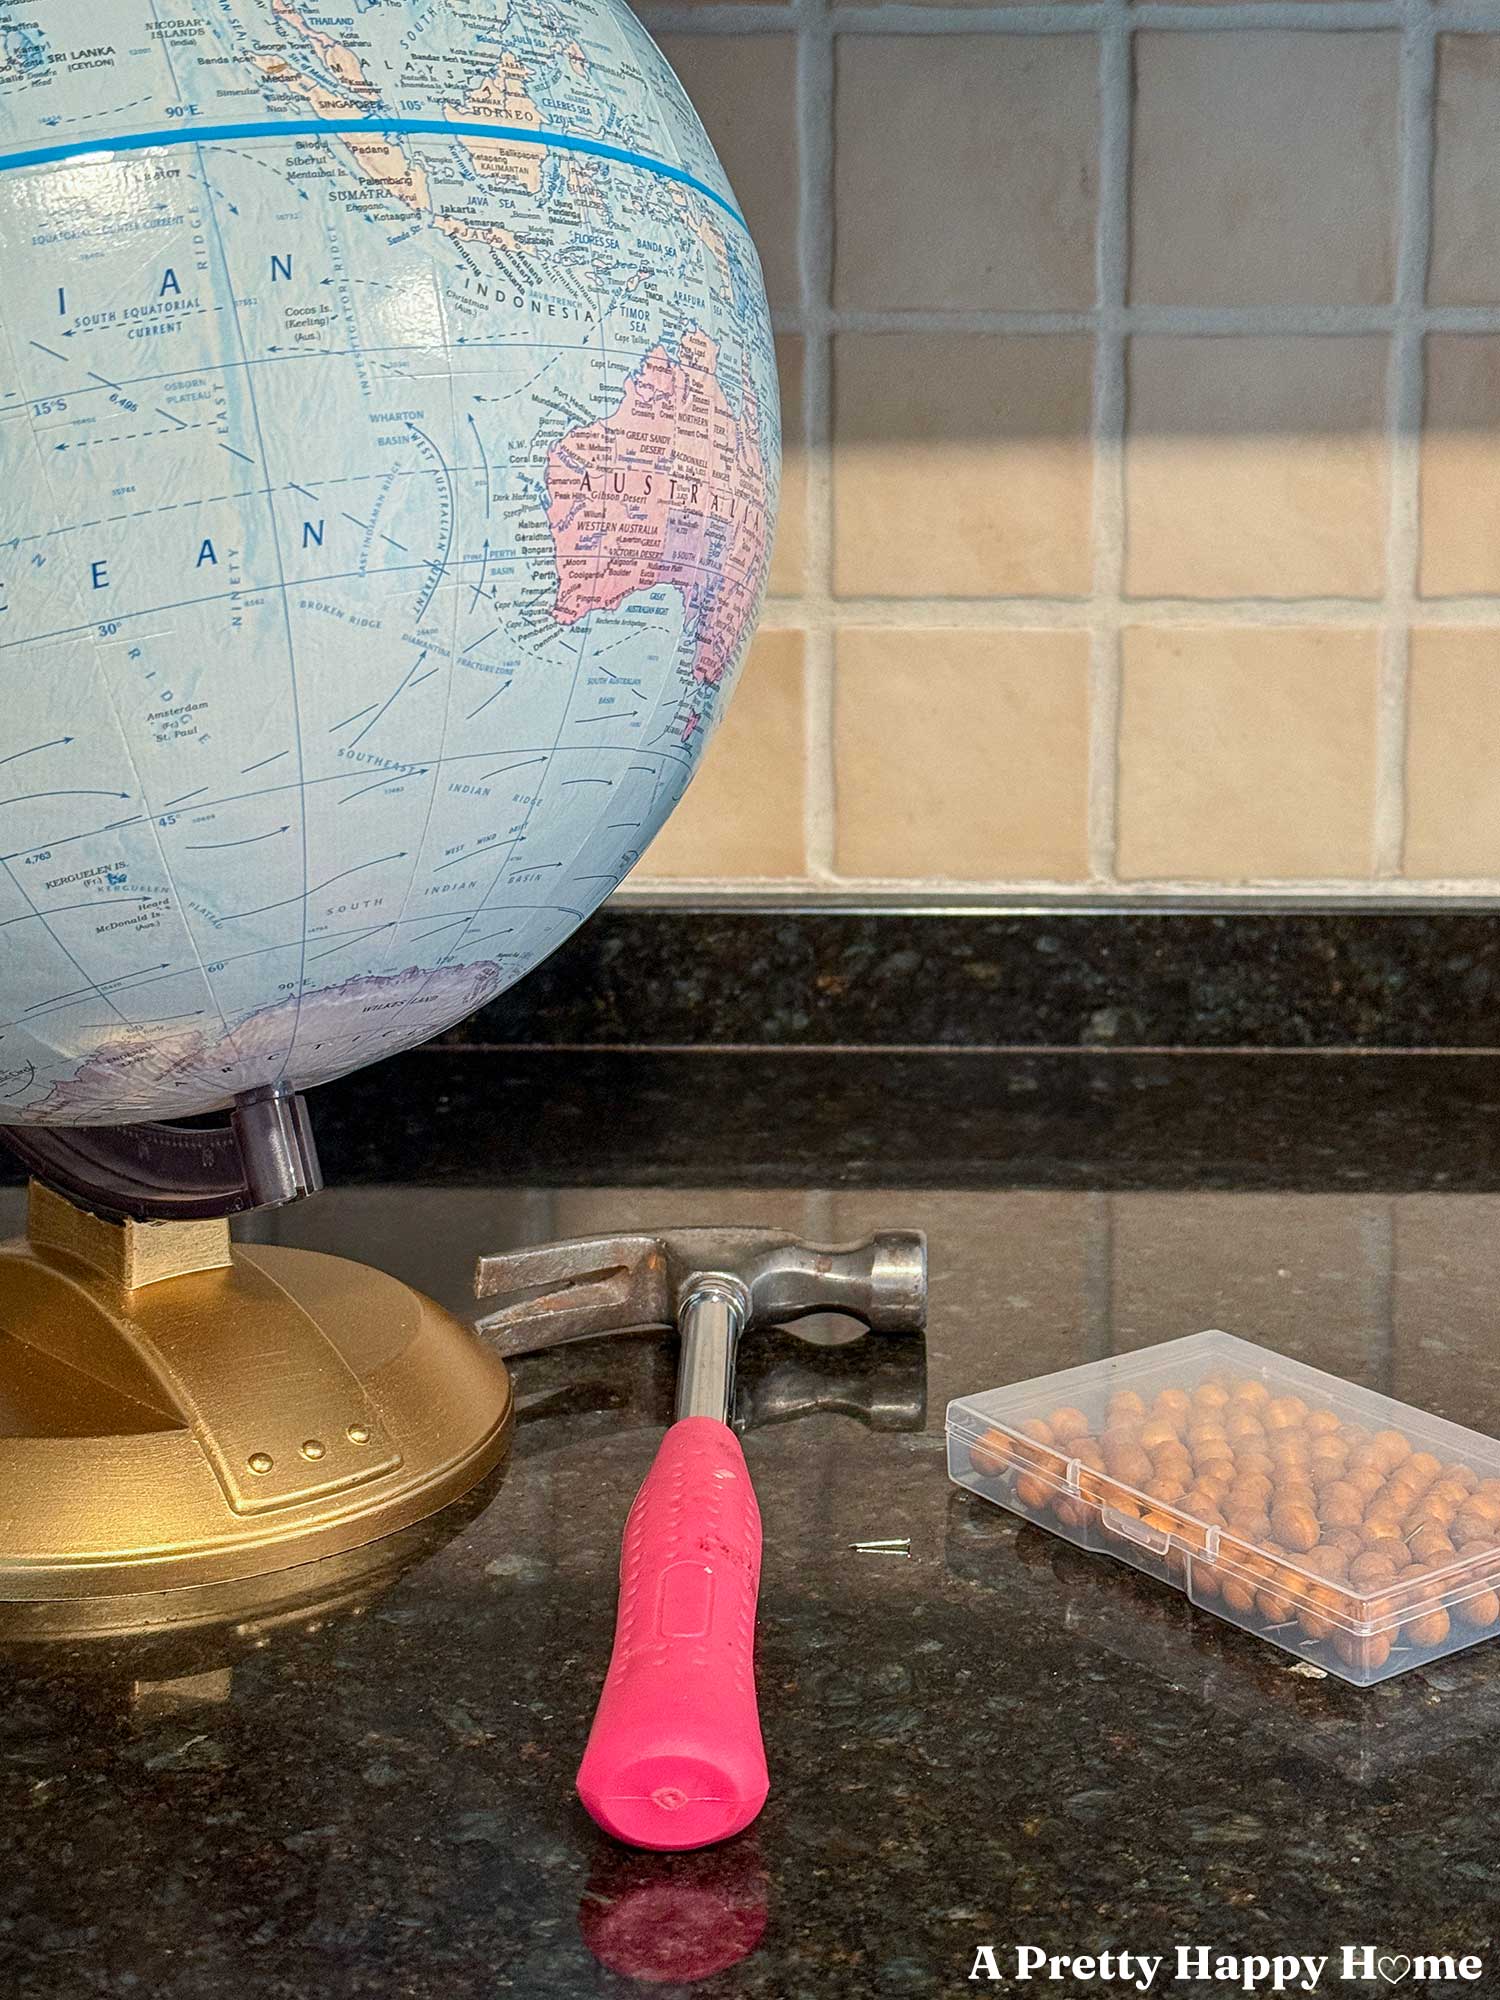
Hammer
Tiny nail (to create a pilot hole)
How To Make a DIY Push Pin Travel Globe
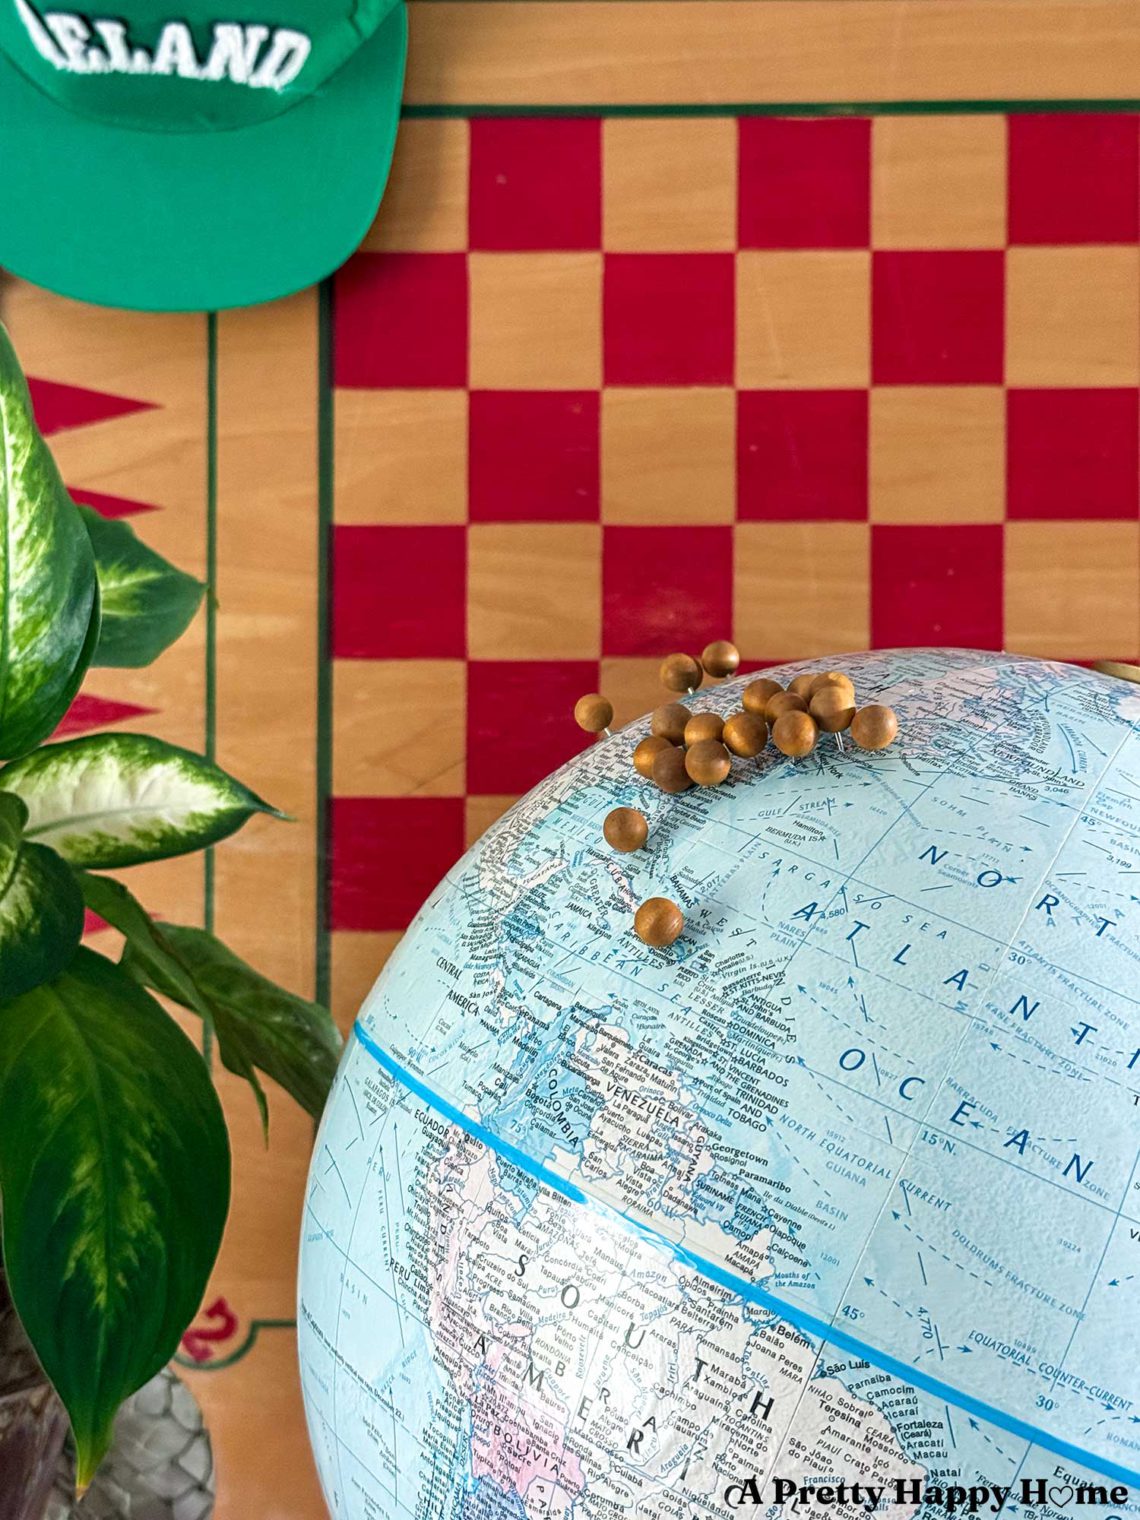
Step 1: Select your push pins or map pins.
Map pins come in all different colors. You can also get pins with flags on them, and you could probably right the date on those pins.
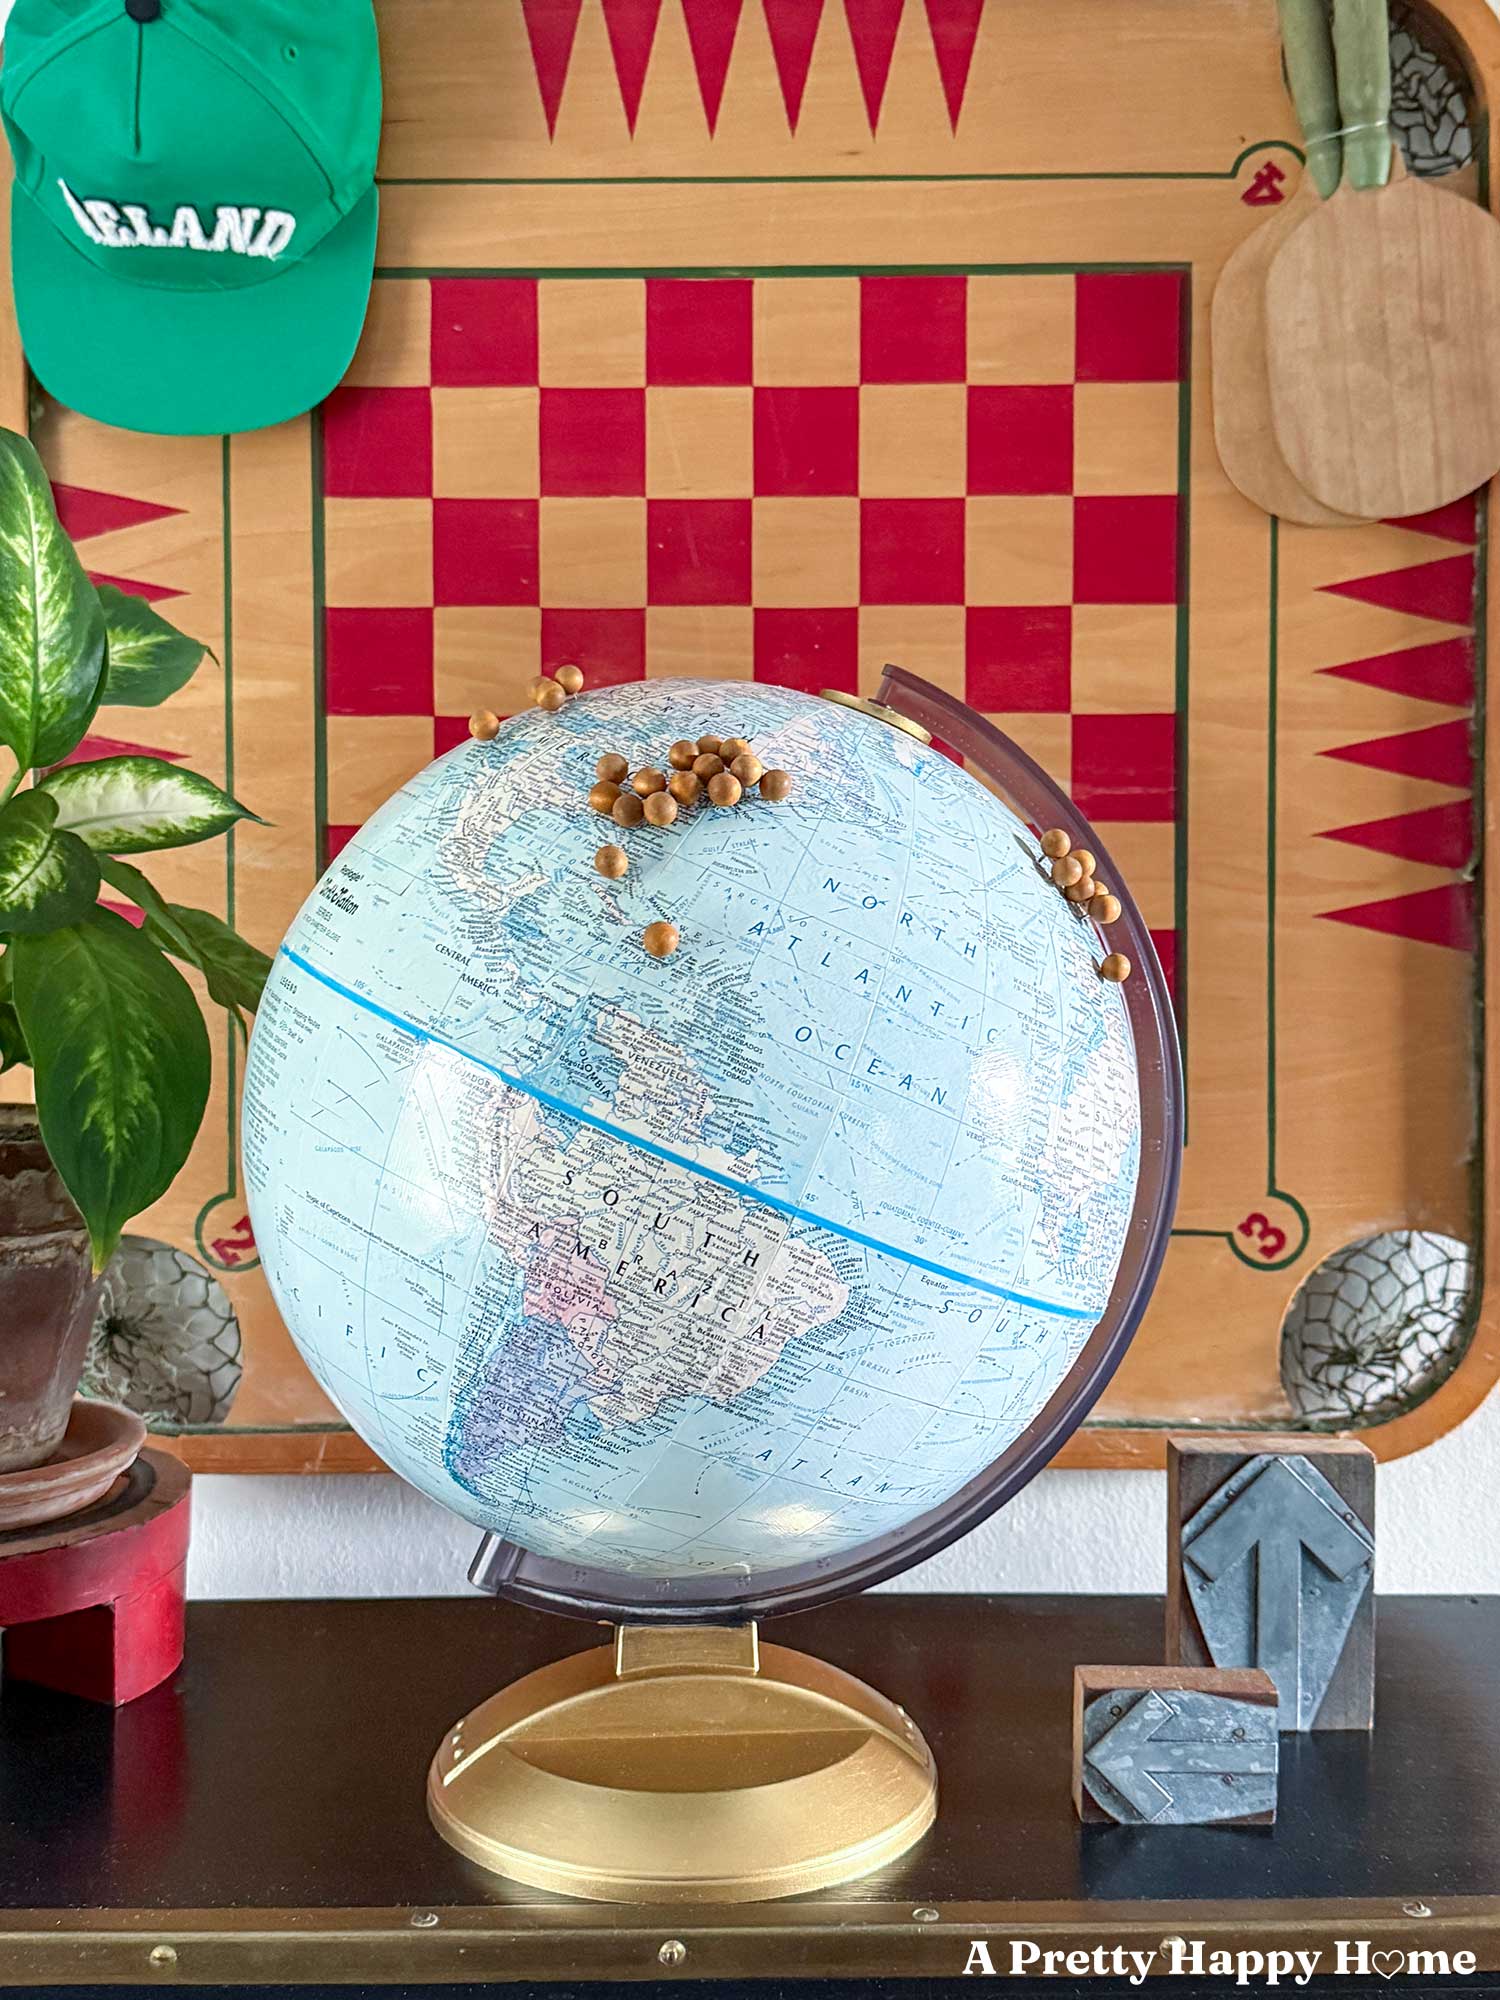
The smaller the head of your push pin or map pin, the easier it will be to fit multiple pins close together. Some countries or states are very small and close together on a globe. The wood push pins I used were a little too big to be completely accurately placed, but I loved how they looked.
Keep in mind that the size of your pin heads might prevent your globe from doing a full rotation on its axis unless the head of the pins fit under the meridian (the half-circle frame that holds the globe in place).
Step 2: Create a pilot hole.
It’s easier to push a push pin or map pin into your globe if you create a pilot hole first. I used a tiny nail and carefully tapped it into the globe. Go easy with this…the globe is not indestructible.
The nail needs to be smaller than your push pin. If you have trouble holding the tiny nail, try gripping it with needle-nosed pliers.
You can try tapping the push pin or map pin directly into the globe with your hammer, but some pins are quite thin and can bend when encountering the resistance of the cardboard.
I did not try using a drill for the pilot hole because I didn’t want to risk shredding the map paper on the outside of the globe.
Tip: Test this pilot hole process on the bottom of the globe or some other location that isn’t super visible on your globe first. (Antartica, I’m thinking of you.) This lets you get the hang of the technique. It will also confirm that your globe is made of cardboard, and is strong enough to handle this project. I don’t want you to be sad or mad if your globe cracks because this is supposed to be fun!
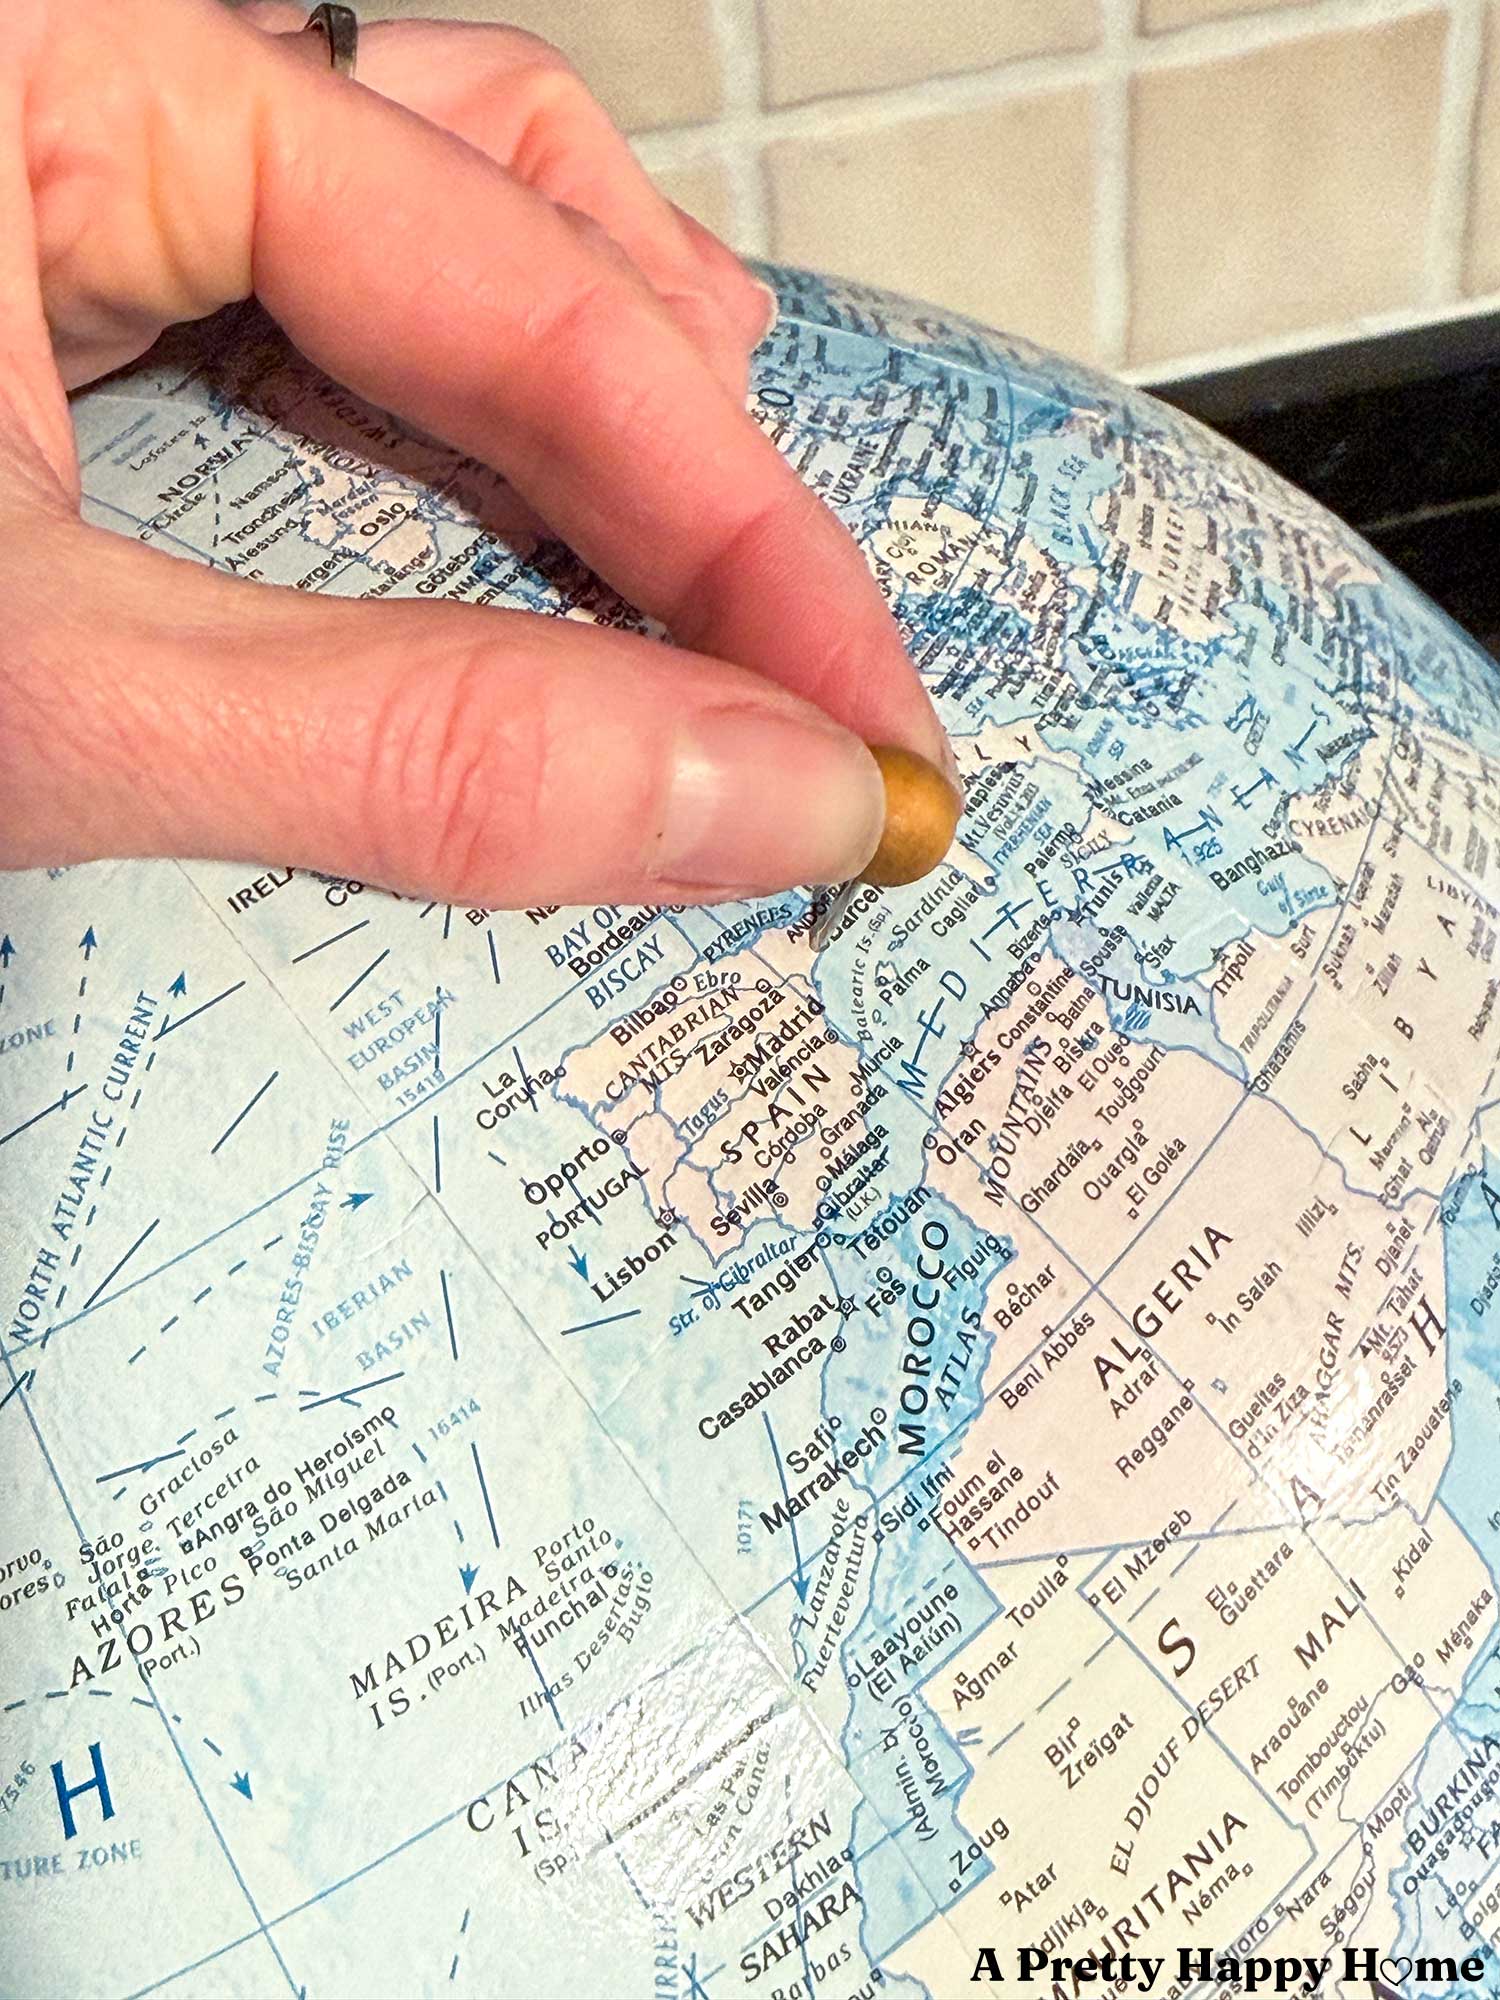
Step 3: Insert your push pins or map pins.
After your pilot hole is made, you can insert your push pin. It’s that easy!
I liked the 3-D effect of my push pins being inserted at different heights on the globe, but again, the smaller the head of your push pin or map pin, the more easily you can fit the pins close together.
Where to Find a Cardboard Globe
Your best bet is to check your mom’s house first. Haha! If that fails, you’ll need to thrift a vintage globe from a thrift store, garage sale, Facebook Marketplace, or Etsy.
Globes made in the mid-20th century were often made from cardboard, pasteboard, or paper mâché. It’s hard to explain, but they will have a cardboard feel to them, and the map strips (they are called gores) are made from paper.
Most new globes sold today are made from plastic. I have not tried this technique with a plastic globe, but if I was going to, I’d use a drill to create a pilot hole for the push pin. The wild card is I don’t now how brittle the new plastic globes are, so I’m not 100% certain the method would work. If you try it, let me know in the comments so we all can learn!
Where to Find a Cork Globe
This craft was inspired by a cork travel globe. I loved the idea of having one, but didn’t want to spend the money.
If you’ve never seen a cork globe or would still prefer one after reading this post, they range in size and price, but you can find them from $40 – $230. This one from Uncommon Goods is very cool, and this one from Etsy is smaller, but can be personalized.
Also, not a globe, but this Backlit Cork Travel Map is super cool if you have the wall space.
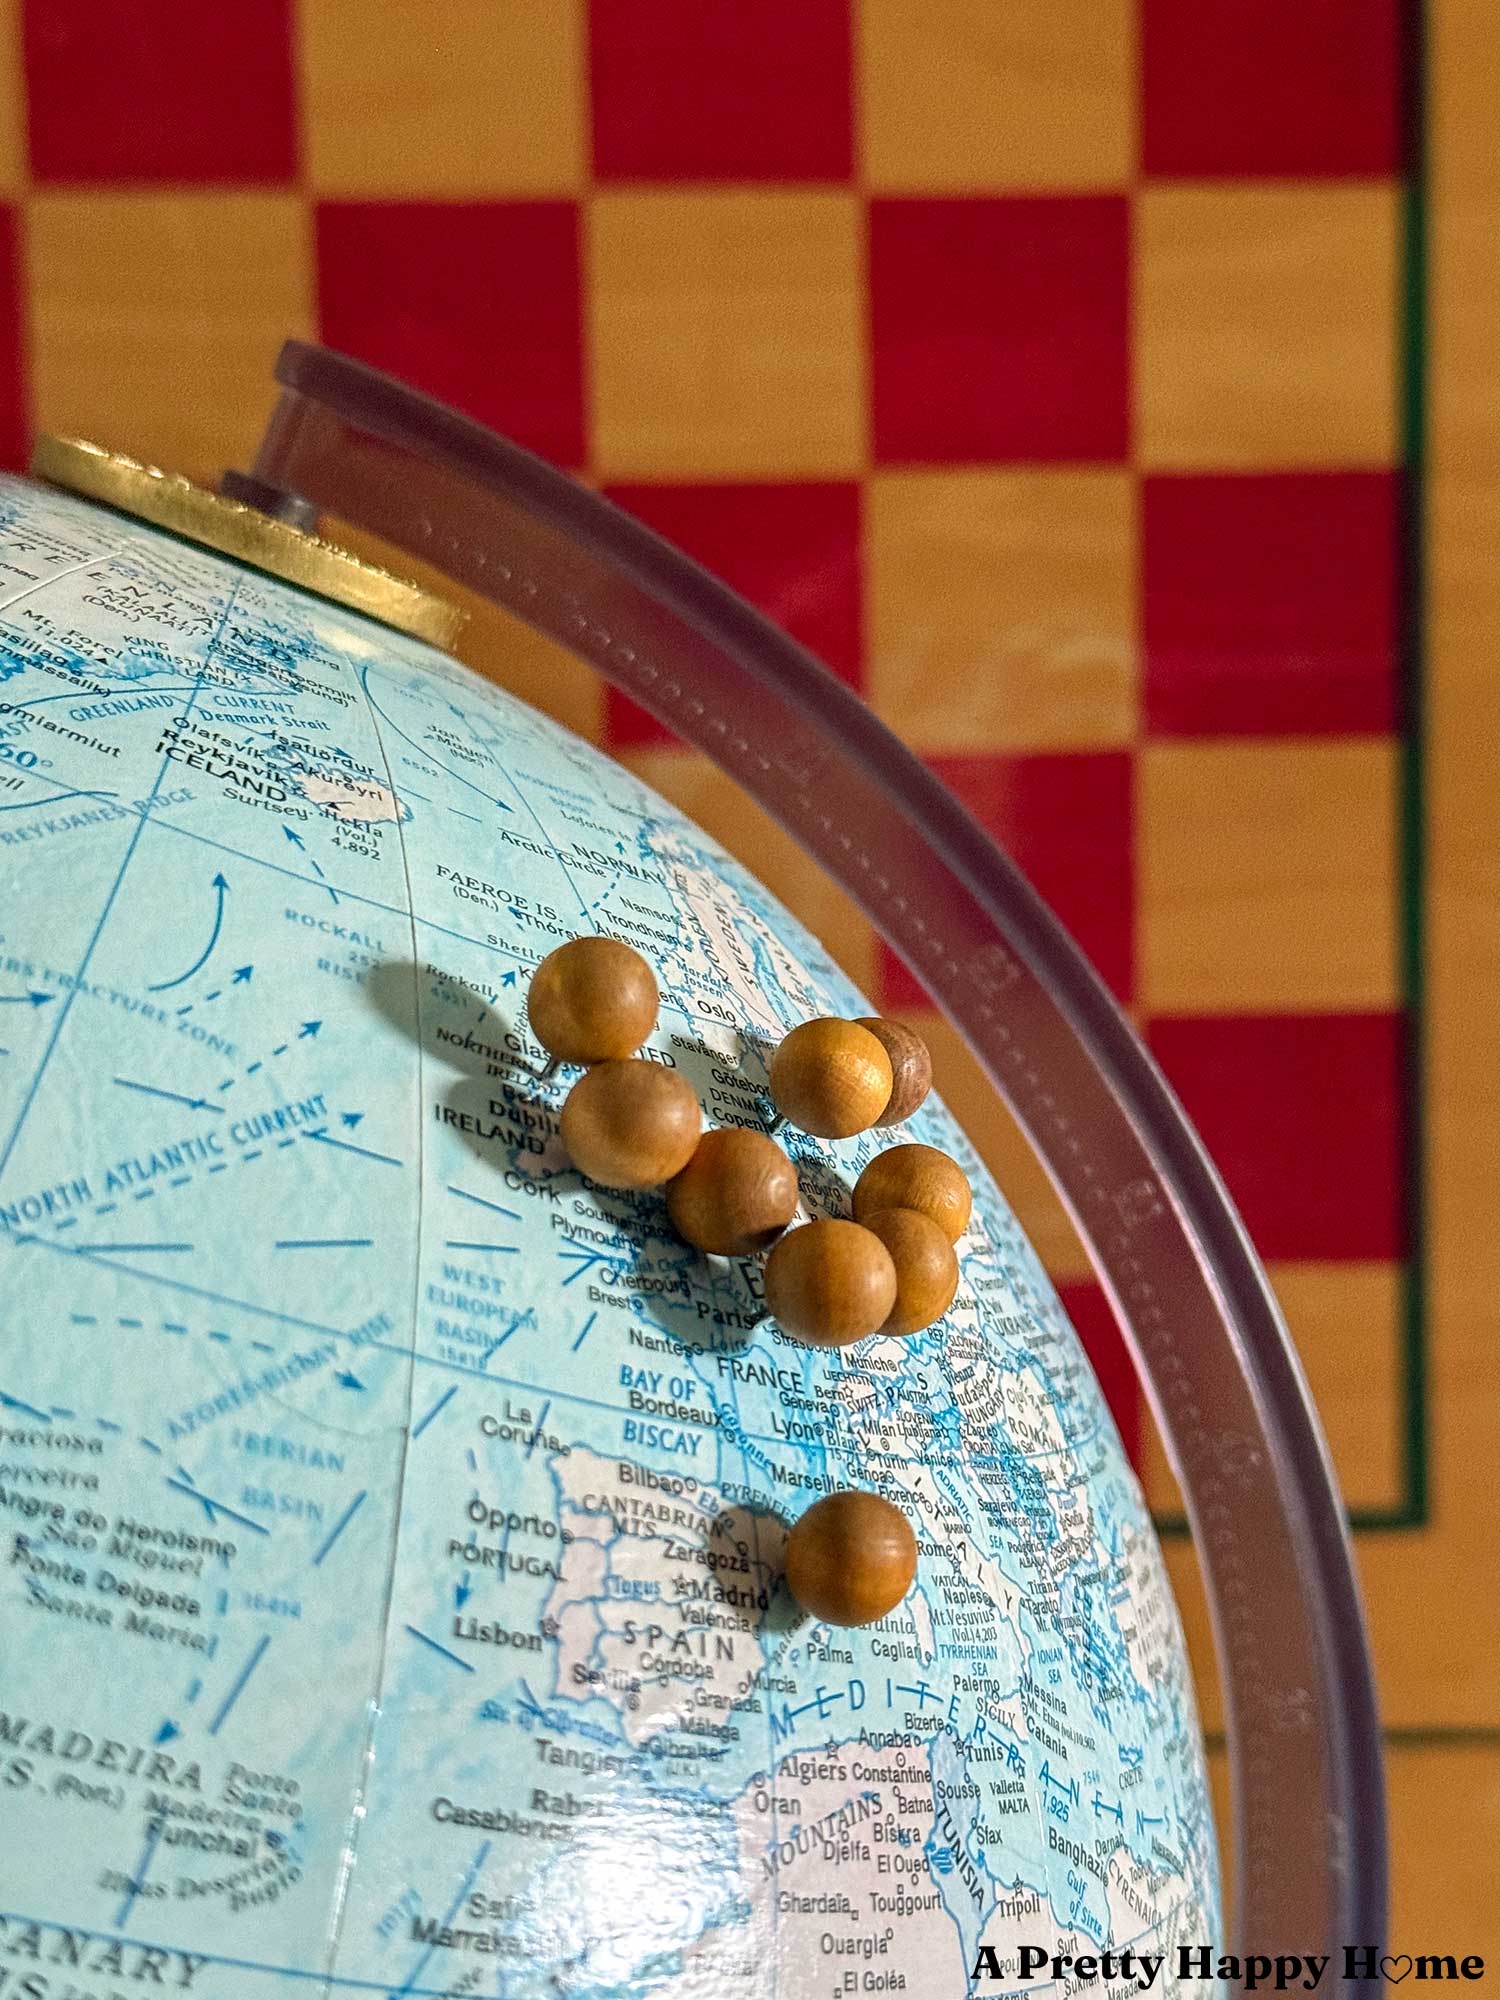
The push pins on this globe are the countries and states my youngest child has visited. Since the globe is located in his room, that seemed best instead of including the places we visited before he was born.
However, in looking at it, it’s clear we need to consider traveling to the southern hemisphere. We’re missing out on so much!
Let me know what you think of this DIY Push Pin Travel Globe! Do you have any fun travel plans coming up? Comments definitely make my world go round. You can comment here on this blog post, email me here, or reach out via direct message on Instagram or Facebook.
Happy Travels!
Thank you for spending part of your day here. Shall we call it a mini-vacation from the real world? If you’d like to extend that mini-vacation, try reading one of these posts.
Visiting Ireland: The Cliffs of Moher and Aran Islands With Kids
Travel: Franklin D. Roosevelt Presidential Library
Leather Map Made From Old Boot Leather
Tourist Maps Make Great Wrapping Paper
*affiliate links in this blog post*


4 Comments
Nancy B
This is just amazing and I love the way it looks! Globes and maps have always had a special place in my heart, and now my house. I have 8 globes of various ages, most of them on the top of our entertainment center. I’ve thought of painting one with chalkboard paint because I saw one somewhere that I admired, but can’t bring myself to do it. This, however, I might be able to do. Thanks so much for the neat idea!
annisa
Funny you mention chalkboard paint. I used to have one – I’m sure it was from Michael’s or something – with chalkboard paint. I would use it as a countdown to Christmas. Kind of a whole Santa goes around the world kind of thing. I probably thought it was more fun than my kids did, though. HA!
If I was to paint one now, I’d probably use magnetic paint.
Donna via Funky Junk Interiors
HOW has this yet ever been thought of?! Guess it was waiting for you! I’m totally doing this to a lamp I made from a globe I’ve yet to share… what a fun little detail to add with actual meaning!
annisa
Well, someone might have done it, but I didn’t Google it to check. LOL! And I never would have thought to make a lamp from a globe…adding the travel pins would be such a cool touch. Can’t wait to see your creation!